
Quick Read
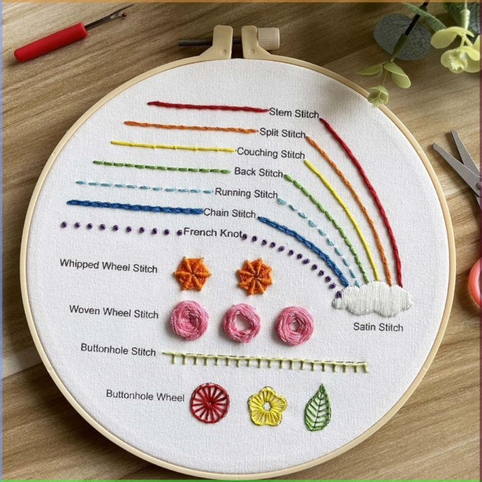
Most Beginner Hand Embroidery patterns rely on five stitches: running, backstitch, satin, French knot, and stem. Learn them in order, practice each on a scrap before moving on, and you’ll have the working vocabulary for almost any beginner pattern by the end of a weekend.
Related: 1 Machine, 2 Skills: Choosing an Embroidery Sewing Machine Combo for Home Use
You open a Beginner Hand Embroidery pattern. It references twelve stitches. You look up the first one, and the tutorial mentions three more you don’t know. Twenty minutes later, you have six tabs open and nothing stitched. This is the spiral that ends most first projects.
You don’t need twelve stitches. You need five. These appear in nearly every Beginner Hand Embroidery pattern we’ve reviewed.
What Supplies Do You Actually Need to Start Hand Embroidery?
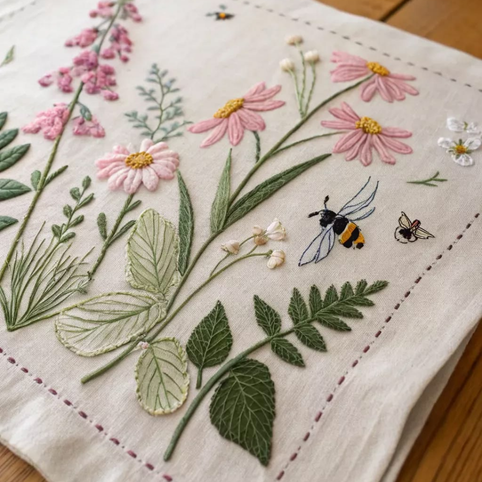
Hand embroidery has a low barrier to entry. You don’t need a machine, a large workspace, or expensive equipment. Here’s what to gather before you sit down to practice.
Supplies checklist
- Embroidery floss: DMC stranded cotton floss is the standard for beginners. It’s colorfast, widely available, and consistent in quality. Each skein has 6 strands twisted together. Most patterns call for 2 to 3 strands for fine detail and 6 strands for bold coverage. Start with a basic palette of 10 to 12 colors.
- Embroidery needles: Crewel needles in sizes 3 through 9. Use size 7 or 8 for 2 to 3 strands. Use size 3 or 5 for 6 strands. The needle should pass through the fabric with light pressure. If you’re forcing it, the needle is too large for your thread count.
- Fabric: Woven cotton or linen, medium weight. Quilting cotton and even-weave linen are both ideal for beginners. Avoid stretchy fabrics until you’re confident with tension.
- Embroidery hoop: A 6 to 8-inch wooden hoop. The hoop holds your fabric taut so stitches lie flat and tension stays consistent. A quality wooden hoop costs under $8 and makes a visible difference in stitch quality.
- Transfer method: Water-soluble marking pen for tracing designs onto fabric. The lines disappear with a light mist of water. Avoid iron-on pens until you’re comfortable, since they’re permanent if pressed too long.
- Small scissors: Embroidery scissors with sharp, pointed tips for trimming thread tails close to the fabric.
How to separate floss: This is the skip-step most beginner tutorials rush past. Cut a 12 to 18-inch length of floss, hold the end, and pull out individual strands one at a time rather than splitting them in a bunch. Pulling multiple strands together causes tangling and knotting. Separate the strands first, then combine the number you need.

- SUPERIOR QUALITY: Double mercerized for strength and luster
- RELIABLE: 100% colorfast and fade resistant with consistent color skein to skein
- TRUSTED: Known for superior quality, DMC embroidery floss has been used by generations of stitchers for their needlework treasures and future heirlooms
- CLASSIC SIZE: Each skein is 8.7 yards of divisible 6-strand thread
- USE FOR MANY NEEDLEWORK TECHNIQUES: Perfect for cross stitch, counted thread, embroidery, needlepoint, smocking, punch needle embroidery, appliqué, and quilting
(As an Amazon Associate, we earn from qualifying purchases.)
Which 5 Embroidery Stitches Should Every Beginner Learn First?
Learn these in order. Each one builds a muscle memory that makes the next one easier.
Skill prerequisite: Comfort threading a needle and managing 12 to 18 inches of floss without tangling. If you haven’t done either before, run through the floss-separation step above on a scrap before moving on. Skipping this step is the most common reason beginners stall on stitch one.
1. Running Stitch
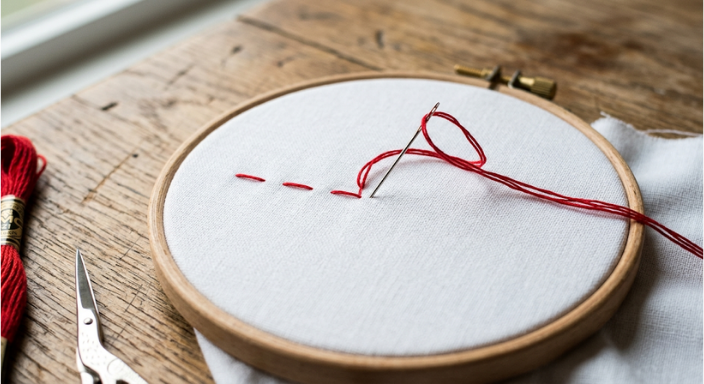
The running stitch is the foundation of hand embroidery and of all hand sewing. Pass the needle up through the fabric, then back down, creating evenly spaced stitches in a line. The length of the stitch and the gap between stitches should be equal for clean results.
What it’s used for: Outlines, borders, simple patterns, and as the basis for more complex stitches like the whipped running stitch. Almost every beginner pattern uses the running stitch somewhere.
Practice tip: Draw parallel lines on a scrap of fabric and practice keeping your stitches consistent in length. Even spacing is a skill that builds with repetition. Don’t expect perfection on the first pass.
2. Backstitch
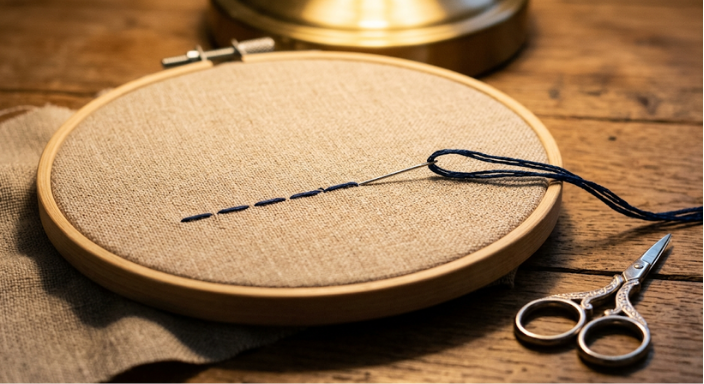
The backstitch produces a solid, unbroken line. It’s the hand embroidery equivalent of a machine stitch. Come up through the fabric, take one stitch forward, then bring the needle back to the end of the previous stitch. Each new stitch starts where the last one ended.
What it’s used for: Text lettering, curved outlines, detailed linework, stems, and any design element that needs a solid continuous line. The backstitch is the workhorse of the five. Once you know it, you can embroider text, botanical illustrations, and geometric patterns without any other stitch.
The skip-step: Pull the thread with consistent tension on every stitch. A backstitch pulled too tight produces a raised ridge. One that’s too loose lies flat and gaps. The goal is tension that sets the thread in the fabric without distorting the weave.
3. Satin Stitch
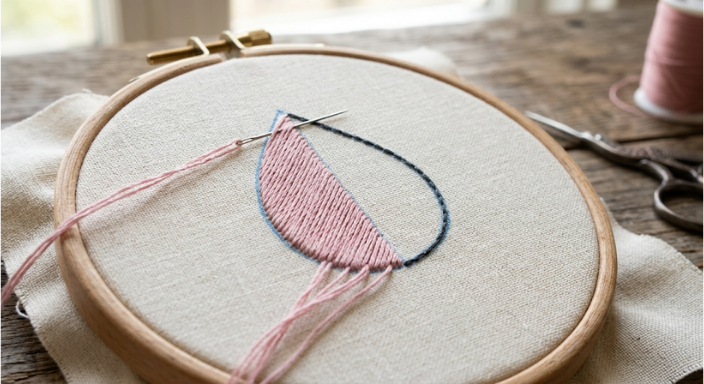
Satin stitch fills in solid shapes like petals, leaves, and small geometric forms. Work parallel straight stitches side by side across the shape, keeping each stitch close enough to the next that the fabric underneath is fully covered.
What it’s used for: Any solid-filled shape, including flower petals, leaves, small geometric elements, and color blocking. The satin stitch is what makes embroidery look polished and substantial.
The skip-step: Angle your stitches slightly for natural results. Straight vertical satin stitches on a petal look geometric and stiff. Angled stitches that follow the natural taper of the petal look organic. Outline the shape in backstitch first, then fill with satin stitch to the edge of the outline for a crisp border. This is the step most tutorials skip entirely.
4. French Knot
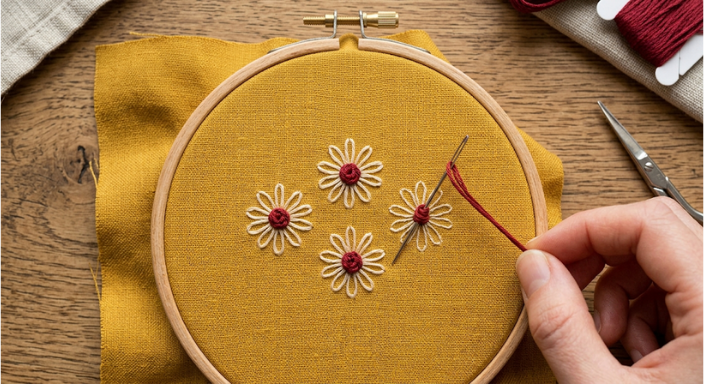
French knots create small raised dots that add texture and dimension. Come up through the fabric, wrap the thread around the needle once or twice, hold the wrapped thread taut against the fabric, and insert the needle back down very close to (but not in) the same hole you came up through.
What it’s used for: Flower centers, berry clusters, eyes, decorative texture fill, star fields, and any element that needs a raised dot with visual weight. French knots are one of the most distinctive elements in hand embroidery, and they appear in nearly every floral pattern.
The skip-step: If your French knot disappears to the back of the fabric, you inserted the needle through the same hole you came up through. Insert the needle one or two fabric threads away. If your knots look sloppy, use fewer wraps. One wrap produces a tighter, neater knot than two. Hold the thread taut with your non-needle hand until the knot seats on the surface.
5. Stem Stitch
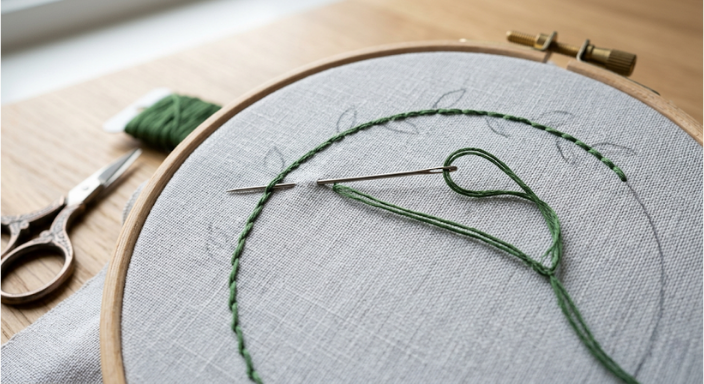
The stem stitch produces a rope-like twisted line that’s slightly thicker and more textural than the backstitch. Work forward along the line with the thread always on the same side of the needle. Unlike the backstitch, which moves backward, the stem stitch always progresses forward, with each new stitch overlapping the middle of the previous one.
What it’s used for: Flower stems, vines, branches, curved lettering, and any line that needs visual weight and a slight twist texture. The stem stitch handles curves gracefully. Tighter curves benefit from shorter individual stitches.
The skip-step: Keep the working thread consistently on the same side of the needle (always above, or always below). Switching sides mid-project produces an inconsistent twist that looks like a mistake, not a technique variation.

- 【Smooth & Sturdy】Give your fingers the comfort of non-slip needlework ! Small embroidery hoop is perfect for Christmas ornaments and small cross stitch projects
- 【Has Perfect Size】6 Inch embroidery ring which is ideal for small projects or getting started with hoops
- 【Comfort & Safety】You get cross stitch hoops that have rounded edges and have no loose stands or sharp spots, so that You can do the needlework in peace
- 【Quality you'll Love】 No more struggle in quilting, stainless steel screws keep the fabric tightened like a drum, once tightened can hold the cloth firmly in place
- 【DIY made easier】 Make your spare time enjoyable, cross stitch frame makes easier for craft lovers to express their ideas and create meaningful crafts for the loved ones
What Can You Make With Just These 5 Basic Embroidery Stitches?
With running stitch, backstitch, satin stitch, French knot, and stem stitch, you can complete virtually any beginner floral pattern, most geometric designs, text and lettering, botanical illustrations, and simple character designs. The stitch library beyond these five (chain stitch, lazy daisy, fishbone stitch, long-and-short stitch) adds nuance and texture, but it builds on the same muscle memory you’re developing here. Master these first five.
If you’ve tried embroidery before and abandoned a project mid-way because it felt overwhelming, use the staged approach. Practice each stitch in a sampler before starting a design. If you’re a first-timer who needs the motivation of a visible project, choose a simple pattern that uses only running stitch and backstitch and finish it before adding more stitches. The fix isn’t to power through. It’s to choose a first pattern that only uses stitches you’ve actually practiced.
A note on body and fit: hand embroidery itself is body-neutral, but if you’re stitching onto a finished garment, fit changes how the embroidered area drapes and stretches. Place embroidery on stable areas like yokes, pockets, and cuffs rather than across bust apex points or full-curve seams where the design will distort with body movement. This applies across all body types. The larger the curve underneath, the further the embroidery design needs to sit from the apex.
Common Beginner Hand Embroidery Mistakes
- Too many strands for the fabric weight. Six strands of lightweight cotton look heavy.
- Not separating the floss before threading.
- Thread longer than 18 inches. It will tangle before you finish.
- Loose hoop tension. Pull the fabric taut so it feels like a drum.
- Skipping the outline backstitch before satin fill.
- Letting the thread twist without correcting it. Let the needle hang to untwist.

- Premium Grade Nickel Plated Steel Needles
- Size Is 3/9"
- Package Dimension : 1.8" L X 0.2" W X 4.2"H
- Country Of Origin : United Kingdom
The Bottom Line
Five stitches: running, backstitch, satin, French knot, stem. That’s the minimum viable Beginner Hand Embroidery skill set. Learn them in order, practice each in isolation before moving to the next, and you’ll have a working vocabulary by the end of a weekend.
For deeper reference, once you’re past the basics, the Royal School of Needlework maintains the most rigorous public stitch library available.
Want 20 Embroidery stitches? Check this video out from Mordern craft.
Frequently Asked Questions
-
What is the easiest Beginner Hand Embroidery stitch?
The running stitch. It’s a simple over-under motion with no technique complexity, and most beginners produce clean, even stitches within a few minutes of practice. Once you can keep stitch length and gap length equal on a scrap, you’ve already learned the foundation that every other beginner stitch builds on.
-
How many strands of floss should I use?
Use 2 strands for fine detail and delicate outlines on lightweight fabric. Use 3 strands for standard outlines and general work, which is the most common count in beginner patterns. Use 6 strands for bold textural fills or heavier fabrics like denim, canvas, and twill, where finer counts get visually lost.
-
Do I need a hoop for Beginner Hand Embroidery?
Yes. The hoop keeps fabric taut, which prevents the puckering and distortion that make beginner stitches look uneven once the work is removed and the fabric relaxes. Stitching in hand without a hoop requires developed tension control. Use the hoop until your stitches look the same in-hoop and out-of-hoop.
-
How long does Beginner Hand Embroidery take to learn?
Most beginners practice all five stitches in a single weekend. Plan 20 to 30 minutes of focused practice per stitch on a scrap fabric sampler before applying them to a real pattern. Speed matters less than getting clean, even results on each stitch before moving on to the next one.
-
What’s the difference between backstitch and stem stitch?
Backstitch produces a flat, solid line ideal for lettering and clean outlines, and each new stitch moves backward to meet the previous one. Stem stitch produces a raised, twisted rope-like line ideal for stems, vines, and curves, and each new stitch progresses forward with the working thread held to one side.
-
How do you fix a French knot that pulls through to the back?
You inserted the needle into the same hole you came up through, so there was no fabric thread to seat the knot. Pull the thread back to the front, position the needle one or two fabric threads away from the original entry point, and insert it there instead.
-
What fabric is best for Beginner Hand Embroidery?
Medium-weight woven cotton or linen. Solid-color quilting cotton is most beginner-friendly because it’s stable in the hoop, takes water-soluble marking pen well, and doesn’t shift mid-stitch. Avoid stretchy knits, very thin fabrics like batiste, and heavyweight canvas until your tension is consistent enough to handle their behavior.
Why did you vote that way? Drop your take in the comments.