
Quick Look at Embroidery Sewing Machine Combo
- An embroidery sewing machine combo for home use is one machine that stitches everyday seams and automatically stitches embroidery designs.
- A sewing and embroidery combo machine switches modes: you sew normally with a presser foot, then attach an embroidery unit and hoop fabric for designs.
- A dual-function embroidery sewing machine is ideal for home users who want space-saving versatility for clothing fixes, gifts, quilting accents, and personalized items.
- Look for beginner-friendly features: clear screen, easy threading, speed control, good lighting, and simple design placement tools.
- Check embroidery essentials: hoop sizes, maximum embroidery area, built-in fonts, design editing (rotate, mirror, resize), and USB design import.
- Built-in designs are a big help for beginners because you can stitch something cute right away without downloading files.
- If you sell small batches, a home embroidery sewing machine with built-in designs can add value fast with monograms, labels, and simple motifs.
An embroidery sewing machine combo for home use is one of the easiest ways to expand what you can make without adding a second machine to your craft room. Instead of choosing between practical sewing and decorative embroidery, you get both in one setup, which is a big win for home users.
This kind of machine is a great fit for beginners who want guided features, hobbyists who love customizing gifts, and small craft sellers who want to add names and designs to items like tote bags, baby gifts, and zipper pouches. The best part is the convenience: having sewing and embroidery in one machine saves space, reduces setup time, and makes it easier to switch from “make it” to “make it personal.”
What an Embroidery Sewing Machine Combo for Home Use Is
A combo machine is exactly what it sounds like: a sewing machine plus an embroidery machine in one body. In sewing mode, it works like a typical home machine. You stitch seams, hems, buttonholes, zippers, and utility stitches using standard presser feet and a flat work area.
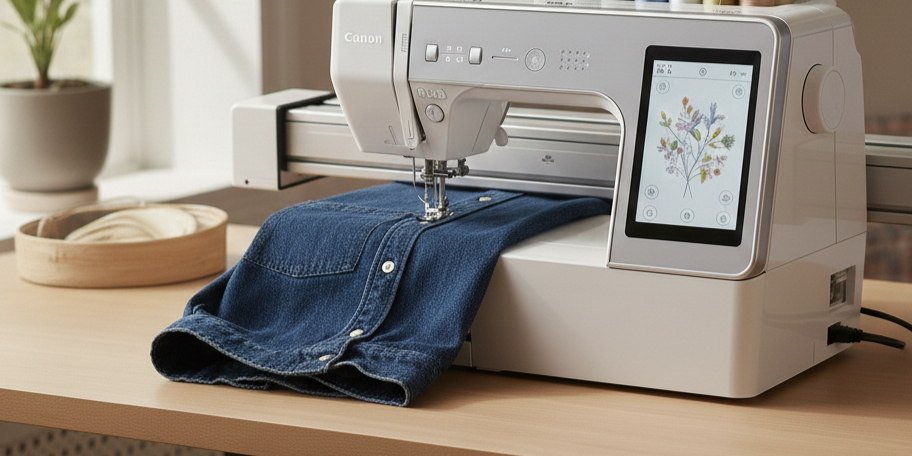
In embroidery mode, the machine “draws” with thread. You hoop your fabric, choose a design on the screen, and the machine stitches it out using a moving hoop and built-in sensors. Many models include a detachable embroidery unit that you attach only when you need it, which helps keep things simple and less bulky day to day.
If you have ever wanted to add a monogram to a towel, a small floral design to a denim jacket, or a professional-looking label to handmade items, an embroidery sewing machine combo for home use is designed for that exact kind of creativity.
How a Sewing and Embroidery Combo Machine Works
A sewing and embroidery combo machine has two “jobs,” and it changes how it moves depending on the mode.
Sewing mode: you move the fabric
In sewing mode, you guide fabric under the needle while the feed dogs pull it along. You choose your stitch (straight stitch, zigzag, stretch stitch, buttonhole), adjust stitch length and width, and sew like normal.
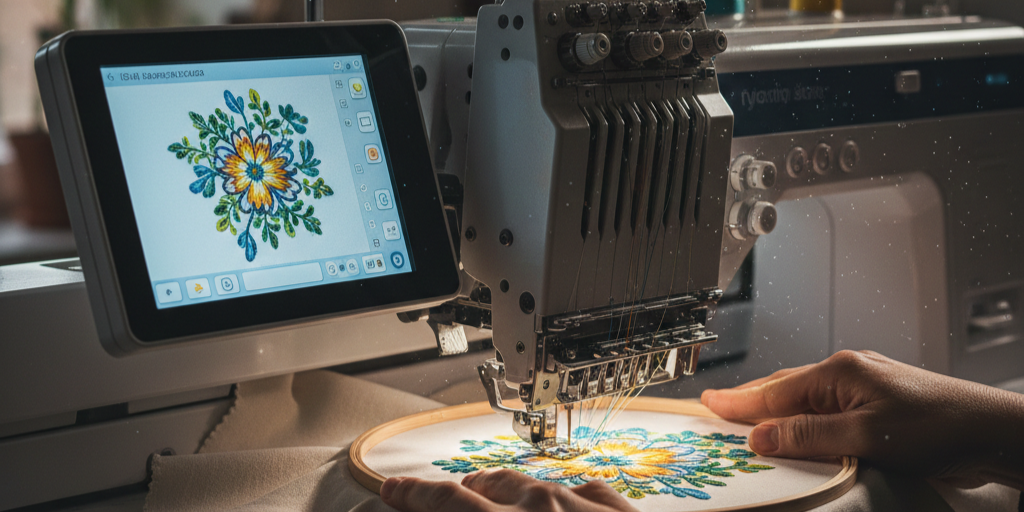
Embroidery mode: the machine moves the hoop
In embroidery mode, your fabric stays hooped and held in place, and the machine moves the hoop in tiny steps. The needle goes up and down while the hoop travels left, right, forward, and back to form the design. The machine also tells you when to change thread colors and often includes alignment tools to help position the design where you want it.
What “setup” usually looks like
Here is the typical workflow for embroidery on a dual-function machine:
- Stabilize the fabric (this is what prevents puckering).
- Hoop fabric and stabilizer together, smoothly and snugly.
- Attach the embroidery unit (if your model uses one).
- Select a built-in design or load one via USB.
- Place and preview the design on-screen.
- Thread the machine, pull up the bobbin thread, and start stitching.
- Change thread colors as prompted, trim jump stitches if needed, and remove from hoop.
Once you do it a couple of times, it feels like following a recipe.

- 【Creative Embroidery Power】130 built-in embroidery designs let you create stunning personalized projects. Combine letters, edit patterns, or mix designs for unique results. Includes two embroidery areas—4"x4" and 4"x9.25"—for both small and large creations.
- 【Versatile Sewing Performance】Enjoy 207 built-in stitches and a one-step buttonhole function for all sewing needs. Includes 5 presser feet—buttonhole, rolled hem, zipper, button, and embroidery foot—so you can switch easily between sewing styles.
- 【Smart Touch Control】The 7-inch touchscreen with the exclusive InStitch i2 system offers an intuitive, phone-like interface. The system automatically recommends the right presser foot and supports 12 display languages for effortless operation.
- 【All-in-One Starter Kit】Everything you need is included—polyester sewing thread, embroidery thread, pre-wound bobbins, and stabilizers. Practice right out of the box with built-in patterns and supplies.
- 【Learn more about the machine】Find us via multiple methods included in the box package. Or join our ”PooLin Official User Group“ for expert tips and community support. Watch tutorial videos on YouTube by searching "PooLin" for step-by-step guidance.
(As an Amazon Associate, we earn from qualifying purchases.)
Benefits of a Dual-Function Embroidery Sewing Machine for Home Users
A dual-function embroidery sewing machine is not just about saving space, although that is a real perk. The bigger benefit is how it changes what you feel confident making at home.
1) One machine, more finished-looking projects
Embroidery adds a polished touch to simple projects. A basic tote bag becomes gift-worthy with a name. Plain napkins look boutique with a border motif. Kids’ hoodies become special with a small icon or initials.
2) Space saving and less equipment juggling
If you have a small table or shared craft corner, a combo machine helps you avoid the “two machines, no room” problem. You store one machine, one set of accessories, and one manual.
3) Faster personalization for small craft sellers
If you sell occasionally, personalization can raise perceived value without doubling your workload. Think monograms, name patches, small logos, “handmade by” labels, and seasonal motifs. You can also batch similar items in one hoop size for a smoother workflow.
4) Beginner-friendly guidance built in
Many combo machines are designed for home users, so they include on-screen prompts, automatic needle threading, thread cutters, and step-by-step embroidery screens that reduce guesswork.
5) A more enjoyable learning curve
Sewing builds useful skills. Embroidery adds quick wins. That mix keeps motivation high, especially for a determined beginner who loves visible progress.
Key Features to Look For in an Embroidery Sewing Machine Combo for Home Use
Not every combo machine feels beginner-friendly, so it helps to know what to prioritize. These are the features that tend to matter most for home use.
Sewing features that make everyday projects easier
- Adjustable speed control
A speed slider lets you slow down for curves and corners, which is a confidence booster for beginners. - One-step buttonhole
If you sew garments or bags, a consistent buttonhole feature saves frustration. - Built-in utility and stretch stitches
Stretch stitches matter if you sew knits, leggings, or T-shirts, because a regular straight stitch can pop when the fabric stretches. - Good lighting and a clear needle area
Better visibility reduces mistakes and makes sewing more enjoyable. - Easy bobbin system
A top drop-in bobbin with a clear cover is simpler for most home users, and it makes it easier to spot thread issues early.
Embroidery features that affect results and “ease of life.”
- Embroidery area and hoop sizes
This determines how large a design you can stitch in one go. A smaller area is fine for monograms and small motifs. A larger area is helpful for bigger designs like towel borders or full chest logos. - Built-in designs and fonts
A strong library of included designs is especially valuable when you are learning. - Design placement tools
Look for on-screen positioning, grid lines, and the ability to rotate or mirror a design so you can align it neatly. - USB import option
This gives you room to grow. You can start with built-in designs, then add purchased or self-made designs later. - Thread color prompts and preview
Helpful screens that show color order and a preview reduce mistakes and thread waste. - Stabilizer guidance (even if it is basic)
Some machines include built-in tutorials or prompts, which is a nice bonus for beginners.
Comfort features that matter more than you think
- Automatic needle threader
Embroidery uses more thread changes, so an easy threading system saves time and eye strain. - Automatic thread cutter
Not required, but it is a quality-of-life feature if you embroider often. - Simple menus and a readable screen
A confusing interface is one of the fastest ways to make embroidery feel stressful instead of fun.

- Set includes: 1* 3-in-1 needle threaders; 1* 2-in-1 needle threaders;1* needle case + 18 needles (67mm*3, 60mm*3, 50mm*3, 46mm*9)
- 3-in-1 Dual-End Design: One end features a needle case (containing 2 needles), while the other end combines thread cutting and threading functions. Its 3-in-1 dual-end functionality enables needle storage, thread cutting, and threading operations, perfectly meeting sewing enthusiasts' needs for organized tool storage.
- 2-in-1 dual-head design: one end for thread removal and the other for thread insertion. Its dual-head functionality enables both thread removal and thread insertion operations.
- Portable Storage design: The Sewing Seam Ripper can be easily placed in any sewing toolbox or pocket.Its small size makes it easy to store, and it is perfect for carrying around.
- Automatic Retraction Design: When using the sewing thread scissors or threader, exert force to push it out for cutting sewing threads or threading. It will automatically retract when idle, enhancing safety.
(As an Amazon Associate, we earn from qualifying purchases.)
Why Built-In Designs Matter for Beginners
A home embroidery sewing machine with built-in designs helps you skip the most confusing early step: figuring out design files, formats, and downloads. When designs are already inside the machine, you can focus on the skills that actually affect results:
- Choosing the right stabilizer
- Hooping smoothly
- Threading correctly
- Learning how tension and fabric type affect stitching
- Understanding how to trim and finish cleanly
Built-in designs also give you “practice projects” that are already tested for the machine. That means fewer surprises like gaps, weird density, or designs that stitch out too stiff. For a beginner, that reliability builds confidence quickly.
A simple way to learn is to stitch the same small built-in design on a few fabrics, like quilting cotton, denim, and a sweatshirt knit, using different stabilizers. You will learn more in one afternoon than you will from scrolling videos for hours.
Real-World Examples Without the Hype: Brother SE Models
If you have been browsing combo machines, you have probably seen Brother SE models pop up often in this category. They are commonly referenced because they typically combine approachable menus with built-in designs and a clear “sew mode vs embroidery mode” setup.
The important takeaway is not the brand name. It is what to notice when you compare popular examples like these:
- How easy it is to switch between sewing and embroidery
- Whether the included hoops match the size of the projects you want to make
- How many built-in designs and fonts are included for learning
- Whether the screen tools help you place designs accurately
- If the machine supports USB design import for future growth
Use popular models as a “feature checklist,” then choose the machine that fits your space, your patience level, and the kinds of projects you actually plan to make.
Quick Setup Tips for Better Results at Home
Even the best embroidery sewing machine combo for home use needs a good setup to shine. These small habits prevent most beginner problems.
- Stabilizer is non-negotiable
If your embroidery puckers, pulls, or looks wavy, stabilizer is usually the reason. Match stabilizer to fabric type, and when in doubt, start with a basic cut-away for knits and a tear-away for stable woven cotton. - Hoop like you mean it
Your fabric should be smooth and firm like a drum, but not stretched out of shape. Wrinkles in the hoop often become wrinkles in the stitching. - Start with simple designs
Dense, detailed designs are harder. Begin with small motifs, simple outlines, and chunky lettering so you can learn clean tension and tidy finishing first. - Plan your thread colors
Lay out threads in order and keep bobbins ready. Embroidery is smoother when you remove tiny interruptions. - Test on a scrap first
Always stitch a quick test on a similar fabric and stabilizer combo. It saves heartbreak on a finished project.
Final Thoughts
An embroidery sewing machine combo for home use is a smart investment if you want one machine that can handle everyday sewing and also help you personalize projects with embroidery. It brings versatility to a small space, makes it easier to create gifts and polished finishes, and gives you creative flexibility whether you are a beginner, a hobbyist, or a small craft seller. With the right features and a little practice with stabilizer and hooping, a combo machine can grow with you for years.
Frequently Asked Questions
-
Is an embroidery sewing machine combo for home use good for beginners?
Yes. Most combo machines suit beginners because they pair guided touchscreens, built-in designs, and basic sewing stitches in one unit. Start with the built-in alphabet on a woven cotton scrap before loading imported designs. That sequence builds machine literacy before you fight stabilizer and hooping at the same time.
-
What is the difference between a sewing and embroidery combo machine and a regular sewing machine?
A combo machine stitches embroidery designs automatically through a hoop system, while a regular machine cannot. The combo also has a separate embroidery mode, design memory, and usually a USB or screen interface. A regular sewing machine handles construction stitches, buttonholes, and zippers only, with no automated motif work.
-
Do I need a computer to use a dual-function embroidery sewing machine?
No. You can run any built-in design straight from the machine using its screen and onboard memory. A computer becomes useful later when you want to download new designs, resize them, or organize files by project. Start with built-ins for your first ten projects before adding software to the workflow.
-
What stabilizer should I use with a home embroidery sewing machine with built-in designs?
Match the stabilizer to the fabric, not the design. Use tear-away for stable woven cotton, cut-away for stretchy knits, and water-soluble for sheer fabrics or freestanding lace. When stitches pucker or tunnel under the hoop, the stabilizer is wrong before the tension is. Test on a scrap from the same fabric first.
-
How big of an embroidery area do I need for home projects?
It depends on the project. For monograms, pocket motifs, and patches, a 4×4-inch hoop covers most home jobs. For towel borders, jacket backs, or quilt blocks, you need a 5×7-inch hoop or larger. Start with the smallest hoop that fits your design, since bigger hoops mean more hooping mistakes.
-
Can I embroider on thick items like towels or sweatshirts?
Yes, with the right setup. The item has to fit flat in the hoop without bunching. Use a sturdy cut-away stabilizer, a water-soluble topping film for towels to keep loops from poking through, and a sharp 90/14 embroidery needle. Test stitch density on a scrap first because thick fabrics distort more than woven cotton.
-
Are Brother SE models a reasonable starting point for this category?
Yes. Brother SE models come up often as entry-level combo picks because they pair sewing and embroidery in one unit at a home-friendly price. Test the hoop size, stitch count limit, and screen interface against your real project list before buying. The cheapest model in the line is rarely the right one for towels or jackets.