
Top Things to Know
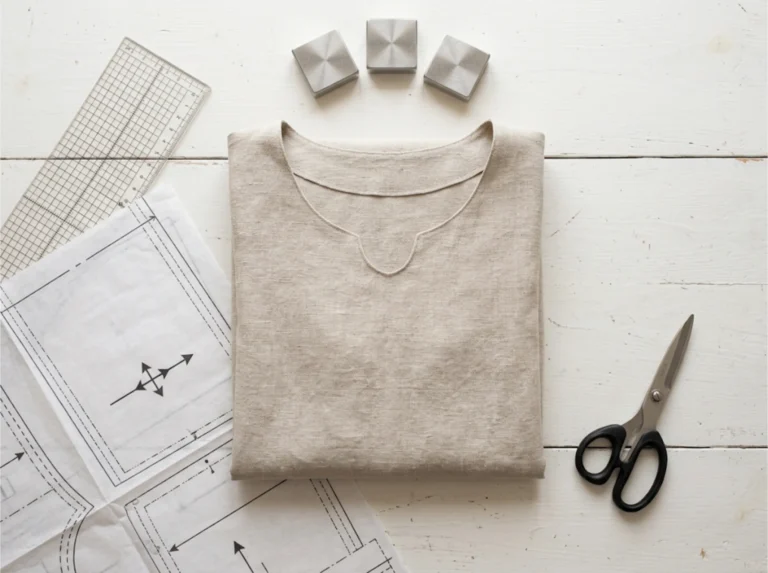
The Shoreline Shift Dress pattern is a beginner-friendly summer dress with straight seams, a simple neckline, and no zipper. It works best in lightweight cotton, linen, or rayon with soft drape. Most beginners can finish it in one weekend with about six to eight hours of active sewing time. Sewists above a C cup must perform a five-minute bust adjustment before cutting to keep the silhouette skimming the body instead of hanging like a tent.
Related:
Why Is the Shoreline Shift Dress Trending Right Now?

The Shoreline Shift Dress is everywhere on TikTok this spring. Sewbakemake, Jackimarian, and Jenna Phillips have all posted full construction videos in the last month. The hashtag stack (#beginnersewing, #sewingproject2026) is doing real numbers.
The trend is bigger than one pattern. Sewists are moving away from fast fashion and building summer wardrobes by hand. The shift silhouette fits the moment because it’s simple to construct and easy to wear in the heat.
Here’s the honest part. The dress is simple to sew. It is not always simple to fit. That gap is what this guide closes.
Is the Shoreline Shift Dress Pattern Beginner-Friendly?
Yes, with one condition. You should have one finished project with a hemmed edge before you start. A pillowcase counts. A simple drawstring skirt counts. If you have never finished a single sewing project, start with the free pillow dress guide at the bottom of this article and come back.
Here’s what the Shoreline Shift Dress requires:
- A bust dart (one per side)
- A neckline finish (bias tape or facing)
- Two armhole finishes
- Side seams
- A hem
None of these is hard on its own. The trouble is doing all five for the first time on the same garment. Sewists who have already hemmed something know how the fabric behaves under the iron. That single piece of knowledge changes everything.
The sewing world is split on this. Some teachers say cut your fashion fabric, sew it, troubleshoot reactively. Others say tissue-fit first if you’re above a C cup. We’ll show both paths. The right one depends on your body and your patience.

- Thread is for hand sewing only
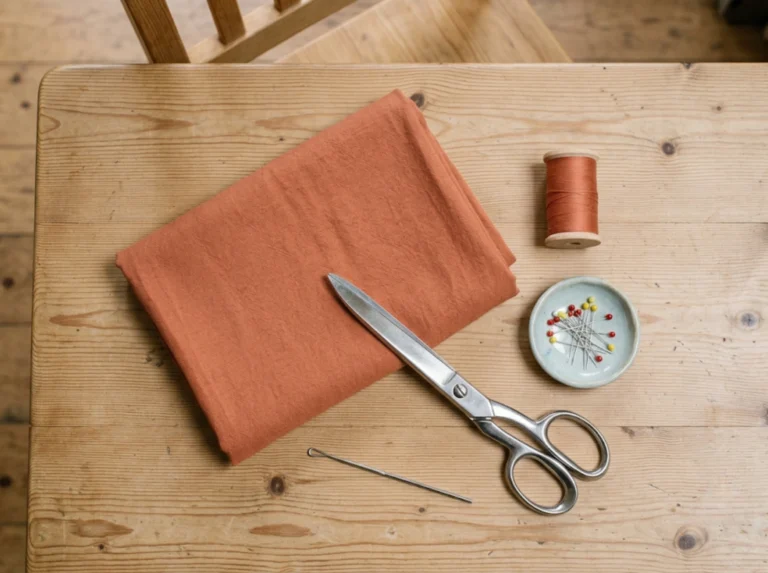
What Fabric Works Best for a Shoreline Shift Dress?
Drape is the silhouette. Stiff fabric turns this dress into a tent.
Best picks:
- Cotton voile
- Rayon challis
- Lightweight linen (3.5 to 5 oz weight)
- Cotton lawn
- Tencel or rayon blends
Avoid:
- Quilting cotton (too stiff, reads as a tablecloth)
- Heavy linen (over 6 oz)
- Bottom-weight twill
- Anything labeled “structured” or “crisp.”
Yardage is 2 to 2.5 yards for sizes XS through XL. Buy half a yard extra for your first attempt. You will make a cutting mistake. Everyone does.
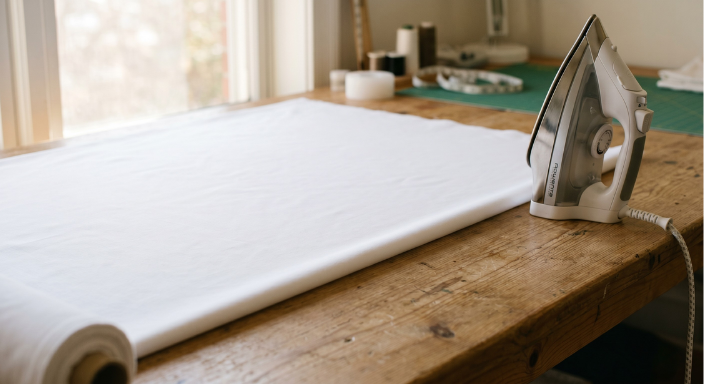
Pre-wash the fabric. Always. The dress will shrink in the first laundry cycle, and the shoulders will shift up by close to an inch. Wash on the same setting you plan to wash the finished dress, dry the same way, then press flat before cutting.
One sewist on PatternReview.com put the fabric problem plainly when describing a shift that came out wrong: the cotton chambray “stands away from the body,” while the rayon “skims the body.” Same pattern, two different garments. Drape decides.

- This light cotton voile fabric is very lightweight, semi sheer and has a beautiful drape. It is perfect for creating stylish peasant blouses, skirts and dresses with a lining and heirloom projects. It can also be layered to give more fullness to dresses and skirts.
- Washing Instructions: Machine Wash Cold/Tumble Dry Low
- 58" Wide. Fabric is sold by Washing Instructions: The yard and cut to order. For example, order of 1 yard (Qty=1) is 58" x 36''. Order of 3 yards (Qty=3) is 58" x 108''.
How Do You Pick the Right Size for a Shift Dress?
Three measurements, not one.
- Full bust: around the fullest part of your chest
- High bust: above the bust, under the arms
- Hip-to-waist differential: hip measurement minus waist measurement
Pick your pattern size by your high bust measurement, not your full bust. This is the single most common sizing mistake in shift dresses. Sizing by full bust gives you a chest that fits and shoulders that hang halfway down your arms.
The 2-inch rule: Subtract your high bust from your full bust. If the difference is 2 inches or less, sew the pattern as drafted. If the difference is more than 2 inches (roughly a C cup and above), you need a full-bust adjustment before you cut.
Why side seams cannot rescue a too-narrow chest: the bust apex sits in the wrong place, the dart points to nothing, and the hem rides up at the front. Adding fabric to the side does not move the apex. Only a bust adjustment moves the apex.
This is true for everybody. It’s especially true for plus-size sewists, where the math compounds. One PatternReview.com poster said it directly: “My measurements put me in a size 18, but that is split more evenly between front and back than I need. So I use a size 16 and an 18 back.”
How Long Does It Take to Sew a Shoreline Shift Dress?
Honest answer: six to eight hours of active sewing time, plus one hour for cutting, plus one hour for fitting if you’re doing a bust adjustment.
A weekend is realistic. An afternoon is marketing copy.
Time goes into:
- Cutting (longer than you think, especially on the first attempt)
- Staystitching the neckline
- The bust dart (15 minutes per side if you press carefully)
- Finishing the armholes (this is where most beginners get stuck)
- Hemming
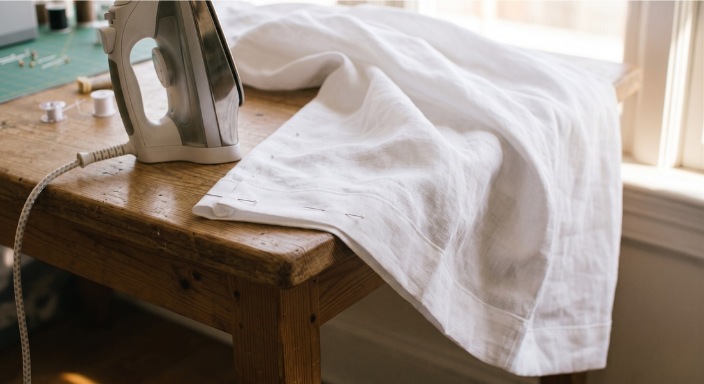
Pressing eats time and saves the dress. Press every seam before crossing it with another seam. This is not a finishing step. It is a construction step. Skipping it produces puckered seams that no amount of later pressing will fix.
“I refuse to stay up past 10 PM to fix a tension error.” – Reddit, r/sewing
That sewist is right. Tired sewing creates problems faster than it solves them. Build the dress over a weekend, with breaks. Two three-hour sessions beat one nine-hour marathon every time.
How to Sew the Shoreline Shift Dress Step-by-Step for Beginners
Step 1: Pre-Wash and Press the Fabric
Wash, dry, and press your fabric flat before cutting. Use the same settings you plan to use for the finished dress. Skipping this step causes shrinkage that will distort the fit on the first laundering.
Step 2: Lay Out the Pattern and Cut
Use a single fabric layer for printed fabrics and a double layer for solids. Pin the pattern pieces along the grainline arrows. Cut with sharp shears or a rotary cutter. Dull blades fray the edges, and the seams will fight you later.
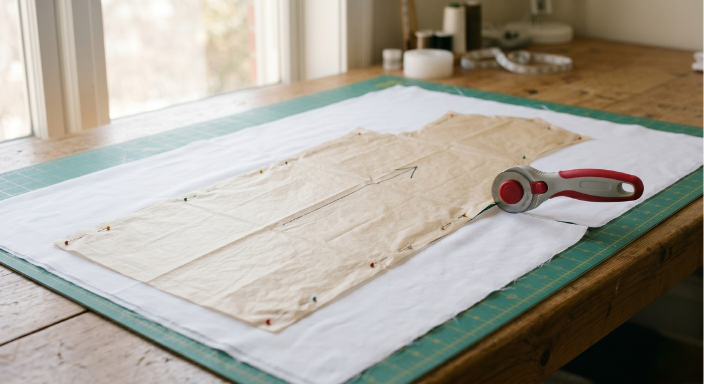
Step 3: Mark the Darts and Notches
Use tailor’s chalk or a wash-out marker to transfer dart legs and the dart apex to the wrong side of the fabric. Mark all notches. These marks are how the pattern pieces find each other later.
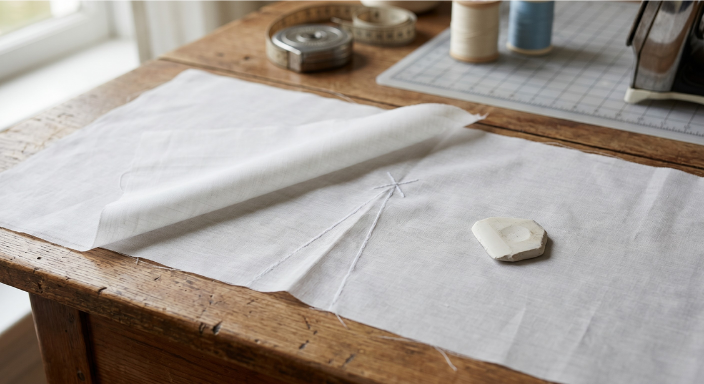
Step 4: Sew the Bust Darts
Stitch from the wide end of the dart toward the point. At the apex, stop, lift the foot, and pull the threads to the back. Knot the thread tails by hand. Do not backstitch at the dart point. Backstitching causes a visible pucker that no amount of pressing will fix.
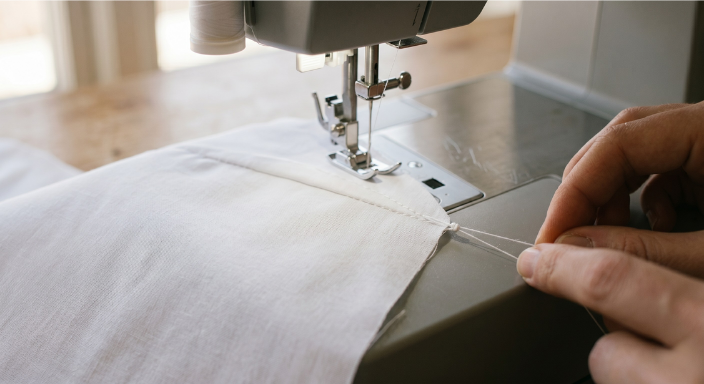
Step 5: Sew the Shoulder Seams
Place the front and back pieces right sides together. Pin at the shoulders. Stitch with a 5/8-inch seam allowance. Press the seam allowance toward the back. Press, do not just iron over the top. Press means lift, set, hold, lift.
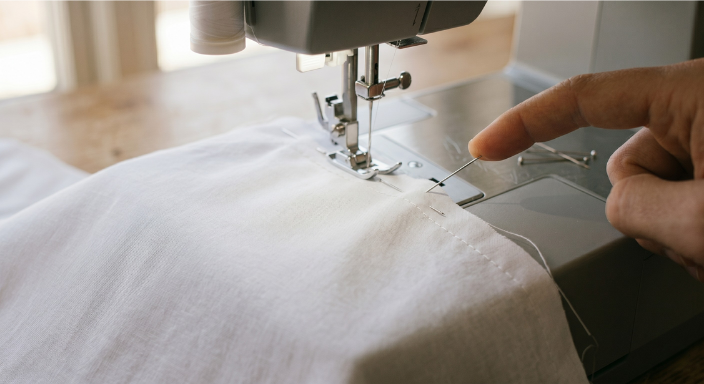
Step 6: Finish the Neckline with Bias Tape
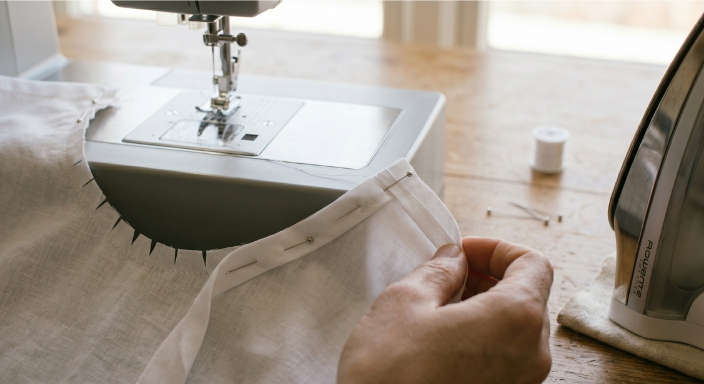
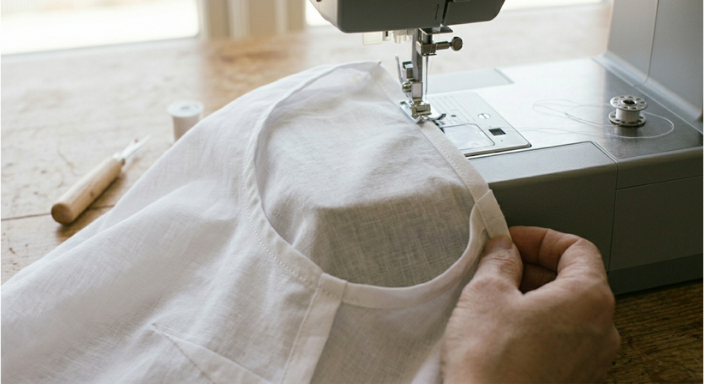
Single-fold bias tape is the beginner-friendly choice over a facing. Pin the bias tape along the neckline on the right side, stitch in the fold line, then turn the tape to the wrong side and topstitch. Clip the seam allowance at the curves before turning. Bias tape stays flat. Facings roll. For a first dress, choose flat.
Step 7: Sew the Side Seams and Finish the Armholes
Stitch the side seams from underarm to hem. Press open. Then finish the armholes with bias tape (same method as the neckline) or a narrow hem (fold a quarter inch, fold again, topstitch). Bias tape is faster. A narrow hem looks cleaner if you’re patient.
Step 8: Hem the Dress
Try the dress on before hemming. Mark the length you want with chalk while wearing the dress (a friend helps). Take it off, fold the hem twice (a half-inch and then an inch and a half), press, pin, and topstitch. Press one more time when finished.
What Are the Most Common Shoreline Shift Sewing Mistakes?
Mistake 1: Quilting cotton. Too stiff. The dress reads as a tent, not a dress. Use voile, lawn, or lightweight linen instead.
Mistake 2: Skipping the bust adjustment above a C cup. Side seams cannot fix a too-narrow chest. The fix is a five-minute pattern adjustment before cutting fashion fabric.
Mistake 3: No muslin for cup D and above. The fashion fabric is not the place to discover that the bust apex is two inches off. Tissue-fit or muslin the bodice section before cutting.
Mistake 4: Skipping the pre-wash. The shoulders will shift up by an inch after the first laundry cycle. The dress will fit a different person than the one you measured.
Mistake 5: Treating pressing as a finishing step. Seams pressed at the end will buckle. Press as you go, every seam, before crossing it.
“I’m starting to think I’m getting worse at sewing, but really, the patterns are just lower quality now. They expect you to figure out the tricky parts yourself.” – Reddit, r/craftsnark
That frustration is real. The fix is not more patience. The fix is doing the bust adjustment that the pattern instructions skipped.

- SEWING, ARTS, AND CRAFTS STAPLE: This Fiskars Rotary Cutter can cut multiple layers of fabric, felt, vinyl, and quilting materials; Ideal for doing arts and crafts for adults; Great addition to your sewing accessories and quilting supplies
- PRECISION ART SUPPLIES: Precision-ground, 45mm rotary blade is perfect for projects and fabric that require precise cutting of multiple layers of materials; Pair with Fiskars Self-Healing Cutting Mat to protect your work surfaces
- LONG LASTING AND RELIABLE: High-grade steel blade provides improved durability and long-lasting sharpness; Fiskars craft supplies and materials are built to last
- COMFORTABLE AND CONVENIENT: Symmetrical stick handle design allows for ambidextrous cutting for right-handed users and left-handed users; Sliding button extends blade during use, locks it into position, and retracts it for safe storage;
- QUALITY TOOLS FOR ARTS AND CRAFTS: From scissors and cutting mats, rotary and paper cutters, to classroom essentials, scissors for kids, and quilting and scrapbooking supplies, Fiskars crafting tools are designed to help you express yourself
How Do You Customize the Shoreline Shift for Plus Sizes and Different Bodies?
Curve-inclusive math has three steps.
- Step 1: High bust selects the size. Always. Even in plus sizes. Especially in plus sizes.
- Step 2: Cup adjustment adds the volume. Add a full-bust adjustment based on the difference between your full bust and high bust. The standard adjustment is one inch of width per cup size above B.
- Step 3: Hip check. Measure the pattern’s finished hip width flat against your hip measurement plus 2 inches of ease. If you come up short, add the difference at the side seams below the bust dart, not above it.
For sewists above 5’7″, add length at the lengthen/shorten line on the pattern, not at the hem. Adding at the hem changes the curve of the side seam.
For sewists with sloped shoulders, drag lines from the shoulder to the bust mean the pattern shoulder is too square for your body. The fix is a shoulder slope adjustment, not a bust adjustment.
These are not advanced moves. They are the standard adjustments most bodies need on most patterns. The patterns are graded for an average body that does not exist.
Make the Dress, Not the Excuse
The dress that fits gets worn 40 times. The dress that doesn’t sit in a closet.
Three principles hold this guide together. Fit first. Drape governs the silhouette. Sequence honestly.
Real beginners finish imperfect dresses and learn faster than perfectionists who never cut. The Shoreline Shift Dress is a good first dress because it has enough construction to teach real skills (a dart, a neckline, an armhole, a hem) without the steps that overwhelm (a zipper, a waistband, a buttonhole). Pick the right fabric. Pick the right size. Make the bust adjustment if your math says you need one. Then cut.
Ready to Sew Your First Shift Dress?
Cayden Naughton‘s Shoreline Shift Sewing Tutorial | Sew Along | Flowy Drawstring Dress | Summer Sewing | Tank Dress
Frequently Asked Questions
-
Is the Shoreline Shift Dress pattern truly beginner-friendly?
Yes, with one condition. Finish one project with a hemmed edge first, like a pillowcase or simple skirt. The shift requires darts, a neckline finish, and armhole finishing. None of these are hard, but trying all three at once with no prior completion under your belt is where most beginners stall.
-
What fabric works best for a Shoreline Shift Dress?
Cotton voile, rayon challis, lightweight linen, or cotton lawn. The dress depends on drape, not structure. Quilting cotton, heavy linen, and bottom-weight twill make the silhouette boxy and tent-like. Pre-wash and press the fabric before cutting because shrinkage in the first laundry cycle will shift the shoulders up an inch.
-
How long does it take to sew a Shoreline Shift Dress from start to finish?
Roughly six to eight hours of active sewing time, plus one hour for cutting and one hour for fitting if you’re doing a bust adjustment. A weekend is realistic. An afternoon is marketing copy. The time goes into pressing, the bust dart, and finishing the neckline cleanly.
-
Do I need to make a muslin first?
It depends on your cup size. If your full bust minus high bust is 2 inches or less, skip the muslin and cut your fashion fabric. If the difference is more than 2 inches (roughly C cup and above), make a muslin of the bodice section first. Side seams cannot rescue a too-narrow chest after cutting.
-
Can I sew the Shoreline Shift Dress without a serger?
Yes. The pattern works with a regular sewing machine. Use bias tape to finish the neckline and armholes, and use French seams or a zigzag stitch for the side seams. A serger speeds the work but adds nothing the home sewist needs for this specific dress.
-
How do I adjust the Shoreline Shift Dress for plus sizes?
Three steps. Pick the pattern size based on your high bust measurement. Add a full-bust adjustment based on your cup size. Check the hip width against the pattern’s finished hip measurement and add inches at the side seams below the dart if needed. Length adjustments belong at the lengthen line, not the hem.
-
My finished dress looks boxy and unflattering. What went wrong?
Three common causes. The fabric is too stiff (quilting cotton is the most likely culprit). The pattern was sized by full bust instead of high bust, so the shoulders sit too wide. Or the bust adjustment was skipped, and the apex is in the wrong spot. Each is fixable on the next attempt.
Why did you vote that way? Drop your take in the comments.