
Starting a sewing project is always fun, but finishing it is challenging. One of my favorite ways to finish a sewing project is by finishing it with French seams! Learn how to sew French seams below!
TL;DR: How to Sew French Seams
- French seams enclose raw edges for a neat, professional-looking finish.
- Start with wrong sides together, sew a narrow first seam, then trim the allowance so it can be fully enclosed.
- Fold fabric right sides together, press, and sew the second seam to hide all raw edges.
- Press at every stage to get crisp, clean results.
Get A Neat Finish By Learning How To Sew French Seams
Supplies you’ll need on how to sew French seams:
- Pins
- Fabric
- Sewing Machine & Thread
- Scissors
- Iron and Ironing Board
Step One: Pin The Fabric Together
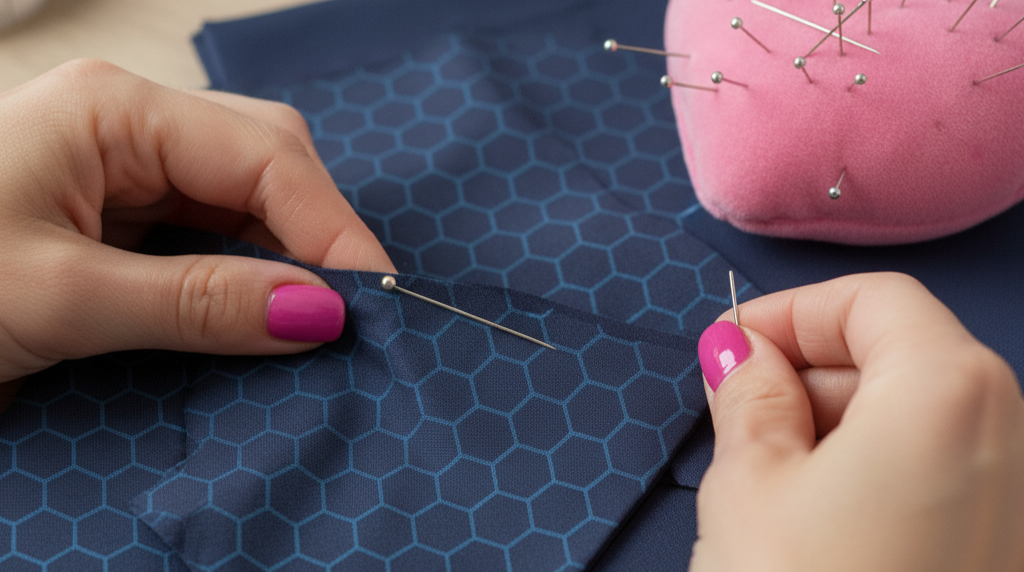
Unlike usual seams that press the right sides of the fabric together, make sure to press the wrong sides of your fabric. Make sure the borders are aligned and pin the fabric together securely.
Step Two: Sew The Fabric Together
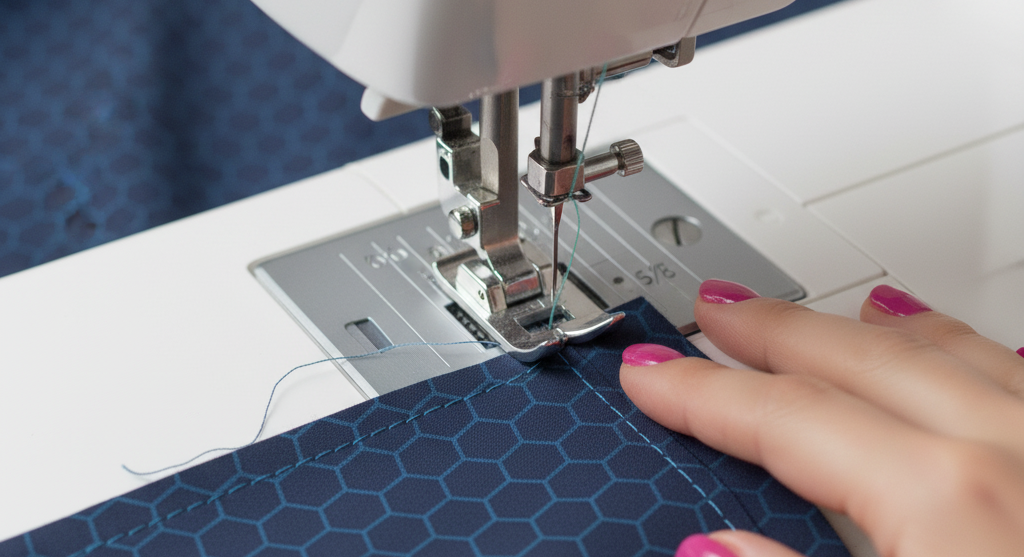
This is the first seam you are going to sew since you will be sewing two seams when doing this neat finish. Make sure you sew 3/4 to 1 centimeter from the frayed edge of the fabric. Use a straight stitch.
Step Three: Press The Seam

Pressing or ironing the fabric will be a recurring step in learning how to sew French seams. But it’s definitely worth it! Pressing the seam will help the thread bind with the fabric.
Step Four: Open The Excess Fabric From The Seam
Lay the fabric flat on the surface and pry open the excess fabric from the plain seam. While keeping it open, press it so it stays open. Be very careful in handling your iron!
Step Five: Trim The Seam Allowances
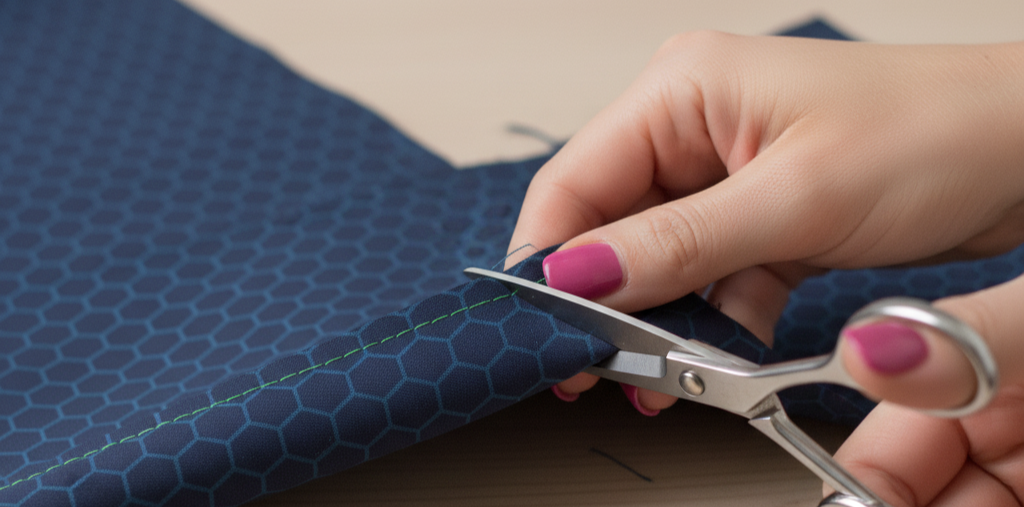
With your pair of scissors, trim the seam allowance down to 1/8 3 millimeters. Make sure you’re cutting only the seam allowance and not the right side of the fabric.
Step Six: Fold The Fabric
Fold the fabric by putting the right sides together. The seam you made and trimmed should be in the middle of the fold. This fixes the raw edges and makes the next steps a lot easier.
Step Seven: Press The Fabric

Press the fold and the area where the seam is. The seam has to be at the very edge of the fabric! This is quite easy to do because the bump of the seam would be very noticeable.
Step Eight: Sew The Second Seam
Sew the fabric 5 millimeters away from the previous edge. Use a straight stitch! If you’re afraid the fabric would slip, I advise you use pins. Be careful using that sewing machine too!
Step Nine: Press The Fabric
Yes, press the fabric – again. Don’t worry, this is the last ironing task! This is just to make sure the stitches melt into the fabric, securing it.
To get a more visual instruction, check out this video by Made To Sew!
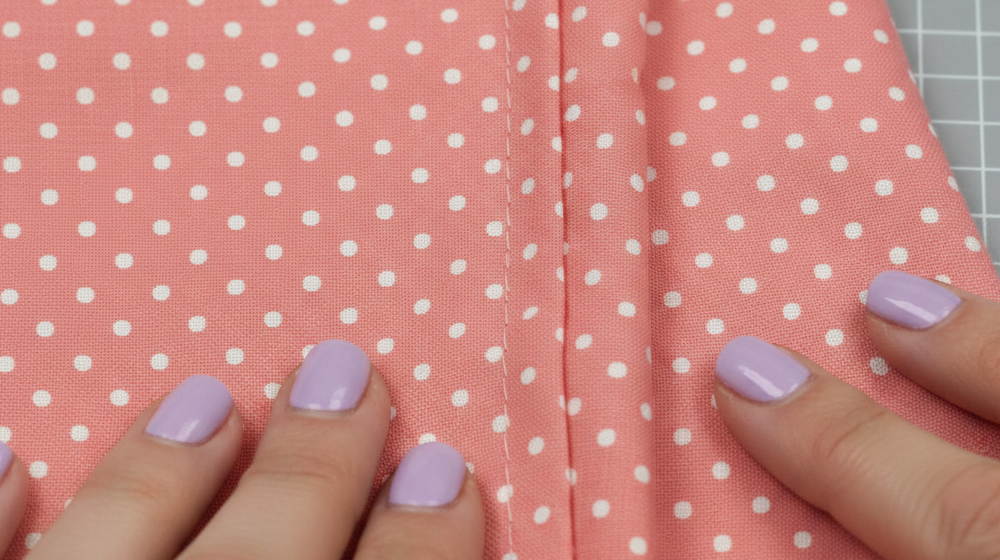
I learned earlier on that all seams vary so much because of the raw edges. When I realized how to sew French seams, I learned just how true that statement was. Unlike regular seams, French seams are virtually invisible. Sewing is a hobby and passion that always has something new to teach you or inspire you to create your very own! Now that you’ve learned how to sew French seams, say goodbye to unwanted visible seams and hello to flawless lines!
Do you know any other techniques for sewing French seams? Leave us a comment below!
Up Next: Two Ways to Sew Zippers
Editor’s Note: This post was originally published in March 2017 and has been updated for quality and relevancy.


