• Home
  • Sewing
    • Patterns
    • Materials
    • Organization
    • Supplies
  • Fashion Sewing
    • Dresses
    • Jackets & Coats
    • Pants & Shorts
    • Tops & Blouses
    • Accessories
  • Home Decor Sewing
    • Curtains
    • Pillows
    • Bedding
    • Novelty
    • Holiday Sewing Projects
  • Hand Sewing
    • Hand Embroidery
    • Crochet
    • Knitting
  • Sewing Techniques
    • Wovens
    • Knits
    • Quilting
    • Sewing Tips & Tricks
    • Specialty Fabrics
    • Sewing Skills
Logo
  • Patterns
  • Materials
  • Organization
  • Supplies
You are here: Home / Finishing Technique / How to Sew Mitered Corners

How to Sew Mitered Corners

November 2, 2022 By Sewing.com 1 Comment

Mitered corners are the secret for neat and expensive-looking sewing projects. The process seems daunting for a beginner but I broke it down to make it easy for you.

Easy Tutorial on How to Sew Mitered Corners

If you are just learning how to sew, making neat mitered corners could be a challenge. The best technique to get rid of bulky and rough looking edge is to miter the corners. Mitered corners add an aesthetic appeal to two edges that meet. It looks daunting for a beginner but it is actually a simple sewing technique useful for a handful of projects like tablecloths, curtains, and blankets.


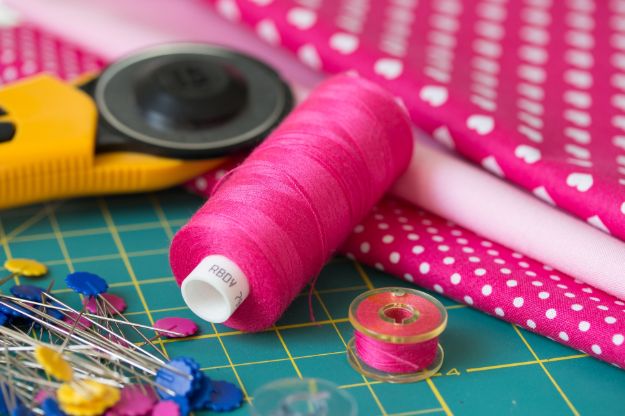
For this sewing technique, you’ll need:

  • fabric
  • sewing gauge
  • marker
  • iron
  • pins
  • sewing machine
  • scissors


Step 1: Fold and Iron

Fold the fabric over 1/4 to 1/2 an inch and iron it. Then fold it over again to about an inch then iron again. Repeat these steps on all the other corners. The creases will serve as guides for the mitered corners.

Step 2: Pin the diagonal crease

How to Sew Mitered Corners

Open the fabric so only the first crease is folded over. Measure 2 times the width of your border from the corner down each side. Draw a line connecting the two marks then fold the corner in half diagonally with the wrong side facing out. Make sure the two marks line up. Iron to create a diagonal crease and pin in place. Repeat these steps on all the other corners.

Step 3: Back stitch diagonal crease

How to Sew Mitered Corners

Backstitch along the vertical crease all the way to the edges. Start from the top edge where the two sides of the fabric meet. Cut off the excess fabric about 1/4 inch from the seam.

Step 4: Right side out

Iron the small seam open. Turn the fabric right side out, and push the point of the corner out. If you want to add a backing, slide it under the mitered corner.
Tip: Iron all over to make sure there are no wrinkles on the fabric.

Step 5: Topstitch

How to Sew Mitered Corners

Pin the open edges in place. Topstitch around the inner edge then iron again. You can also starch it later if you want a crisper looking fabric.


Here’s a closer look on how to sew mitered corners. It is definitely seeeew easy!

Mitering corners appear to be complicated at first but if you just follow the steps carefully, it is actually easy. Try it and see the difference it can make to any square-shaped sewing project you have. Knowing this can help make your handmade items look more expensive.

Have you tried sewing mitered corners in your projects? What’s the best part of this sewing technique? Tell us in the comments below! 

Preparing for your next sewing craft? Better check out these 25 Best Sewing Hacks That Will Make Your Life a Breeze!

Follow us on Facebook, Twitter, Instagram, and Pinterest!


Filed Under: Finishing Technique, Sewing

Comments

  1. Lois Barger says

    August 6, 2016 at 8:12 PM

    Love the mitered corner, i plan to use it this week so i can remember how to do it .
    Thank you , Lois Barger.

    Reply

Leave a Reply Cancel reply

Your email address will not be published. Required fields are marked *

  • Facebook
  • Instagram
  • Pinterest
  • Twitter

SUBSCRIBE TO SEWING.com AND GET THIS FREE GIFT!

Sewing-Basics-for-Family-and-Home

10 DIY Roman Shades – Sewing Tutorials And Ideas

DIY Roman shades are practical …Continue Reading

17 Quick and Easy Thanksgiving Sewing Project You Can Do This Fall

Fill your home with the colors and …Continue Reading

10 DIY Plus Size Halloween Costumes You Can Sew

Go out of the box by creating the …Continue Reading

Go Shopping

  • Joann’s
  • Fabric.com
  • Michael’s
  • Art.com
  • Bed Bath & Beyond

Other Great Sites

  • DIY Projects
  • Homesteading
  • Garden Season
  • Homemade Recipes
  • Makeup Tutorials

Resources

  • FREE Sewing Patterns
  • Sewing Terms Dictionary
  • Sewing Projects
  • Sewing Machines
  • Sewing For Beginners
  • About Us
  • Advertise With Us
  • Privacy Policy
  • Contribute
  • Contact Us
  • Terms of Service
Sewing.com
Email Support: [email protected]
Phone: 512-394-8187

Product returns go to:
1889 E Maule Ave, Ste G
Las Vegas 89119

Copyright © 2023 · Sewing.com


This copyrighted material may not be republished without express permission. The information presented here is for general educational purposes only.

MATERIAL CONNECTION DISCLOSURE: You should assume that this website has an affiliate relationship and/or another material connection to the persons or businesses mentioned in or linked to from this page and may receive commissions from purchases you make on subsequent web sites. You should not rely solely on information contained in this email to evaluate the product or service being endorsed. Always exercise due diligence before purchasing any product or service. This website contains advertisements.

We use cookies to personalize content and ads, to provide social media features and to analyze our traffic. You consent to our cookies if you continue to use our website.

Privacy settings

Privacy Settings

This site uses functional cookies and external scripts to improve your experience. Which cookies and scripts are used and how they impact your visit is specified on the left. You may change your settings at any time. Your choices will not impact your visit.

NOTE: These settings will only apply to the browser and device you are currently using.

This website uses cookies

We use cookies to personalize content and ads, to provide social media features and to analyze our traffic. You consent to our cookies if you continue to use our website.

Powered by Cookie Information