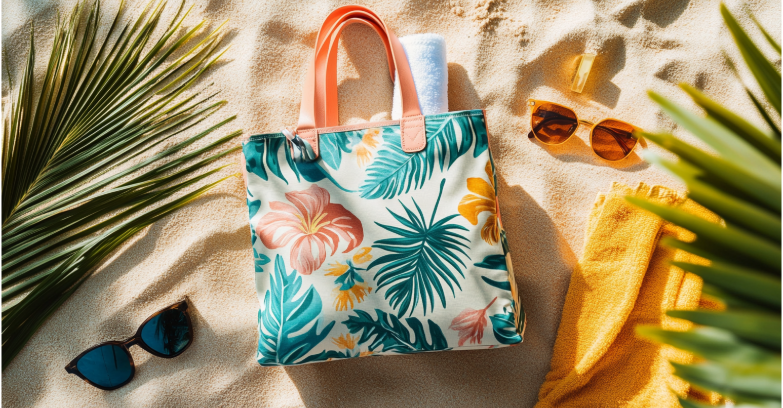

Heading to the beach or park always sounds like a good idea, until you’re trying to carry a water bottle or a towel that keeps slipping out of your tote bag. That’s why this DIY picnic and beach tote bag comes in handy. It’s roomy enough for all the essentials, and it has a built-in towel pocket right on the outside so you can grab your towel without digging through everything else.
TL;DR: DIY Summer Tote Bag: Easy Sewing Tutorial
- Walks you through sewing a simple, durable summer tote bag, ideal for beach trips, markets, or everyday carry.
- Uses basic rectangles and straight-line stitching, making it highly beginner-friendly and quick to finish.
- Recommends sturdy cotton, canvas, or outdoor fabric plus webbing or fabric straps for a long-lasting, washable tote.
- Includes optional touches like pockets, lining, boxed corners, or decorative fabrics to personalise your final look.
Related: 17 Must-Have Summer Tote Bags | Sewing Ideas
What You’ll Need
Main Fabric: Canvas, denim, or cotton holds up well.
Towel Pocket: Cut a piece of terry cloth or cotton big enough to hold a towel.
Materials:
- Thread
- Pins or clips
- Sewing machine with a heavy needle
- Iron
- Scissors or rotary cutter
- (Optional) Snap or Velcro for the pocket
Summer Tote Tutorial: Sew a Bag With Room for Towels
Got fabric ready? Let’s walk through how to sew your own summer tote.
Step 1: Cut Your Pieces
Start by cutting two rectangles for the front and back of the bag. Each piece should be 18 inches wide and 16 inches tall. Next, cut one rectangle for the bottom panel, measuring 18 by 8 inches. For the towel pocket, cut a piece of fabric about 16 by 12 inches.
Now cut two strips for the handles, around 24 to 28 inches long, depending on how low you want the bag to hang. If you’re using webbing or denim, you can leave the edges raw. If you’re making the handles from fabric, fold the long edges in toward the centre, then fold in half again. Press the folded strips flat and topstitch both sides to finish the straps.
Step 2: Make and Attach the Towel Pocket
Take the towel pocket piece and hem the top edge. Fold it down by half an inch, press it flat, and stitch straight across.
Once the edge is finished, centre the pocket on the front panel of the bag and pin it in place. Sew down the left and right sides, then stitch across the bottom edge. Backstitch at the top corners to keep the pocket secure when it’s in use. If you want extra organisation, sew a vertical line down the middle of the pocket to split it into two.
Step 3: Assemble the Bag
With right sides facing, pin the front, back, and bottom panels together. Start by attaching the bottom panel to the front and back pieces along the long edges. Then sew the side seams to shape the body of the bag.
To help the bag stand up on its own, box the corners. Flatten each bottom corner until the side seam lines up with the bottom seam to form a triangle. Measure 3 inches from the tip, draw a straight line, and sew across it. Trim off the extra fabric, then repeat on the other corner.
Step 4: Add the Handles and Finish the Top
Grab the fabric straps and pin them to the top of the bag. Place each strap about 4 inches in from the side seams. Check that they’re not twisted before sewing them down. Reinforce each strap end with a stitched box or X pattern so they hold up to weight.
If you’re using a lining, place it inside the outer bag with the right sides facing. Pin around the top edge and sew all the way around, but leave a small gap so you can turn the bag right side out.
Once it’s turned, press the top edge flat and topstitch all the way around to close the gap and finish the top seam. If you’re skipping the lining, just fold the top edge down twice, press, and stitch to clean it up.
One Bag, So Many Summer Plans
That’s it! You now have a sturdy summer tote ready for your next beach getaway. What fabric would you use for yours? Tropical print? Gingham? Denim and terry combo? Whatever your style, this project keeps your summer better organised and a little more stylish.
You can check out this Tote Bag Tutorial from Art Gallery Fabrics.
Frequently Asked Questions
-
What fabric holds up best for a summer tote that gets wet, sandy, and stuffed past capacity?
Mid-weight canvas (10–12 oz) is the workhorse here. It resists sagging when wet and survives sand abrasion better than quilting cotton. Denim works if you preshrink it twice. Skip lightweight cottons unless you’re lining and interfacing; they buckle under a wet swimsuit by week two.
-
Do I actually need to line this bag, or is that step skippable?
Skippable, but you’ll regret it on a tote that hauls wet gear. A lining hides raw seam allowances, prevents fraying after the first wash, and adds the structure that keeps the bag standing open at the beach. If you skip it, finish every interior seam with a zigzag or French seam, no exceptions.
-
Is this honestly a beginner project, or is that just what every blog says?
Honestly, beginner-friendly if you can sew a straight seam and operate a sewing machine without panic. The construction is flat-panel boxing — no curves, no zippers, no fitting. If your machine is threaded correctly and your tension is balanced on a scrap, you can finish this. Test on a fabric scrap first.
-
My straps keep ripping off the bag after a few uses. What am I doing wrong?
You’re skipping the reinforcement stitch. Sew a 1-inch square at each strap base, then stitch an X through the square. This distributes the load across the canvas instead of letting it tear at a single seam line. One maker on Reddit’s r/sewing called this “the difference between a tote and a trash bag.”
-
Can I substitute an old beach towel for the towel pocket fabric?
Yes, and it’s the better move for a no-sew or minimal-sew flip. Cut from the thicker body of the towel, not the hemmed edge, the hem creates bulk your machine will fight. Use a denim needle (size 90/14) and lengthen your stitch to 3.5mm. Terry frays heavily, so finish the raw edges.
-
Will this bag survive the washing machine, or do I have to hand-wash it?
Machine-washable on cold, gentle cycle, inside a mesh bag to protect the straps. Air-dry only heat shrinks canvas unevenly and warps the box shape. If you used iron-on interfacing, hand-wash instead. The adhesive softens in hot water and creates bubbled patches that never lie flat again.
-
How do I resize this without the proportions looking off?
Scale all three dimensions by the same percentage, not just one. If you want a bigger bag, multiply width, height, and depth by 1.25 together. Changing only one dimension produces a tote that looks stretched or squashed. Adjust the strap length proportionally; too short straps on a tall bag won’t clear your shoulder.


