
Is your sewing room overflowing with fabric scraps, tangled threads, and scattered tools? You’re not alone. Many sewing enthusiasts struggle to organize their creative spaces because supplies tend to pile up quickly. This guide provides practical tips for decluttering, organizing, and maintaining a functional and inspiring embroidery area.
These sewing room organization ideas can turn your messy sewing area into an efficient workspace.
Sewing Room Organization Secrets for a Neat and Creative Space!
Nothing kills creativity faster than a cluttered sewing room! Digging through piles of fabric and losing your tools mid-project? It’s time to take control and transform your space into an organized haven. These sewing room organization ideas will make sewing smoother, faster, and more enjoyable!
1. Declutter First: Clear the Chaos Before Organizing
Before adding new storage, start by decluttering. Organizing clutter only creates neat piles of unnecessary stuff. Go through every item in your sewing room and ask yourself:
- Do I still use this regularly?
- Is this tool or fabric still in good condition?
- Does this item inspire me, or am I holding onto it out of habit?
Sort items into three categories: keep, donate, and toss. Be honest with yourself while doing that. If you find tiny fabric scraps you haven’t used for years, maybe it’s time to let them go.
2. Maximize Vertical Space to Free Up Your Work Surface
Your walls are valuable storage space that often goes unused. Instead of cluttering your worktable, use vertical space to keep tools handy.
Storage Solutions to Try:
- Pegboards: Hang scissors, rotary cutters, rulers, and small baskets for thread spools.
- Floating Shelves: Store fabric bins, jars of buttons, and pattern books without using floor space.
- Wall-Mounted Rods with Hooks: Hang embroidery hoops, zippers, ribbons, or small tools in clear pockets.
This vertical setup not only saves space but also turns your supplies into a creative display.
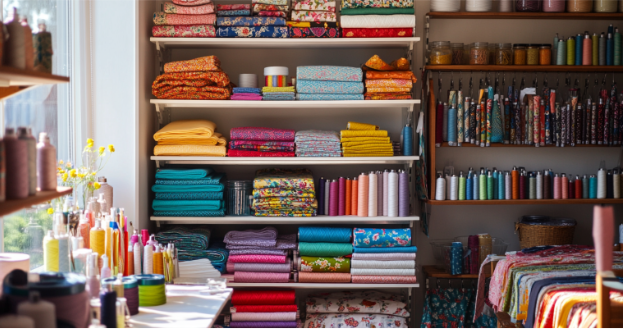
3. Smart Fabric Storage Solutions
Fabric is difficult to organize because it is bulky and easily forgotten once it’s tucked away. However, the key is visibility. If you can’t see it, you’re less likely to use it. Moreover, visible storage helps you avoid buying fabric you already own.
Fabric Folding Hack:
Fold fabric using comic book boards. Then, wrap the fabric around the boards to create mini “bolts” that stand upright in bins or shelves. This keeps the fabric neat and prevents wrinkles.
If this isn’t your style, try:
- Clear Drawer Units: Perfect for fat quarters or small fabric cuts. They also make color sorting effortless.
- Rolled Fabric Storage: Roll larger fabric pieces and store them upright in baskets. This method not only saves space but also keeps fabric wrinkle-free.
- Hanging Fabric: Use pant hangers to hang fabric in a closet. This keeps it wrinkle-free and organized.
Neatly stored fabric not only saves space but keeps you inspired. You’ll actually remember what fabrics you own!
4. Tidy Up Your Thread with Smart Organization
Tangled threads and missing bobbins can be frustrating. Organizing your threads saves time and keeps supplies in good shape.
Thread Storage Ideas:
- Wall-Mounted Thread Racks: Display spools organized by color. This keeps them untangled and easy to grab.
- Bobbin Storage Hack: Use foam toe separators (the kind for pedicures) to hold bobbins. They prevent threads from unraveling.
- Keep Thread and Bobbins Together: Slide bobbins onto matching spools using a golf tee or binder clip.
Organized threads mean less time detangling and more time sewing.
5. Budget-Friendly DIY Storage Solutions
You don’t need expensive organizers for a functional sewing room. Many household items work perfectly to keep supplies tidy.
Creative Repurposing Ideas:
- Mason Jars: Store buttons, pins, snaps, and small tools. Their clear design makes items easy to find.
- Silverware Trays: Organize scissors, seam rippers, and fabric markers neatly in drawers.
- Ice Cube Trays or Muffin Tins: Use them to organize beads, pins, needles, and small embellishments.
Think outside the box (literally), and you’ll find clever storage solutions all around your house.
6. Create a “Work-in-Progress” (WIP) Station
Unfinished projects often create clutter if they don’t have a home. Set up a specific area to manage your current projects.
What to Include in Your WIP Station:
- A labeled bin, shelf, or drawer for each active project.
- A folder for patterns, notes, and sketches.
- A container for project-specific items like buttons, zippers, or thread.
This keeps projects organized and ensures nothing gets lost.
7. Label Everything for Easy Access
Labels further organize the sewing room. They help you find items quickly and return them to the right spot.
Simple Labeling Ideas:
- Label Maker: Creates clean, professional-looking labels.
- Washi Tape & Marker: Write on colorful washi tape for fun, customizable labels.
- Chalkboard Stickers: Great for bins where contents change often—just wipe and rewrite as needed.
Moreover, clear labels help save time and reduce frustration during projects.
8. Adopt the “One In, One Out” Rule
Keeping your sewing room organized isn’t just about decluttering once. To maintain order, follow the “one in, one out” rule.
Additionally, every time you buy new fabric, tools, or notions, you’ll need to donate, use, or toss something you already own. This habit keeps clutter under control without constant cleaning.
9. Make Your Sewing Room Inspiring, Not Just Organized
Yes, organization is important, but your sewing room should also inspire you. Add personal touches to create a space you love.
Inspiring Ideas:
- A cozy chair or colorful rug to make the room feel warm.
- A bulletin board for sketches, fabric swatches, or quotes.
- String lights or bright lamps for a cheerful workspace.
When your sewing room feels inspiring, you’ll enjoy spending more time there.
Tidy Space, Creative Mind
Organizing your sewing room isn’t just about neatness. It’s about making a relaxing space that inspires creativity. With these sewing room organization hacks, you’ll spend less time searching for supplies and more time doing what you love—sewing!
💬 What’s Your Favorite Sewing Room Organization Idea?
Do you have a clever organization tip that transformed your sewing space? Hit reply and share it with me—I’d love to hear your ideas!
✅ FAQs: Sewing Room Organization Tips
- How do I start organizing my sewing room?
Start by decluttering. Remove everything, sort it, and only keep what you use. - What’s the best way to store fabric?
Fold fabric on comic book boards or store in clear bins to keep it visible and organized. - How can I organize my threads?
Use spool racks, drawer dividers, or small containers like ice cube trays for bobbins. - What if I have a small sewing space?
Use vertical storage, over-the-door organizers, and fold-down tables to maximize space. - How do I keep my tools organized?
Repurpose items like mason jars, utensil trays, or pegboards to keep tools tidy. - Should I label my storage bins?
Yes! Labels help you find items quickly and make cleanup easier. - How do I store my work-in-progress projects?
Use stackable trays, clear project bags, or rolling carts to keep projects organized. - What’s the best way to organize patterns?
Store patterns in labeled binders, file folders, or magazine holders. - How do I prevent my sewing space from getting messy again?
Have a place for everything and clean up after each project session. - Can I organize on a budget?
Absolutely! Repurpose household items like jars, boxes, and trays for creative storage.


