
Spring is knocking, and it’s time to trade your heavy coat for something lighter, brighter, and… DIY! A lightweight jacket is the perfect sewing project to welcome the season and wake up your creative mojo. So whether you’re team trench, bomber, or utility jacket, we’ve got you covered (literally). Let’s break down the styles, fabrics, and tips to get you started.
Trending Lightweight Jacket Styles for Spring
This spring, lightweight jackets are stealing the spotlight with bold yet wearable designs. Shackets (a blend of shirt and jacket) are trending for their casual ease and versatility. Oversized utility jackets are equally in demand and provide practicality and stylish edge. Meanwhile, cropped jackets with clean lines or playful puffed sleeves add a touch of flair to spring outfits.
If you’re wondering where to find patterns for these styles, check out indie pattern companies like Grainline Studio, Closet Core Patterns, or Papercut Patterns. Many offer digital downloads, so you can start right away. You can also look for sewing magazines that often feature trendy designs.
The Fabric Files: How to Choose the Perfect Material for Spring Jackets
Fabric is the foundation of any jacket, so make it count. Crisp cotton and breezy linen are perfect for warmer days, while lightweight denim adds structure without stiffness. For jackets with a bit more flow, rayon or Tencel are dreamy options that drape beautifully. Neutral tones are always versatile, though a pop of color or quirky print can make your piece stand out. Whatever fabric you choose, don’t forget to prewash it to avoid shrinkage or warping after sewing.
Your Weekend Guide to Sewing the Perfect Lightweight Jacket 🧵
Nothing beats the satisfaction of sewing your own spring wardrobe. 🪡 Ready to begin? Here are the steps:
Gather Your Materials
- Fabric
- Thread
- Pins or Clips
- Sewing Machine
- Fabric Scissors or Rotary Cutter
- Measuring Tape
- Tailor’s Chalk or Fabric Marker
- Iron and Ironing Board
- Pattern Weights
1. Cut the Pattern Pieces
Lay out your pattern pieces on the fabric. To ensure better accuracy, secure them with weights or pins. Cut carefully and always follow the grainline directions on your pattern. A rotary cutter can also help you achieve clean, precise edges and make the assembly smoother.
2. Mark Important Points
Now, take tailor’s chalk or a washable fabric marker to mark darts, notches, and seam allowances. These tiny details may seem unnecessary at first, but they’ll save you time during assembly and prevent mistakes.
3. Sew the Seams
With everything prepared, start sewing the main seams—shoulders, side seams, and sleeves. For extra security, use a straight stitch and backstitch at the beginning and end of each seam. Pressing your seams after sewing also makes your jacket look neat and professional.
4. Assemble the Sleeves
Attach each sleeve to its corresponding armhole and align the notches you marked earlier for precise placement. Be patient, as this can be a bit tricky. Use plenty of pins to secure the fabric, especially around the curved areas, to avoid puckering.
5. Add the Collar or Binding
Attach the collar or binding if your pattern includes one. Take your time, especially when working around curved edges. Remember, accuracy will make your jacket look more refined.
6. Hem the Edges
Finally, hem the bottom edge and sleeves to finish your jacket. Fold the fabric under twice to hide raw edges, then stitch carefully for a clean look. If you’re feeling creative, this is also the perfect time to use a decorative stitch and add your style.
Pro Tip 💡
Always press as you go to make everything look neater and more professional. Plus, it helps avoid wrinkling during assembly.
Creative Design Hacks for DIY Jackets
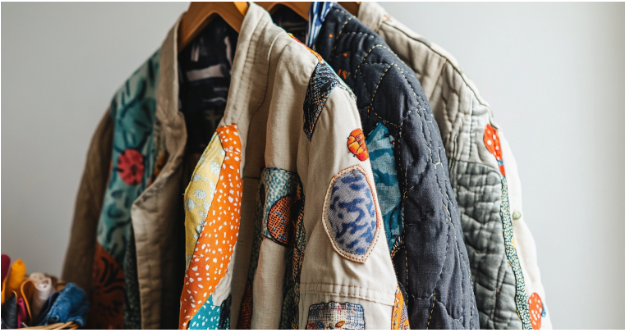
Why settle for ordinary when you can create something extraordinary? Add contrasting fabrics to pockets, cuffs, or collars to make your jacket stand out. Embroidered motifs, fabric patches, or hand-painted designs also let you express your style. Moreover, you can mix closures, like pairing a chunky zipper with delicate buttons, for a fresh twist.
Clever Ideas for Leftover Fabric
Fabric scraps are treasures in disguise waiting to become something useful or fun. You can turn larger remnants into matching accessories like scrunchies, bucket hats, or headbands for a cohesive look. You can also save even the tiniest bits for stuffing toys, pincushions, or future creative experiments. Using every scrap not only reduces waste but also lets your creativity flow long after your jacket is finished. After all, why let any piece of beautiful fabric go to waste?
Bloom Into Creativity
What’s better than stepping into spring? Stepping in wearing your very own DIY lightweight jacket! Don’t let this season pass without creating something as unique as the blooms around you. 🌷Which jacket will you try first? Let us know below! ✨
FAQs: Lightweight Jacket Styles for Spring
- How much fabric do I need for a lightweight jacket?
Most patterns require 2-3 yards, but check your specific pattern. - Can I sew this if I’m a beginner?
Yes! Pick a simple pattern and follow the steps carefully. - What’s the best thread for spring jackets?
Polyester thread works well because it’s strong and versatile. - Do I need a serger?
Not at all. You can finish seams with a zigzag stitch. - Can I make adjustments to the pattern?
Absolutely. Shorten sleeves or adjust the length to suit your style. - What’s the easiest pattern for a first jacket?
Kimono-style or unlined blazers are great starting points. - How do I sew straight seams?
Use the seam guide on your machine and sew slowly. - Should I line my jacket?
Lining adds polish but isn’t necessary for beginners. - What’s the best way to store patterns?
Keep them in zip-top bags or file folders to avoid wrinkles. - Can I machine wash my handmade jacket?
Yes, as long as the fabric is machine washable. Pre-washing prevents surprises.


