
Valentine’s Day is your chance to think outside the (chocolate) box. This year, skip the chocolates and craft something lasting: a heart-shaped wall hanging! This piece adds warmth to any space with its quilted design and classic heart motif. Plus, this keepsake isn’t just for Valentine’s Day or anniversaries. It’s a project that you can display year-round. Let’s break it down and create a heart-shaped masterpiece.
Picking the Perfect Palette for V-Day 🎨
Choosing colors for your heart quilt is half the fun! Classic reds and pinks always exude romance and warmth. If you’re looking for something softer, try blush and lavender shades for a dreamy vibe. For a bolder twist, burgundy with gold or navy with coral can create stunning contrasts. Meanwhile, mixing textures like satin, cotton, or velvet adds depth and elegance. A thoughtfully chosen palette ties everything together and ensures your quilt reflects the love it represents.
How to Choose Fabrics That Speak to Your Style 🧵
Fabric is the foundation of any quilt, so pick what feels right to you. Soft cottons are always a classic option because they’re versatile and simple to work with. When you want a touch of luxury, fabrics like satin or velvet can add a romantic vibe. Bold patterns, such as florals or polka dots, effortlessly infuse personality without overpowering your design.
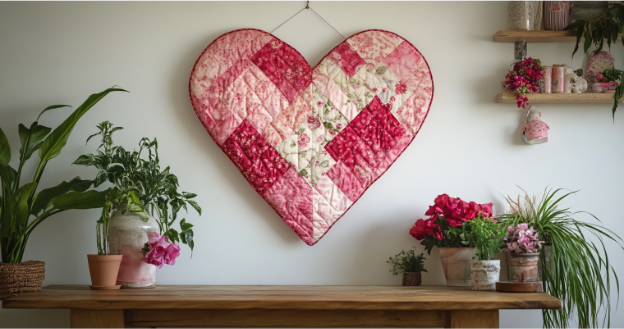
How to Make a Heart-Shaped Wall Hanging
Valentine’s Day decor doesn’t have to be over-the-top! A heart-shaped wall hanging is the perfect way to add a sprinkle of love to your space. If love never goes out of style, neither will this wonderful project! 🧵 Now, get ready to make one:
Step 1: Cutting Your Fabric ✂️
Slice your fabric into manageable sections. Position your heart template on your chosen fabric, then trace the shape with a pencil or fabric marker. You’ll need one piece for the front and another for the back.
Next, cut your batting into a slightly smaller heart shape. This ensures it fits snugly between the fabric layers without poking out at the edges.
Step 2: Layer It Up 🪡
Now it’s time to build your quilt sandwich. First, lay the backing fabric face down on your workspace. Then, place the batting directly in the center. Position the top fabric and ensure the right side faces up.
Afterward, smooth out any wrinkles or uneven layers. A flat, tidy sandwich makes sewing so much easier later.
Step 3: Quilt the Heart ❤️
Quilting secures the layers together while adding a decorative touch to your project. Sew simple lines across the heart using your sewing machine—or by hand! Straight stitches, crisscross patterns, or freehand swirls all work beautifully.
If you’re new to quilting, start with straight lines, as they’re easy to manage. Remember to go slowly and keep your stitches even to get the best results.
Step 4: Trim and Bind the Edges ✨
After quilting, clean up the edges of your heart. Use scissors or a rotary cutter to trim any excess fabric or batting.
To create a finished look, add binding around the edges. You can fold the backing fabric over and stitch it in place or cut a separate strip of fabric for binding. Carefully pin it before sewing to keep it secure.
Step 5: Add the Hanging Loop 🪢
Transform your quilted heart into a wall hanging with a simple fabric loop. Cut a strip of fabric about 4-6 inches long. Fold it in half, then sew the ends securely to the back of your heart.
This small addition prepares your project for display. It’s also a quick way to include a charming, functional detail.
Creative Ways to Personalize Your Heart Quilt ✨
Adding personal touches transforms your quilt into a one-of-a-kind keepsake. For instance, stitch initials or special dates, or use sentimental fabric scraps from a loved one’s shirt or a baby blanket. Additionally, incorporate appliqué shapes—stars, flowers, or even smaller hearts—for added visual interest. You could also embroider sweet phrases or love notes for a more intimate touch. Every small detail you put works together to tell your story and makes the quilt unique and heartfelt.
Display Ideas That Make Your Quilt Shine 🖼️
A handmade heart-shaped wall hanging deserves a great spot. Where and how you display your quilt can amplify its beauty. Hanging it on a rustic wooden dowel brings a farmhouse feel, while a sleek metal rod complements a modern aesthetic. For smaller quilts, framing them behind glass creates a gallery-worthy centerpiece.
Your Handmade Heart is Complete 🧵
Congratulations on finishing your heart-shaped wall hanging! It’s a handmade treasure that celebrates love in all its forms. Display it proudly, gift it thoughtfully, or use it to inspire your next creative project. Here’s to many more creative projects ahead—happy stitching!
FAQs: Heart-Shaped Wall Hanging
- What fabric works best for your heart-shaped wall hanging?
Cotton is ideal for its ease and versatility.
- Can beginners make this project?
Absolutely! It’s simple and beginner-friendly.
- Do I need a sewing machine?
No, you can sew it by hand if preferred.
- How big should the heart be?
That’s up to you! Choose a size that fits your space.
- What batting is best for this quilt?
Cotton or polyester batting works great.
- Can I use scraps for this project?
Yes, scraps are perfect for a patchwork look.
- How do I hang the quilt?
Attach a fabric loop or use a wooden dowel.
- Can this quilt be washed?
Yes, hand wash or machine wash on a delicate cycle.
- How long will this take to make?
Most can finish it in a few hours.
- Can I gift this for other occasions?
Of course! It’s perfect for anniversaries, weddings, or birthdays.


