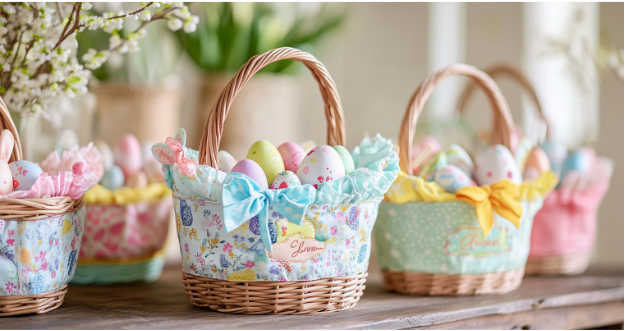

Easter baskets can do more than hold candy and eggs. They can also help set the scene for your holiday celebration. Instead of sticking with plain, store-bought options, why not add your personal touch with custom liners? These personalized liners add colorful fabrics, embroidered designs, and even names to your Easter basket. This guide teaches you how to craft personalized liners that make your Easter extra heartfelt and personal. Ready to give your baskets an upgrade? Let’s begin!
✂️ What You’ll Need
- Easter basket (to measure for the liner)
- Fabric (cotton works best; choose festive prints or solids)
- Lining fabric (optional for extra sturdiness)
- Bias tape or ribbon (for the edge trim and ties)
- Fabric marker or chalk
- Measuring tape
- Pins or clips
- Scissors or rotary cutter
- Sewing machine (or hand-sew if you prefer)
- Thread (matching or contrasting)
Optional extras for customization:
- Embroidery thread (for names or designs)
- Iron-on patches or appliqués
- Fabric paint or markers
🧺 Step 1: Measure Your Basket
To get the basket’s right fit, measure the following:
- Diameter of the basket’s bottom.
- Circumference around the top edge.
- Height from the bottom to the top edge. Add 3–4 inches to allow the fabric to drape over the edge.
Write down these measurements. Accuracy here ensures your liner fits snugly without sagging or being too tight.
✏️ Step 2: Create a Pattern
If you prefer precision, make a paper pattern first:
- Draw a circle for the basket’s bottom and add a ½-inch seam allowance.
- Draw a long rectangle for the sides. The length should be the basket’s circumference plus 1 inch (for seam allowance). The height should be your basket’s height plus the added inches for overhang.
If your basket isn’t perfectly round, trace the bottom directly onto your fabric or pattern paper.
✂️ Step 3: Cut the Fabric
Place your pattern on the fabric, pin it down or use pattern weights. Cut:
- One circle for the bottom.
- One rectangle for the sides.
If you’re adding a lining, cut the same pieces from the lining fabric. This adds structure and durability, especially if the basket will hold heavier items.
🪡 Step 4: Sew the Liner Together
- Attach the side piece: Fold the rectangle in half, right sides together. Sew the short edges with a ½-inch seam allowance to make a loop.
- Add the bottom: Pin the circular piece to the bottom of the loop, right sides together. Then, ease the fabric as needed so it fits smoothly. Sew around the edge with a ½-inch seam allowance.
- Press the seams: Use an iron to press the seams flat. This gives the liner a neat, finished look.
If you’re using a lining, repeat the same steps then place the lining inside the outer fabric with wrong sides together.
🎀 Step 5: Add the Finishing Touches
- Edge trim: Fold bias tape over the raw edge at the top of the liner. Pin it in place and sew all the way around to give your liner a clean, professional look.
- Ties: Cut four pieces of ribbon or bias tape, about 10 inches each. Sew them evenly spaced around the liner’s top edge, so you can tie them to the basket’s handle or sides.
- Personalization: Add embroidered names, appliqués or fabric paint designs before assembling the liner.
🐰 Step 6: Fit the Liner in Your Basket
Place the liner inside the basket and adjust it so the bottom sits flat and the sides drape evenly. Then, tie the ribbons securely to keep it in place. Finally, fluff the fabric over the edges for that cozy, festive look.
🌷 Personalization Ideas
Want to go beyond basic? Try these fun ideas:
- Monogrammed liners: Embroider initials or names for each family member.
- Patchwork style: Use fabric scraps for a colorful, quilt-like look.
- Themed designs: Add bunny, chick or egg appliqués for extra flair.
- Reversible liners: Use two different fabrics, so you can flip them for a fresh look each year.
🧺 Care Tips
Since Easter baskets can get messy with chocolate and jellybeans, make your liner easy to clean:
- Use machine-washable fabrics.
- Pre-wash the fabric before sewing to prevent shrinking.
- Spot clean or wash on a gentle cycle, then air dry to maintain the shape.
✨ The Easter Basket Glow-Up Is Complete!
Congratulations—you’ve just given your Easter baskets the ultimate glow-up. A simple liner, a dash of creativity, and voilà: baskets that steal the show way before the candy makes an appearance. Now, go fill them with goodies and let the compliments roll in.
🙋♀️ FAQs About Sewing Easter Basket Liners
- What type of fabric works best for Easter basket liners?
Cotton is ideal because it’s easy to sew and washable. You can also use linen or lightweight canvas. - How do I make the liner fit snugly?
Accurate measurements are key. Add ties to adjust the fit as needed. - Can I make liners without a sewing machine?
Yes! Hand-sew with a simple running stitch or backstitch. It just takes a bit longer. - How do I personalize the liner with names?
You can embroider names by hand or machine, use iron-on letters, or fabric paint. - Can I reuse the liners every year?
Absolutely. Use durable fabrics, and store them flat to keep their shape. - How do I make liners for odd-shaped baskets?
Trace the basket’s bottom and sides directly onto the fabric to create a custom fit. - Do I need to line the liner?
Not necessarily, but adding a lining makes it sturdier, especially for heavier items. - How do I stop the liner from sliding around?
Add ties to secure it to the basket, or use elastic around the top edge for a snug fit. - Can I make reversible liners?
Yes! Use two different fabrics and sew them together like a double layer. - Is this a good project for beginners?
Definitely. The straight seams and simple shapes make it perfect for new sewists.


