
Learn how to make simple DIY rod pocket curtains in 4 easy steps! Rod pocket curtains are a simple yet beautiful kind of window treatment, perfect for any room in your home. So, round up your sewing materials, and we’ll show you how to make rod pocket curtains in just 4 steps!
TL;DR: DIY Rod Pocket curtains
- Measure your window (width and drop) and add extra allowance for hems and the rod-pocket tube to ensure the panel fits correctly.
- Cut your fabric to size, handle selvedges, and join panels if needed, so the curtain width offers enough fullness.
- Fold and hem the side and bottom edges; then create a wide double-fold at the top to form the rod-pocket casing.
- Sew the pocket tube by stitching about half an inch from the fold, insert your rod, hang and distribute the fullness evenly.
- You can customise with added headers for extra height or choose whether your curtain will open from the centre or be a single panel.
RELATED: How To Make Roman Shades
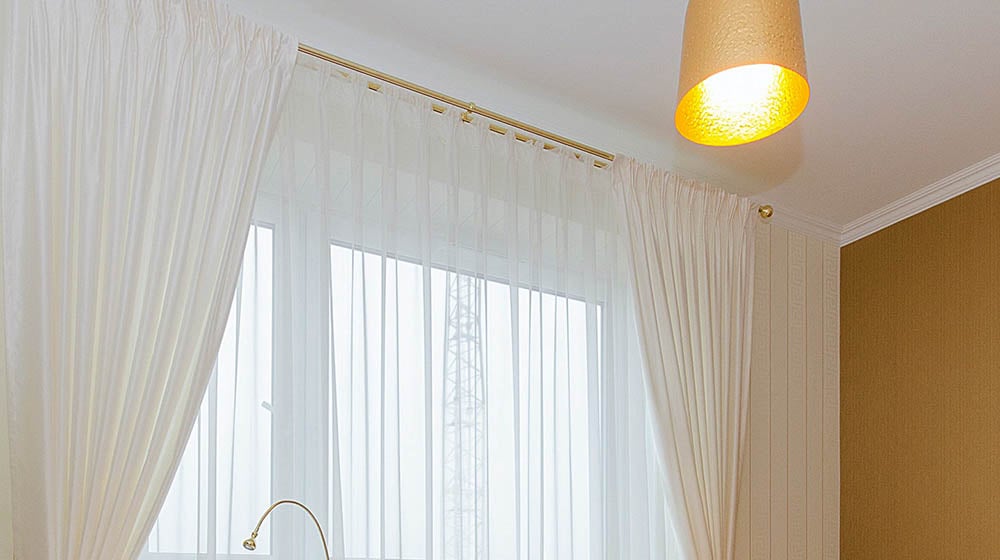
Make DIY Rod Pocket Curtains and Never Buy Curtains Again!

Materials You’ll Need to Make Rod Pocket Curtains:
- Drapery fabric
- Ruler or Measuring Tape
- Scissors or a Rotary Cutter and Mat
- Fabric Marker or Pencil
- Thread
- Pins
- Iron
- Sewing Gauge (optional)
How to Make Rod Pocket Curtains:
- Measure your windows and cut your fabric according to their size. Don’t forget to add 4 inches to the width and 12 inches to the height, to account for the hems and allowances.
- Prepare your fabric for sewing by folding the edge an inch and ironing it. Fold it again and iron it before you start sewing the hems. Sew down the length of the fabric and secure the ends of the hems using a backstitch. Do this again on the other side of the curtain fabric.
- The top hem is where you insert the rod for your curtain. For this curtain, we used a 3-inch double-fold hem. Fold your fabric 3 inches wide before ironing it. Repeat this step once more.
- To complete your rod pocket curtains, this is what you should do. From the pocket, sew along the bottom crease about half an inch away from the edge.
Additional Tips:
- You can also add a header for your curtain, which will create an illusion of extra height. Sew an inch from the top of your panel to form a 1-in header.
- Hang your curtain first to see how long or short you want your curtain to fall. For this curtain, we used the same 3-in double fold technique we did for the top hem. Sew down the width of the panel about a quarter inch from the crease.
Now your rod pocket curtains are ready! We bet you’ll start making another set as soon as you’re done with this one.
For a more detailed tutorial, watch this video from OnlineFabricStore.net:
Window treatments like this small curtain are the simplest and most affordable way to revamp your home interior. With a nice printed fabric or a beautifully designed curtain, your room will instantly look brighter and cozier. Improving your home aesthetic doesn’t need to be costly and complicated.And by making your own rod pocket curtains DIY, you also get to flex your sewing muscles and improve your skills.
Will you give this simple DIY rod pocket curtains project a try? Let us know in the comments below!
UP NEXT:
- 10 DIY Roman Shades – Sewing Tutorials And Ideas
- Learn How To Sew Scalloped Edges To Spruce Up Your Sewing Projects
- How To Get The Exact & Perfect Female Body Measurement
We aim to feature the hottest trends in the sewing world, so get in touch if you can contribute! WRITE FOR US!
Stay connected with us on Facebook, Twitter, Instagram, and Pinterest!Editor’s Note: This article was originally published 0n October 2, 2019, and has been updated for quality and relevancy.