

In this article…
- Visible mending repairs worn clothes with purposeful stitches and patches, so garments last longer and waste drops.
- The guide covers seven methods: darning, patching, weaving, appliqué, sashiko, boro, and reverse appliqué, plus essential tools and fabric matching.
- Beginners can start on denim with a running stitch. A small patch usually takes about 30 minutes.
Tired of tossing your favorite clothes the moment a tiny hole appears? A few stitches can keep them in rotation for seasons to come. Visible mending is the art of repairing wear and tear in clothes using decorative stitches or fabric patches. It helps support sustainability by reducing textile waste. This guide covers various methods along with patch ideas and insider tips. Ready to turn worn spots into conversation starters?
7 Types of Visible Mending: Turn Fabric Flaws Into Style Statements
Different fabrics require distinct repair methods. Some approaches weave threads into knits while others layer patches on heavy-duty materials. Here are seven visible mending techniques for every kind of rip and fray:
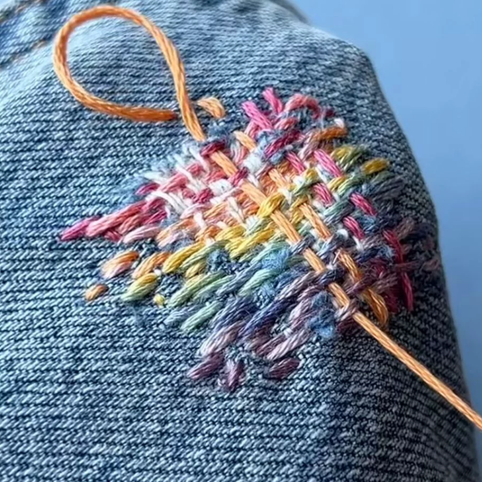
1. Darning
Darning is a technique that involves weaving thread across the damaged area to repair it. It covers the hole with a grid of horizontal and vertical stitch rows. Additionally, darning works best on socks, sweaters, and denim, as their sturdy knits can firmly hold the threads in place. If you’re going for an invisible mend, choose a yarn that matches both the fabric’s weight and color.
2. Patching
Patching requires cutting a fabric piece and stitching it onto the damaged spot. It can mend classic denim jeans, sturdy canvas bags, and outdoor jackets. For a creative twist, pick patches with bold colors or fun prints and turn repairs into personalized accents.
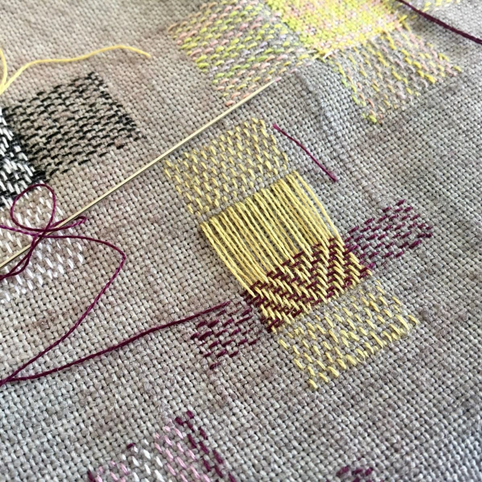
3. Weaving
Weaving is a mending technique that rebuilds damaged cloth by threading new yarn across holes or rips. It fits open‑weave textiles such as linen shirts, cotton blouses, and wool scarves. These fabrics have larger spaces between threads that can guide the new yarn and hold it in place. To elevate the stitch, try a slightly lighter or darker thread shade for texture and contrast.
4. Appliqué
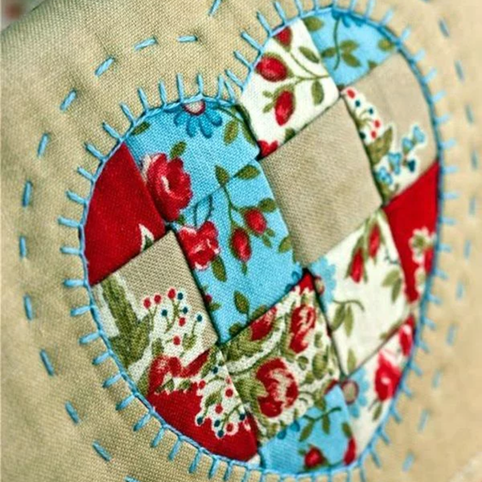
Appliqué is a decorative patching method that involves layering decorative fabric shapes over worn areas or plain surfaces. The process consists of cutting motifs from scrap fabric and securing the edges with stitches. Appliqués look great on denim jackets, baby onesies, and canvas tote bags. For a neat finish, trim the excess fabric using pinking shears to reduce fraying and make the design stand out.
5. Sashiko
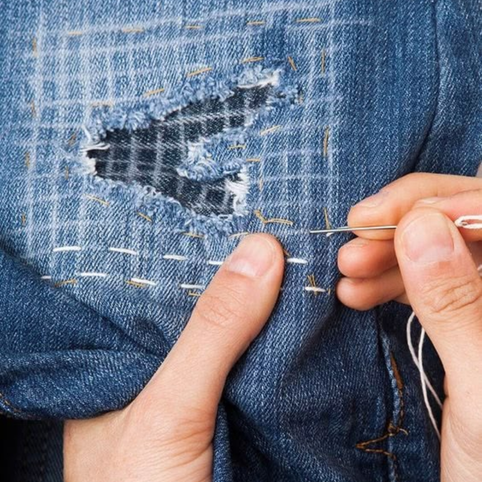
Sashiko is a traditional Japanese stitchwork that uses long running stitches and geometric patterns to reinforce fabric. It works beautifully on heavy denim jackets, indigo-dyed work shirts, and cotton pants. For best results, use sashiko thread to maintain an even stitch length and create consistent patterns.
Moreover, Sashiko’s common motifs carry significant meaning. The asanoha (hemp‑leaf) design represents steady growth, while the seigaiha (wave) pattern stands for resilience and good fortune.
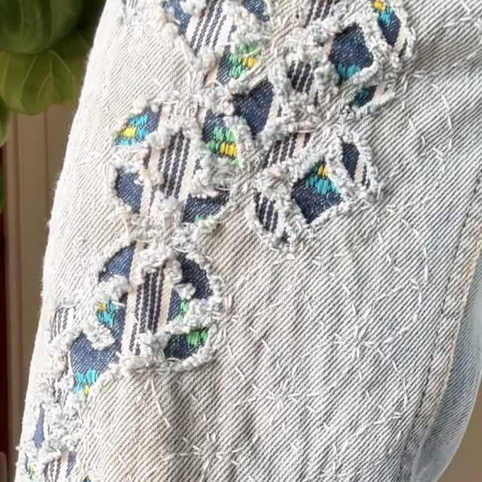
6. Boro

Boro is a mending method that stacks indigo‑dyed cotton pieces into layered patches to cover holes or strengthen worn areas. It stems from the Japanese principle of mottainai, a sense of regret over waste. Boro embodies the concept of “finding beauty in imperfection,” as each frayed scrap remains fully visible.
In addition, Boro is commonly used on heavy workwear such as cotton kimono jackets, denim overalls, and canvas bags. These pieces can handle the extra patches without sagging or puckering.
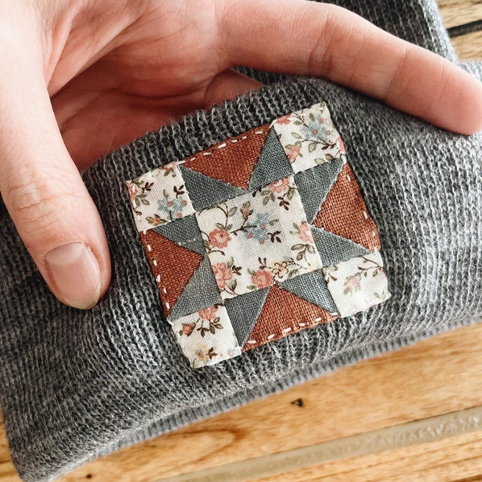
7. Reverse Appliqué
Reverse appliqué is a mending technique that removes a section of the top fabric to reveal a contrasting patch underneath. Choose bold prints or geometric shapes, such as florals or triangles, to create eye-catching designs. Additionally, reverse appliqué works best on pieces such as lined jackets and quilted blankets. These garments are made of stable underlayers, which prevent the patch from shifting.
Visible Mending: From Frayed to Fabulous
Visible mending proves that a tiny tear doesn’t have to mean saying goodbye to a favorite piece. The seven visible mending methods above offer various repair styles that match different fabric types. Every stitch turns a ragged hole into an eye-catching detail.
Which visible mending style will you try first?
Frequently Asked Questions
-
My stitches pucker the fabric. How do I fix it?
Puckering means your thread tension is too tight, your stitches are too short, or the fabric isn’t held flat. Loosen your grip, lengthen each stitch slightly, and stretch the area in an embroidery hoop before continuing. If puckers are already set, gently steam them flat with an iron held just above the surface.
-
Should I use embroidery floss or sashiko thread?
Both work. Embroidery floss splits into six strands, so it adapts to delicate cotton, linen, and lighter fabrics where bulk would show. Sashiko thread is a single thicker cotton strand that handles denim, canvas, and high-wear zones better. Beginners can start with floss since it’s cheaper, easier to find, and forgiving.
-
How do I keep my thread from tangling and knotting?
Cut your thread no longer than 18 to 24 inches; longer strands twist on themselves and snag. Run the cut length through beeswax or a thread conditioner before threading the needle. If a knot still forms mid-stitch, stop pulling immediately, ease it out with a pin, and resume.
-
Should I wash the garment before mending it?
Yes, wash and fully dry it first. Dirt and skin oils weaken fibers near the hole and dull your needle, and unwashed fabric can shrink unevenly after mending and pull your repair out of shape. A clean garment also lets you see the true damage area and any thinning fabric next to the obvious hole.
-
How do I mend a curved spot like a knee, elbow, or inner thigh?
Curved areas need short stitches and looser tension because the fabric flexes when you move. Slip a darning egg, lightbulb, or smooth jar inside to hold the curve, anchor a backing patch at least an inch beyond the hole on every side, and avoid pulling the thread tight against the curve.
-
What if my visible mend wears through again in the same spot?
That spot was already weak before you mended it, and your stitches likely anchored into thinning fabric instead of sound cloth. Re-mend it by extending the new stitches at least one inch past the failure into healthy fabric, and add a backing patch underneath so the repair shares stress across a wider area.
-
When is a hole too big to darn, and when should I patch instead?
Switch to a patch once the hole is bigger than a quarter, the edges are frayed, or the surrounding fabric feels thin between your fingers. Darning rebuilds small gaps in sturdy cloth; patching covers larger damage and reinforces weak zones. If you’re unsure, choose the patch, it almost always lasts longer.
Check out more visible mending methods in this article.
Why did you vote that way? Drop your take in the comments.


