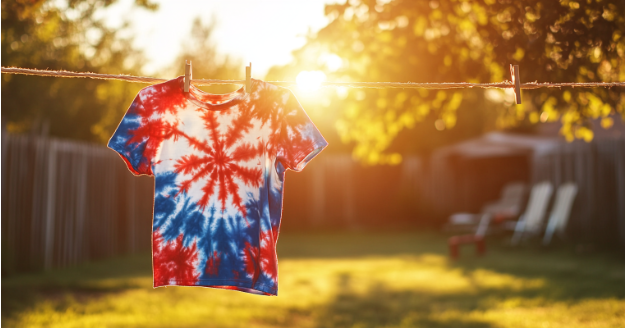

Nothing says 4th of July like all things red, white, and blue. If you’re looking for a creative way to show off your spirit this year, why not make your own patriotic tie-dye shirt? This tutorial breaks down how to make a traditional tie-dye shirt that you can wear to BBQ parties or the 4th parade.
TL;DR: DIY Tie-Dye Shirt for the 4th of July
- Shows how to make a patriotic red-white-and-blue tie-dye shirt using simple folding, twisting, and dye-application techniques.
- Uses beginner-friendly materials, a 100% cotton shirt, squeeze-bottle dyes, and rubber bands, so anyone can complete the project quickly.
- Walks through creating a starburst or stripe-style pattern, perfect for 4th of July celebrations.
- Emphasizes proper prep and setting steps (pre-washing, soaking, drying) to ensure vibrant, long-lasting color.
What You’ll Need For Your Tie-Dye Shirt

- 100% cotton white T-shirt
- Red and blue one-step tie dye
- Zip ties or strong rubber bands
- Plastic tablecloth or trash bags
- Cookie cooling rack or metal baking rack
- Plastic grocery bags or cling wrap
- Pair of gloves
- A bucket or a bowl of warm water
- Mild laundry detergent
- Scissors
Step 1: Pre-Wash and Soak the Shirt
Start by washing your cotton shirt in plain water to remove any coating that might interfere with the dye. Don’t use fabric softener, as it can block color absorption. After washing the shirt, leave it damp.
Next, soak the damp shirt in a bucket or large bowl of warm water. Warm water helps the dye absorb more evenly into the cotton fibers. Keep the shirt submerged until you’re ready to start tying.
Step 2: Fold and Secure for Stripe Pattern
Lay the damp shirt flat on a plastic-covered table or a trash bag-lined surface. Decide where the blue “flag” section should go. If you want it in the upper left corner when worn, start gathering the shirt from the bottom right corner and move diagonally toward the left shoulder.
Using both hands, pinch the fabric and start gathering the shirt in a loose, continuous line. Keep scrunching along the same direction until the shirt forms a long, twisted bundle. Don’t worry if the folds aren’t perfect: the unevenness is what gives tie dye its signature look.
Afterward, secure the bundle with zip ties. Place the first one near the starting corner, then add a new tie every two inches along the length. Leave a slightly larger section near the collar and sleeve for the blue portion of the flag design.
Step 3: Mix and Apply the Dye
Now it’s time to add color. First, put on your gloves and place the tied shirt onto a baking rack. Doing so keeps the shirt lifted off the surface, so excess dye can drip away.
Follow the instructions from your dye kit. Most one-step tie-dye bottles require warm water filled to a line on the bottle. After filling, shake the bottle well to mix the dye thoroughly.
Apply blue dye to the largest top section of the shirt, the area meant to represent the flag’s star field. Squeeze until the fabric is fully saturated. Next, apply red dye to the following section, then leave the next one blank for white. Continue alternating red and white sections. Once the front is done, flip the shirt and repeat the same pattern on the back.
Step 4: Set the Dye
When both sides of the shirt are dyed, it’s time to let the colors set. Carefully place the shirt into a plastic grocery bag or wrap it tightly in cling film.
Then, leave the wrapped shirt in a warm place for 6 to 8 hours to activate and lock in the color. If you want to get a bold finish, avoid unwrapping the shirt too early to let the dye fully set into the cotton fibers.
Step 5: Rinse, Wash, and Reveal
After the setting time is up, bring the shirt to a nearby sink or outdoor rinse station. Put your gloves back on and use scissors to cut off the zip ties. Then rinse the shirt with warm water. Keep rinsing until the water runs mostly clear.
Next, wash the shirt in a washing machine using a mild detergent. Make sure to wash it separately from other laundry to avoid staining other clothes. Once clean, dry the shirt as usual. The colors may lighten slightly after washing, but the final result will still look vibrant.
Star-Spangled and Hand-Dyed
Your patriotic tie-dye shirt is now ready! The best part of this project is how each pattern turns out a little differently. The way the colors mix and the swirls settle makes every design one of a kind. For more summer DIYs, head to Sewing.com and find your next favorite project.
FAQs
- What kind of shirt works best?
Use a 100% cotton white shirt for the best dye results. - Can I use food coloring instead of dye?
No, fabric dye is necessary for lasting color. - Do I need to pre-wash the shirt?
Yes, wash without fabric softener before dyeing. - Can I use rubber bands instead of zip ties?
Yes, but zip ties give tighter, more defined lines. - How long does the dye need to set?
Let it sit in a warm place for 6 to 8 hours. - Will the colors bleed in the wash?
Rinse thoroughly first and wash separately to avoid bleeding. - Can kids do this project?
Yes, with adult help for tying and dyeing. - How do I make the white stripes?
Skip dyeing certain sections to leave them white. - What if the red turns pink?
Use 100% cotton and avoid over-saturating the fabric. - Can I add stars to the blue section?
Yes, use fabric paint or iron-on vinyl after drying.