
Thanks to these special sewing techniques, adding zippers to create pants leg openings has never been this easy! If you’re getting bored with your plain old pants and are wondering what to do with them, well you came to the right blog. This tutorial contains sewing techniques specifically prepared for you! Transform your pants into something more by placing side zippers to make it easier to fold up the ends while cleaning or gardening. Or better yet, apply these sewing techniques in making a gift for a friend, brother, son, or daughter who’s been bugging you to upcycle their pants for ages. This is the perfect sewing project to wow them. So keep your eyes glued and let the sewing techniques begin!
TL;DR: How to Add Zippers to Pants Leg Openings
- This tutorial walks you through measuring, marking, cutting, and lining the zipper opening so the zipper sits cleanly against the pant leg.
- You’ll learn how to position the lining, secure the opening, and stitch the zipper for jogger pants or upcycling projects.
- The extra technique tips help prevent snagging fabrics or uneven seams, making the final result look professionally done.
Sewing Techniques: How to Add Zippers to Pants Leg Opening
When you have the right sewing techniques to execute a magical sewing project, pulling it out of the hat is going to be one heck of an easy trick! But the trick is not exactly pulled off right when clothing accents are just glued for the sake of getting the look. Be the coolest mom on the block by surprising your youngster with this stylish apparel.
This tutorial will clearly not give you false promises! You will finally achieve that fashionable and functional leg-zippered jogger pants your groovy teen has long dreamt of. Just follow the easy steps and sewing techniques as indicated below.
The things that you will need:
- Scissors
- Pins
- Marking Tool (this tutorial used Mark-B-Gone Disappearing Ink)
- Ruler
- Measuring Tape
- 2 lengths of Zipper
- Pants
- Lining Fabric (pick the one with the same color as your pants)
- Sewing Machine (optional)
Here’s what you’re going to do:
Step 1. Create the lining pieces
1.a. Measure the width and length of your zipper
Place your measuring tape across the zipper to get the width. Measure the zipper from end to end to get its length.
1.b. Draw a diagram on each lining
Make an outline of the zipper
Draw a rectangular outline of the zipper on the lining pieces with your marking tool and ruler with the length and width you measured earlier.
Draw a center line
Write a straight line in the middle of the rectangle.
Draw a lateral center line on both sides
Create two half-way marks in between the middle line and the top or bottom side.
Measure 1 centimeter from the left end
Measure 1cm from the left end and then mark.
Draw diagonal lines
Add two diagonal lines that connect the half way lines to the center line.
Measure around the rectangle outline
Measure 1/2 inch from the outline and mark again.
Cut out the lining pieces
Cut out from the half-inch allowance of the rectangular outline. Your lining pieces are now ready!
Step 2. Position the lining pieces to your pants
2.a Locate the side seam of your pants
Fold your pants properly and locate the side seam.
2.b. Lay your lining pieces over the seam
Make sure to put the rectangular diagram on top when you put it over the seam. The letter “V” figure should be the one placed away from the pants leg opening.
2.c. Pin the lining pieces
Pin along the outline of the rectangle to secure the lining piece to the pants.
Step 3. Sew on the lining pieces
3.a. Cut along the middle line
Carefully cut along the middle of the middle line of the diagram, including the pants’ fabric. Follow the lines exactly as they are when you reach the “V” figure.
3.b. Reposition the pins
Remove the pins and move them to the edge around the lining.
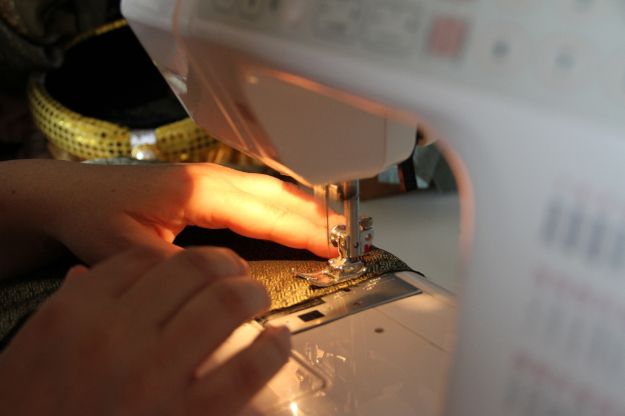
3.c. Straight stitch along the rectangle
Attach the lining piece to your pants by sewing a backstitch with your sewing machine. Leave a seam allowance of 1 to 2mm.
3.d. Fold the edge of the lining, pin, and sew
Fold the remaining lining inward, towards the wrong side of the pants and pin it down.
Sew a backstitch around the pinned area.
Step 4. Position the zipper
Position the zipper on the pants leg opening and secure with pins. Its edges must be placed underneath the lining.
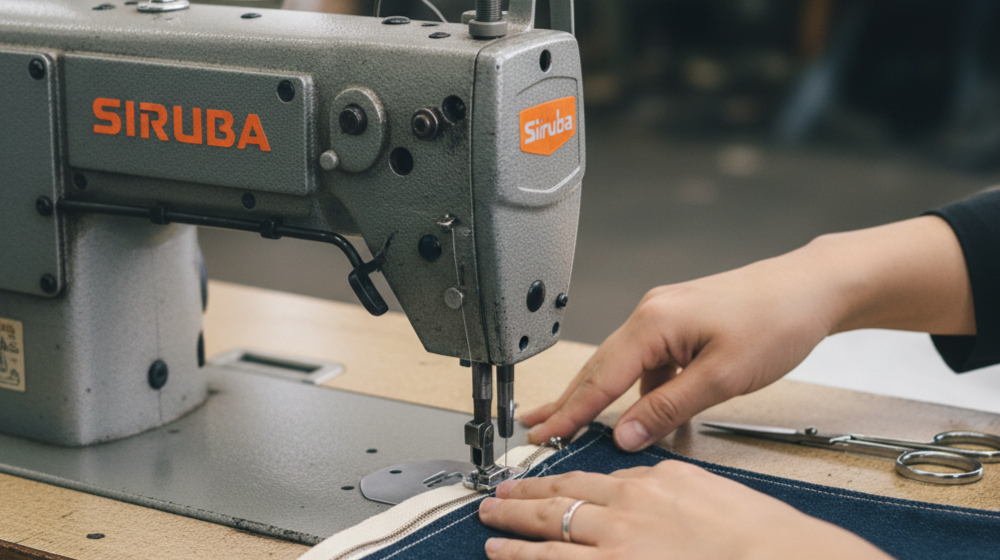
Step 5. Sew on the zipper, and flaunt it!

Sew the zipper with a backstitch using your sewing machine, and you’re done!
Here are some sewing techniques to help you out:
Sewing techniques #1A diagram over your lining will serve as a reference as to where to cut, to sew, and to fold.Sewing techniques #2 Placing a firm paper underneath the fabric of the pants’ legs from where you’re working on will prevent you from accidentally pinning or sewing the other side of the fabric.Sewing techniques #3 Make sure the zipper is not bending when pinning because this will affect the over-all look of the pants.Sewing techniques #4 Sew on the top part of the zipper first to properly secure it to the pants. Then proceed to sew on the sides to keep it from bending.Sewing techniques #5 You can also use a contrasting color for your zipper if you want to highlight this on your pants.Watch and enjoy the sewing techniques from this zippered joggers tutorial by kenandrewdaily:
Sewing techniques are the key to making these jogger pants more than what meets the eye. These sewing techniques are our sewing aids in transforming any kind of pants into its zippered stylish form. You can also perform this trick with an old pair of jogger pants and upcycle it. How about extending the length of the zipper? It’s all up to your imagination and craftiness.
Do you have any sewing techniques you would like to impart with your fellow sewers? Please write your thoughts in the comment box below. I would love to hear from each one of you! 🙂
Would you like to learn more sewing techniques? Learn how to make the perfect dress measurements over here!


