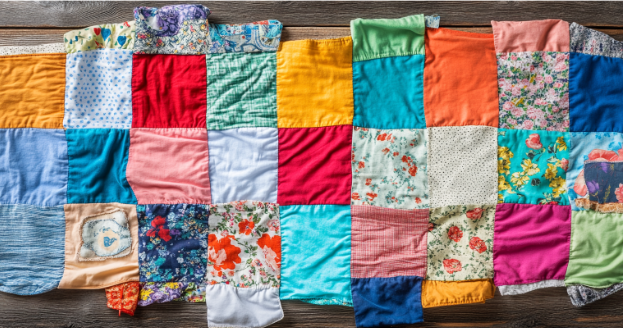

If every quilt tells a story, then a memory quilt takes storytelling to a whole new level. This unique creation is made from sentimental fabrics—worn concert tees, a baby’s first pajamas, or beloved flannels—that hold precious memories. Together, these fragments are stitched into a heartfelt tangible keepsake. This Valentine’s Day, there’s no better way to say “I care” than with a gift stitched straight from the heart.
Step-by-Step Guide: Sew a Memory Quilt for Someone Special 🪡
Love isn’t always spoken—it’s felt, cherished, and sometimes, stitched. A memory quilt brings all those feelings together and uses sentimental fabric pieces that carry history, emotion, and connection. Here’s how to craft this meaningful gift:
1. Gather Your Materials ✂️
- Old T-shirts, baby clothes, scarves, or other sentimental fabrics
- Batting
- Backing fabric
- Thread
- Sewing machine or hand-sewing tools
- Iron
2. Cut and Prep Your Fabrics ✂️
Cut your fabrics into uniform squares, rectangles, or even mix in some triangles for variety. A rotary cutter and ruler are great tools for this, but scissors work just fine too.
If you’re working with stretchy fabrics like T-shirts, don’t skip the interfacing. Add lightweight fusible interfacing to stabilize the material and avoid stretching or puckering while you sew. It’s an extra step, but it makes the process so much smoother.
3. Plan Your Layout 🧵
Lay your fabrics out on a flat surface like a table or the floor. Move the pieces around until you achieve a balanced design that’s pleasing to the eye. Adding solid fabrics next to bold patterns helps keep the quilt from looking too busy.
Once you’re happy with the arrangement, take a quick photo. This small step is a lifesaver because it gives you a reference while sewing. A little planning now saves a lot of frustration later.
4. Assemble Your Quilt Top 🪡
Sew the quilt pieces together row by row and align the edges as you go. A 1/4-inch seam allowance is the sweet spot for quilting and helps keep things uniform.
After sewing each row, press the seams flat with an iron. This ensures the rows align neatly when you stitch them together.
5. Create Your Quilt Sandwich 🥪
Now it’s time to layer everything together. Start by laying the backing fabric flat on a large surface, with the right side facing down. Next, add the batting and smooth out any bumps. Finally, place your quilt top on top, right side up.
Afterward, secure the layers to keep them from shifting while you quilt. Use safety pins, basting spray, or large hand stitches. Whatever method you choose, take your time to smooth out the layers to get the best results.
6. Quilt It All Together 💪
Now it’s time to stitch everything together! Here’s how:
- Start Simple: For beginners, straight-line quilting is the easiest method. Stitch along the seams of your fabric squares or create a grid pattern by sewing straight lines across the quilt. Use a walking foot on your sewing machine for smooth stitching.
- Want to Get Creative? Try free-motion quilting for more artistic designs like loops, swirls, or even hearts. This technique lets you move the fabric freely under the needle. Practice on a scrap piece first to build confidence!
- Pro Tip: Keep the layers flat and smooth as you sew to avoid bunching. Use quilting clips or pins to hold everything in place while you work.
7. Bind the Edges 🎀
After stitching everything together, trim the edges to even them out. Then comes the binding process, the final touch that gives your quilt a polished finish.
Using fabric strips, sew the binding around the quilt’s edges. Fold it over to cover the raw seams, then stitch it down neatly. Choose a contrasting fabric for the binding to make your quilt stand out.
8. Gift (or Keep) with Pride! 🎁
Now comes the best part—sharing your creation. Fold the quilt neatly and wrap it with a ribbon for an extra-special touch. Adding a handwritten note explaining the story behind the fabrics makes the gift even more meaningful.
If you’ve decided to keep it for yourself, display it proudly or cozy up in it on the couch. Either way, you’ve created something truly unique and personal.
Personal Touches Make It Special 💖
Memory quilts are already personal, but little extras can make them even more meaningful. Add a fabric label with a handwritten note like, “Made with love, Valentine’s Day 2025.” Use embroidery to stitch a name, date, or special message. You could even include a hidden pocket for keepsakes or small treasures.
Why This Gift Matters 🥹
Store-bought gifts may be nice but a memory quilt says, “I see you. I value you.” It’s not just a blanket; it’s a tangible collection of shared moments. These memory quilts also become heirlooms that you can pull out for comfort or display proudly during celebrations.
Ready to Get Started?
Why keep those beloved fabrics tucked away? Dig out those sentimental pieces, dust off your sewing machine, and start stitching. This Valentine’s Day, surprise someone with a gift they’ll hold close forever.
FAQs About Memory Quilt
Q: Do I need fancy quilting tools to make a memory quilt?
A: Nope! A basic sewing machine, fabric scissors, and a lot of love are all you need.
Q: What if my fabrics are all different textures?
A: Use interfacing for stretchy or thin fabrics to make them easier to work with.
Q: Can I wash the quilt once it’s finished?
A: Yes! Just use a gentle cycle and cold water to protect the fabrics.
Q: How big should the quilt be?
A: It depends on the recipient! Lap quilts are great for snuggling, while larger ones make stunning bedspreads.
Q: How do I choose a backing fabric?
A: Pick something soft and durable, like cotton or flannel, that complements your quilt top.


