
When the holiday season rolls around, it’s the little details that make all the difference. A handmade holiday table runner is a great way to elevate your dining room and make every meal feel a little more special. Plus, there’s no need for fancy stores or complicated decor as you can make this table centerpiece yourself! Keep reading this fun DIY guide that will make your table extraordinary.
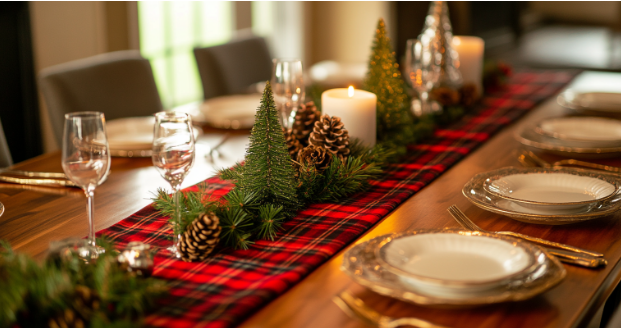
“Create an image of a beautifully set dining table with a cozy, festive holiday table runner. The runner is in a bold red plaid pattern with a touch of decorative trim. The table has holiday-themed decor like small pine trees and candles, giving it a warm and inviting atmosphere perfect for a holiday dinner.”
Ready for the Holidays? Make Your Table Pop with a DIY Holiday Table Runner!
The best part of the holiday season? The traditions. And what’s a tradition without a beautifully set table? If you’re looking to elevate your dining experience, a DIY holiday table runner is just what you need to set the stage for an unforgettable meal. Here’s how to craft a table centerpiece that will impress the guests at your next family gathering.
What You’ll Need:
- Fabric for the top
- Fabric for the backing
- Batting or fusible interfacing
- Decorative trim (optional)
- Thread
- Sewing machine
- Scissors
Measure & Cut Your Fabric 📏
Decide how long and wide you want your runner to be. The standard width is 14-16 inches, and the length can range from 45-60 inches, depending on the size of your table. Cut out two pieces of fabric: one for the top and one for the back. Don’t forget to cut the batting, which should be slightly smaller than the fabric pieces, to avoid extra bulk. These dimensions work well for most tables but feel free to adjust.
Press Your Fabric ✂️
Before you start sewing, press your fabric to remove any wrinkles. Iron both pieces flat, then fold and press the long edges by about 1/4 inch. This will create smooth edges and help the fabric stay in place while you sew.
Layer the Fabric 🪡
Now, layer the fabric. Lay the top fabric right-side up. Then, place the batting on top, followed by the back fabric, with the right side facing down. Pin the edges to keep everything in place while you sew. For a reversible runner, use fabrics that look great on both sides. This way, you can easily flip it when you want a new look.
Sew Around the Edges 🧵
Using a 1/4-inch seam allowance, sew around the edges of the runner. Leave a 3-4 inch gap on one short end so you can turn the runner right-side out. Make sure to sew evenly, especially around the corners, for a neat finish.
Turn the Runner Right-Side Out 🔄
Once the edges are sewn, turn the runner inside out through the gap you left open. Use a point turner or a blunt object like a pencil to gently poke out the corners. Press everything with an iron to create sharp, clean edges.
Add Decorative Trim 🎀
This step is optional, but if you want to add more style, now’s the time to attach decorative trim. Sew on pom-poms, lace, or rickrack along the edges. This adds a personalized touch which is perfect for the holidays. You can either machine-sew or hand-sew the trim, depending on your preference.
Topstitch for a Clean Finish 🌟
Once the trim is in place, topstitch around the entire perimeter of the runner, about 1/8 inch from the edge. This will help secure everything and give the runner a neat, polished finish.
Customize It 🌟
While the basic fabric for your holiday table runner is important, you can get creative with your materials. Here are a few ideas to give your project a unique twist:
Layered Fabrics
For a textured look, use two layers of fabric instead of one. You could combine a bold, patterned fabric for the top and a solid, complementary fabric for the backing. This layering effect gives the table runner more substance and creates a refined look.
Vintage Fabrics
If you’re into a more vintage-inspired style, scour thrift stores for old tablecloths, scarves, or napkins. You can often repurpose these materials to create a one-of-a-kind holiday runner. Not only does this make your project eco-friendly, but it also gives you the chance to work with distinct textures and prints.
Felt and Wool
Another way to give your runner a wintery feel is by using felt or wool fabric. These materials are soft and provide extra warmth which is ideal for cold-weather celebrations. You can even try a patchwork look by combining multiple colors of felt or wool for added homemade vibe.
Enjoy Your New Holiday Table Runner! 🎉
Don’t let another holiday season go by without adding your style to this table decor. Take the leap and start crafting your own beautiful holiday table runner today. Need a little inspiration? Follow along with us for more fun ideas and tips!
Holiday Table Runner FAQs 🎅
- Can I use quilting cotton for this project?
Yes! Quilting cotton is durable, widely available, and perfect for holiday prints.
- What if I don’t want to add decorative trim?
That’s fine! The table runner looks great on its own, without any trim. A simple edge is just as lovely.
- How should I wash my table runner?
Wash it on a gentle cycle with cold water and dry on low heat. Alternatively, air drying will help maintain the fabric.
- Can I make a longer table runner?
Yes! Simply adjust the length to fit your table. A longer runner works well for large tables or buffet-style settings.
- How do I make sharp corners?
After turning the runner inside out, use a point turner or a pencil to gently push out the corners. Press everything with an iron to set the shape.
Click here for more stylish DIY ideas to make your home shine this holiday season. Let’s craft a memorable celebration, together!


