
TL;DR: Floral Headscarf Sewing Tutorial (Beginner-Friendly)
- A simple, beginner-friendly project that walks you through sewing a lightweight floral headscarf using just basic straight stitches.
- Uses soft, breathable fabrics (such as cotton or rayon) and a single rectangular pattern piece, making it perfect for new sewists.
- Teaches key skills: hemming edges, pressing folds, and creating clean corners for a polished finish.
- The resulting headscarf is versatile and wearable; ideal for everyday outfits, sun protection, or as a gift.
If you’re looking for a pretty and practical summer project, this floral headscarf is a perfect pick. Headscarves are making a strong comeback this season, as seen in streetwear and vacation looks. This guide walks you through a beginner-friendly tutorial for sewing a stretchy floral headscarf. Let’s turn that fabric into something you’ll actually want to wear this summer.
Related: 15 Easy Infinity Scarf Crochet Ideas For The Cold Season
Why Make Your Own Floral Headscarf?
Sewing your own headscarf allows you to choose a fabric that suits your style. For example, florals are especially trendy this summer as they add a fresh, romantic vibe to even the most casual outfits. A headscarf helps keep your hair back on breezy days and protects your face from the sun. Making one yourself also means you can adjust it to get the right fit, which can be hard to find in store-bought versions.
🧵 What You’ll Need
- Woven fabric (floral prints work beautifully)
- 1” wide elastic, about 4” long
- Small fabric rectangle for the strap: 11” × 2.5”
- Large fabric rectangle for the main headscarf: 16.5” × 14”
- Sewing machine and basic supplies (scissors, pins, thread, iron)
- Optional: Two 1” pieces of ¼” elastic for added grip along the front
✂️ Cut and Shape Your Fabric
Start with two pieces of fabric:
- Main bandana piece: 16.5” wide × 14” tall
- Strap piece: 11” long × 2.5” wide
To shape the bandana:
- Fold the large rectangle in half vertically with its short sides together.
- From the top open edge, measure down 3” on the raw side and mark that spot.
- Draw a diagonal line from that 3” mark to the bottom corner of the folded side.
- Cut along the line to create a tapered triangle. You should now have a bandana shape that helps the headscarf sit neatly against your head.
🧼 Hem the Edges
Start with the long top edge:
- Fold the top edge down ¼”, press, then fold it down another ¼” and press again.
- Pin the folded edge in place.
- Repeat the same folding process on both angled edges.
- You’ll notice a little excess fabric where the angled sides meet. Go ahead and trim that extra fabric down, tuck in the raw edge, and pin the corner.
- Topstitch all three sides with a ⅛” seam allowance, then give the headscarf a good press.
➕ Optional: Add Hidden Elastic
Adding a hidden elastic can help the front of your scarf stay put, especially if you’ll be moving around a lot or wearing the headscarf for longer periods.
Here’s how:
- On the wrong side of the bandana, measure 6.5” in from both outer corners along the top edge.
- Pin each 1” piece of ¼” elastic in place and center them on those marks.
- Stitch vertically at each end to secure the elastic.
- Trim any excess elastic after sewing.
🪡 Make and Attach the Strap
Grab your smaller rectangle of fabric:
- Fold the fabric right sides together lengthwise and pin.
- Sew down the long edge using a ¼” seam allowance.
- Turn the strap right side out and press it flat.
- Next, insert your 4” piece of 1” elastic into the fabric tube. Line up one end of the elastic with one end of the fabric strap and pin the two together.
To attach the strap:
- Place the strap right side down on one of the short, unhemmed top ends of your bandana.
- Fold the top and bottom raw edges of the bandana over the strap end to encase it and pin everything in place.
- Sew across vertically a few times to secure the strap.
- Then, pull the remaining elastic through to the other end of the strap. Pin it in place and repeat the same steps on the opposite side of the bandana.
🌼 You’re Done!
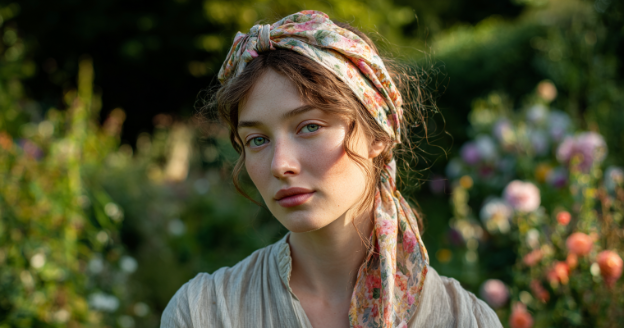
And just like that, you now have a brand new floral headscarf! You can wear the headscarf over loose hair or tie it over a ponytail. Try it on and give yourself a little nod. You did it!
Made for Sunny Days
Make your floral headscarf part of your everyday summer routine! It’s perfect for morning walks in the park or quiet afternoons in the garden. If you sew one up, let us know how it turns out. We’d love to see your version!
❓ 10 FAQs
- Can I make this floral headscarf as a complete beginner?
Yes! This tutorial is beginner-friendly and walks you through every step. No prior experience needed. - What kind of fabric works best for this headscarf?
Lightweight woven fabric, like cotton or linen, works great. Floral prints add that perfect summer feel. - Do I need a pattern for this project?
Nope, you’ll just cut rectangles using the measurements provided. - Can I use fat quarters for this project?
Yes, as long as the fabric pieces meet the size requirements in the tutorial. - Will this headscarf stay in place all day?
It has an elastic strap that helps keep it snug without being tight. You can also add an optional hidden elastic for extra hold. - Is this scarf adjustable?
It’s stretchy in the back, which gives it a flexible fit without needing a custom measurement. - Can I wash the headscarf in the machine?
Definitely! Just use a gentle cycle and avoid high heat if your fabric is delicate. - How long does it take to make?
Once your pieces are cut, it takes about 30–45 minutes to sew — quicker if you’ve sewn before. - Can I style it in different ways?
Yes! Wear it over loose hair, a ponytail, or with a bun. It’s super versatile. - What if I want to make more?
Go for it! Try different fabrics, prints, or even smaller sizes for kids!