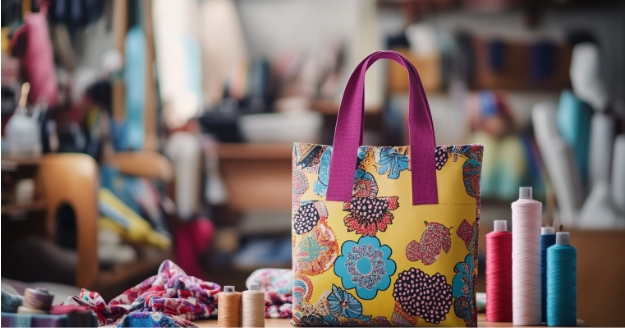

Who doesn’t love a good tote bag? They carry your groceries, gym gear, and even craft supplies. However, store-bought ones often fall short—wrong size, flimsy straps, or just plain boring. So why not make your own? This weekend, grab your sewing tools and create a tote bag that checks all the boxes. It’s fun, simple, and customizable. Plus, you’ll end up with a DIY tote bag you’ll actually love to use.
Why Make a DIY Tote Bag?
Sewing your own tote bag means you’re in control. You get to choose the fabric that matches your vibe and decide the size that fits your needs. And, of course, you can add extras like pockets, bold patterns, or fun straps. Another perk is tote bags are beginner-friendly. You don’t need fancy tools or advanced skills. Even if your stitches aren’t perfect, it’ll still look amazing.
What You’ll Need
- Main Fabric: Canvas or denim
- Lining Fabric (lightweight cotton works best)
- Thread
- Straps: (Webbing, leather, or fabric strips)
- Sewing Machine (Hand-sewing is okay too)
- Basic Tools (scissors, pins, measuring tape, iron)
Here’s how to make a DIY tote bag:
1. Cut Your Fabric
Cut two rectangles from your main fabric. A good size to start with is 16×18 inches. Do the same with your lining fabric. If you’re making fabric straps, cut two long strips about 24 inches each.
2. Sew the Outer Bag
Place the two main fabric pieces together, right sides facing inward. Sew along the sides and bottom and leave the top open. Use a half-inch seam allowance for extra durability.
Want more room in your bag? Create a box bottom. Pinch each bottom corner into a triangle, sew across it, and then trim the excess fabric.
3. Make the Lining
Repeat the steps above using your lining fabric. However, this time, make sure the seams face outward. This ensures the inside of your bag is smooth and clean.
4. Attach the Straps
Pin the straps to the top of the outer bag. Each strap end should be about four inches from the side seams. Double-check that the straps aren’t twisted before pinning.
5. Assemble the Bag
Insert the lining into the outer bag, with the right sides facing each other. Align the top edges and pin everything together. Leave a small gap so you can turn the bag inside out later.
6. Turn It Right Side Out
Gently pull the bag through the gap to turn it right side out. Push the lining into the outer bag, then press the top edge with an iron to smooth it out.
7. Topstitch the Edge
Finally, sew a clean topstitch around the top edge to close the gap and secure the straps.
Creative Ways to Customize Your Tote
Customization transforms your DIY tote bag from basic to eye-catching. Start with your fabric. Pairing solids with vibrant prints gives your bag a fresh, modern style. Patchwork is a great way to use leftover scraps, and it also adds texture and character to your tote.
Then, focus on details. Add embroidery, paint, or patches to showcase your personality. Upgrade your straps, too! Try colorful webbing, braids, or upcycled belts. These tweaks will make your tote totally yours.
Troubleshooting Common Tote-Making Problems 🛠️
Every sewing project comes with challenges, but don’t worry because they’re fixable. If your seams aren’t straight, slow down and guide the fabric carefully. Using pins or clips helps keep everything in place.
Sometimes straps shift during sewing and cause them to look uneven. To avoid this, pin them securely and check before stitching. If your tote looks floppy, it might need interfacing. Adding this extra layer between your fabrics improves structure and makes the bag sturdier.
How to Use Your New Tote Bag 🎒
Your new tote isn’t just for errands! It’s perfect for almost anything. Pack it for a picnic, use it as a gym bag, or carry it to work. The roomy design is great for hauling books, craft supplies, or even a laptop.
It’s also an excellent travel companion. Use it as a carry-on or fold it up and pack it in your suitcase as a backup bag. And the fact that it’s handmade adds little extra joy every time you use it. Plus, you’re doing your part to avoid single-use bags and help the environment. That’s a win-win!
Tote-ally Worth It!
By the end of this weekend, you’ll have more than just a tote bag—you’ll have a handmade essential that’s functional, stylish, and uniquely yours. It’s a quick project that proves sewing can be practical and fun. So, grab your tools, pick your fabric, and start stitching! Your perfect tote is just a few seams away.
FAQs About DIY Tote Bag
- Can I use a different fabric type?
Yes! Try vinyl, faux leather, or upholstery fabric for a unique look. - What size should I make my DIY tote bag?
The size is flexible. Adjust the dimensions to suit your needs. - Do I need interfacing?
It’s optional but helps add structure, especially for lightweight fabrics. - How long does this project take?
Most people can complete it in 2–3 hours. - Can I sew this without a machine?
Hand sewing is possible but time-consuming. A machine makes it faster and sturdier. - How do I clean my tote bag?
Wash it in cold water and air dry. Check your fabric care instructions. - Are boxed corners necessary?
No, but they give the bag more depth and functionality. - Can I sell these bags?
Absolutely! Handmade tote bags are popular and customizable for customers. - What are some strap alternatives?
Leather straps, rope, or old belts work great. - How do I store my tote bag? Fold it flat or hang it to save space.


