
As the holidays approach, many of us start thinking about how to set the perfect holiday table. This year, why not take it a step further with a DIY holiday table setting? Personalize your table decor with handmade cloth napkins, placemats, and coasters that will wow your guests. This guide explores the making of a DIY table decor that can elevate your holiday hosting game!
DIY Holiday Table Setting Guide: Custom Napkins, Placemats, and More
The center of every holiday feast is the dining table, so why not make it spectacular? A DIY holiday table setting lets you create a warm, inviting space that makes your guests feel truly special. Here are a few ideas that can turn your holiday table into a masterpiece.
Sew Your Own Cloth Napkins
What You’ll Need:
- Fabric (cotton, linen, or patterned prints)
- Thread (matching or contrasting)
- Scissors
- Sewing machine
- Iron
- Optional: Embroidery floss for decorations
Step 1: Cut the Fabric
To start, cut your fabric into squares. A standard size is 18 inches by 18 inches, but you can adjust this to your preference. Additionally, leave some extra fabric for seam allowances if needed.Step 2: Fold and Press
Next, fold the raw edges of your fabric over by ¼ inch and press with an iron. Then, fold over another ¼ inch and press again. This will give you clean, finished edges.Step 3: Sew the Hem
After pressing, sew along the folded edge with a straight stitch. Be sure to keep your stitching even for a polished result. For added durability, you can also sew a zigzag stitch over the raw fabric.Step 4: Add Custom Details
Finally, your napkin is ready for use, but you can make it even more special. Consider adding embroidery, monogram initials, or a holiday design such as snowflakes or holly to give it a festive touch.
Placemats: Elegant and Functional
What You’ll Need:
- Fabric (durable options like canvas or quilting cotton)
- Batting (optional for thickness)
- Thread
- Scissors
- Sewing machine
- Iron
- Optional: Decorative trims
Step 1: Cut the Fabric
To begin, cut your fabric to 12 inches by 18 inches. However, you can adjust the size based on your table. If you are using batting for added thickness, cut it to the same size as your fabric.Step 2: Pin and Assemble
Once your fabric is cut, layer the pieces with the right sides facing together. If using batting, place it underneath. Then, pin the edges to hold everything in place. For decorative trims like lace or piping, pin them along the edges before sewing.Step 3: Sew the Edges
Sew around the edges, leaving a small opening so you can turn the placemat right side out. If you are using trims, make sure they are secured with your stitching.Step 4: Turn and Press
Next, turn the placemat right side out through the opening. Afterward, press the edges flat with an iron to give them a crisp finish.Step 5: Add Finishing Touches
Finally, topstitch around the placemat to secure the edges and give it a polished look. You can also add embroidery, monograms, or a decorative design to match your holiday theme.
Coasters: Practical and Stylish
What You’ll Need:
- Fabric scraps (perfect for leftover pieces)
- Fusible interfacing (for sturdiness)
- Thread
- Scissors
- Sewing machine
- Iron
Step 1: Cut the Fabric
First, cut your fabric into the shape and size you prefer. A common size is 4 inches by 4 inches, though you can adjust it as needed. If you have scraps, this is a great way to use them.Step 2: Add Interfacing
Next, cut fusible interfacing to match the size of your fabric pieces. Following the manufacturer’s instructions, fuse it to the back of a single piece of fabric.Step 3: Assemble and Sew
Then, place two fabric pieces right sides together and sew around the edges. Be sure to leave a small gap for turning. To reduce bulk, trim the corners before moving on.Step 4: Turn and Press
After sewing, turn the coaster right side out through the gap. Use an iron to press it flat, making the edges clean and sharp.Step 5: Add Custom Embellishments
Finally, make your coaster stand out with custom touches. You could embroider a seasonal design such as a snowflake or add decorative stitching around the edges. If you want to go bold, use a contrasting trim for extra flair.
Customizing Your Table Accessories
Once you’ve sewn your cloth napkins, placemats, and coasters, personalize them to make your holiday table unique. Try these ideas to enhance your creations:
- Monogramming: Stitch monograms onto napkins or placemats to give them a personal touch. Monogramming each guest’s napkin also creates a thoughtful and memorable dining experience.
- Embroidery: Embroider holiday-themed designs like stars, reindeer, or snowflakes to add festive charm. Enhance placemats by stitching a decorative border or embroidering a small motif in the corner of each napkin.
- Trims and Ribbons: Sew lace, rickrack, or pom-pom trim onto your napkins and placemats for a vintage-inspired finish. Use ribbons in seasonal colors to add style, especially if you plan to gift these accessories.
- Fabric Paint: Paint holiday patterns directly onto your table accessories to create one-of-a-kind designs. Add simple symbols like trees, bells, or snowflakes for a whimsical and artistic effect.
Set the Table! 🌟
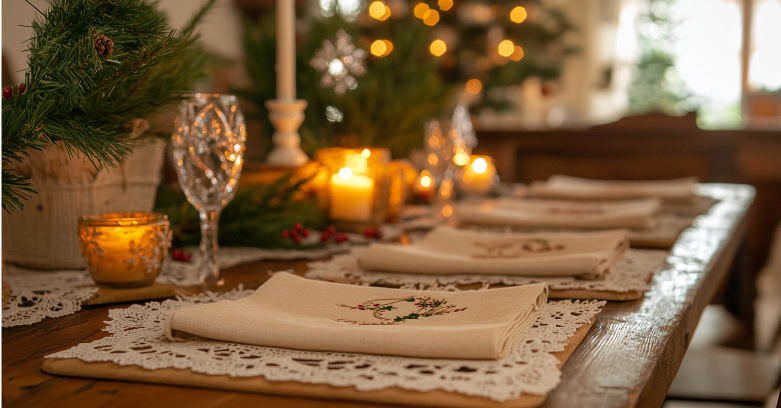
Once everything is sewn and personalized, it’s time to set the table! Lay out your placemats first, then fold your cloth napkins neatly or drape them over each plate. Add your coasters beneath each glass and finish the look with a festive centerpiece. Your handmade pieces will shine in the glow of candlelight.
Let’s Get Crafty!
A DIY holiday table setting transforms ordinary meals into extraordinary gatherings. By pouring your heart and skill into every detail, you give your family and friends something to admire before the actual dinner! Here’s to a season of creativity and celebration!
FAQs
- What fabrics are best for DIY holiday table settings?
Linen and cotton are great for napkins, while thicker fabrics like canvas or quilting cotton work well for placemats and coasters. - Can I make a DIY table setting without a sewing machine?
Yes, you can! Hand-stitching is a great alternative, especially for small projects like napkins and coasters. - How do I choose colors and patterns for my table decor?
Pick colors and patterns that match your holiday theme, like plaids, florals, or solid festive tones such as red, green, or gold. - How long does it take to sew a full table setting?
It depends on your experience level, but a beginner can typically sew a set of napkins, placemats, and coasters in 3-5 hours. - What size should my napkins, placemats, and coasters be?
Napkins: 18″x18″. Placemats: 12″x18″. Coasters: 4″x4″. Adjust as needed for your table or preferences. - What kind of embellishments can I add to my table settings?
Try embroidery, monograms, lace trims, or decorative stitching to personalize your napkins, placemats, and coasters. - Can I wash my DIY table decor after use?
Yes, use machine-washable fabrics and pre-wash them before sewing to prevent shrinkage later. - How do I make my projects look professional?
Press your fabric before cutting and use a hot iron to flatten seams for a polished finish. - Are there no-sew options for holiday table settings?
Yes! You can use fabric glue or fusible webbing to create no-sew napkins or placemats for a quick and easy solution. - What tools do I need for DIY table settings?
Basic tools include fabric scissors, thread, a ruler, pins, and an iron. For advanced details, you might want an embroidery hoop or a sewing machine.
Your perfect holiday table is just a few stitches away! Tap the link for more DIY holiday table setting tips, sewing tutorials, and creative inspiration to make your celebrations unforgettable!


