
Handmade gifts already say “You’re special.” But what if you could make them even more memorable? Adding a custom fabric tag or personalized label turns your already-special creation into an unforgettable keepsake. Curious about how to create these delightful details? Let’s walk through some creative ways to make this happen.
Why Custom Gift Tags and Labels Make a Difference
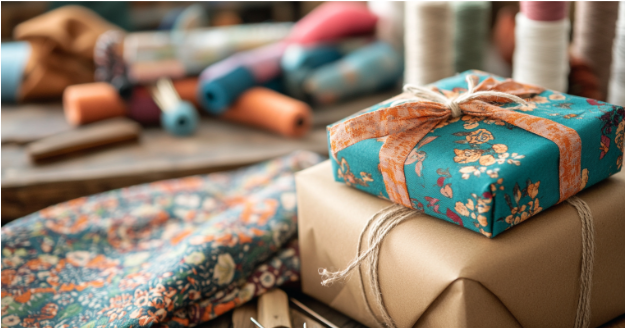
Details linger in memory, that’s why first impressions matter, especially when unwrapping a gift. Fabric tags and labels aren’t just practical—they’re personal and heartfelt. Imagine gifting a scarf with a tag reading, “Made with love by [Your Name].” That simple touch instantly adds meaning and thoughtfulness.Besides, these extras serve another purpose. They elevate your creations to boutique-quality treasures. And because they’re so versatile, you can use them for quilts, knitted hats, or any handmade item.
Gather Your Materials
- Fabric scraps
- Interfacing
- Fabric markers or stamps
- Embroidery floss or thread
- Scissors or a rotary cutter
- Sewing machine or needle and thread
- Ribbons or twine
How to Sew Custom Gift Tags
Crafting the perfect gift doesn’t stop with what’s inside the box. It’s about the whole experience. And nothing says, “I poured my heart into this”, like a handmade, sewn gift tag. Here’s how to create these delightful keepsakes:
Step 1: Prep Your Fabric
Start by cutting your fabric into small rectangles, circles, or any fun shape you like. Adding interfacing to the back will give the tag some stiffness, which helps it hold its shape.
Step 2: Personalize Your Design
Next comes the fun part—making unique tags! You can:
- Use fabric markers to draw designs or write names.
- Stamp festive images like snowflakes or stars.
- Embroider a special message or initials.
This is where you can let your creativity shine. If you’re short on time, even a simple “To: [Name]” can look lovely.
Step 3: Sew It Together
Place two pieces of fabric right sides together. Stitch around the edges and leave a small opening to turn it right side out. After flipping it, press the tag with an iron and topstitch the edges for a polished finish.
Step 4: Add a Ribbon
Finally, attach a ribbon or piece of twine to one corner. This makes it easy to tie the tag to a gift box or bag. And just like that, you’ve created something both practical and beautiful.
Sewing Personalized Labels for Handmade Gifts
While gift tags are a delightful addition to wrapping, personalized labels take it a step further. They’re a signature that stays with your creation forever.
Step 1: Design Your Label
First, decide what you want your label to say. It could include your name, the year, or even a message like, “Made with love by Grandma.” Smaller designs work best since they need to fit neatly on your project.
Step 2: Create Your Label
You can use fabric markers or embroider the text by hand for a homespun feel. Alternatively, print your design onto fabric sheets for a clean, professional look.
Step 3: Attach It
Fold under the edges of your label for a tidy finish, then stitch it directly onto your handmade item. If you’re short on time, an iron-on adhesive will also do the trick.
Tips for Enhancing Your Tags and Labels
Once you’ve mastered the basics, take your creations up a notch with these ideas:
- Layer Textures: Add felt or leather for depth and contrast.
- Experiment with Shapes: Go beyond rectangles. You can try hearts, stars, or even snowmen.
- Coordinate Colors: Match the tags to your gift for a cohesive look.
These little extras might take a few more minutes, but they’ll leave a lasting impression.
Because Details Matter 🎁
The best gifts don’t just come from the heart—they’re wrapped with it, too. Custom tags or labels are the final stitch in the fabric of a truly memorable present. After all, it’s the little things that make the biggest impression.
FAQs
Q: What fabric works best for tags?
A: Cotton, linen, or canvas are durable and easy to work with.Q: Can I make no-sew tags?
A: Yes! Use iron-on designs or adhesive fabric sheets for a no-sew option.Q: How do I prevent fraying?
A: Use pinking shears or apply fray-check to raw edges.Q: Are fabric tags reusable?
A: Absolutely! Many recipients save them as keepsakes or bookmarks.Q: How can I make my labels look professional?
A: Use printable fabric sheets or heat transfer vinyl for crisp, polished designs.


