
Skill Outcome
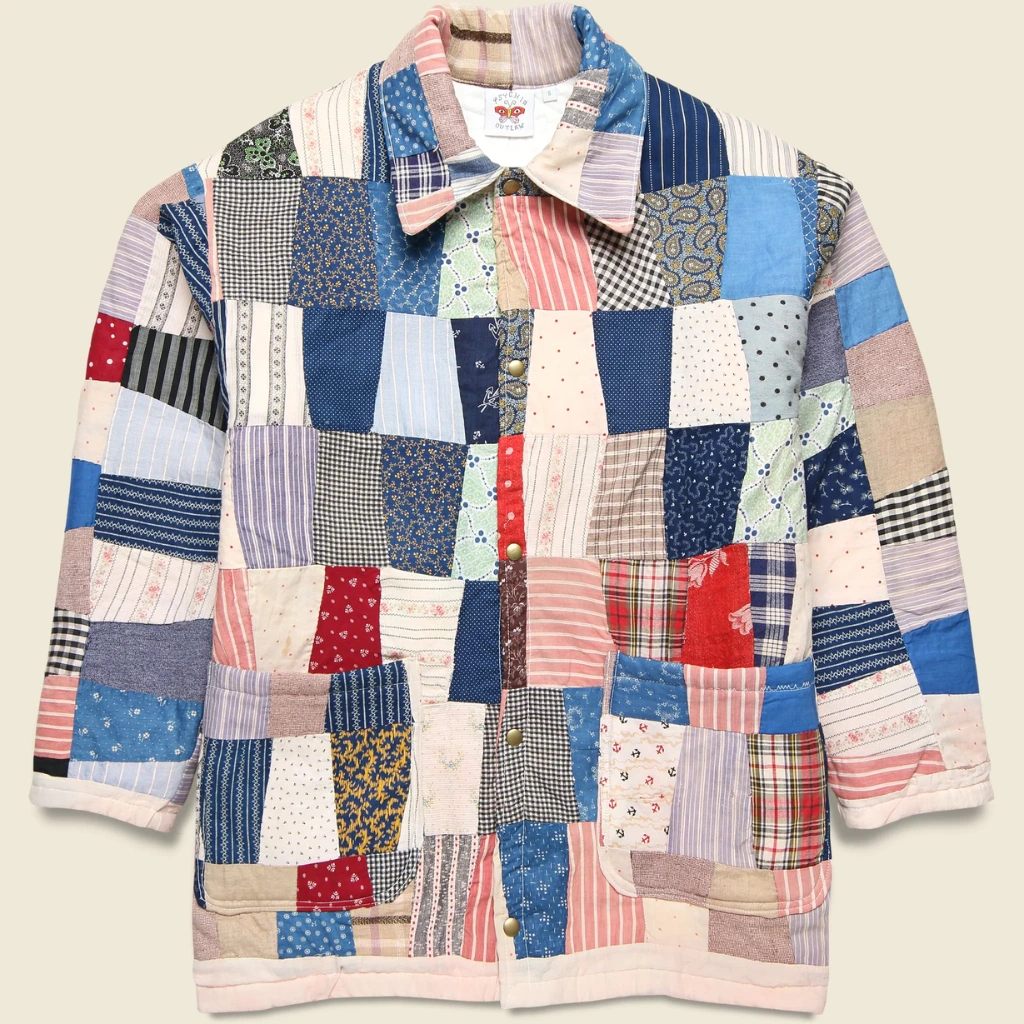
Learn to sew a patchwork chore coat by building oversized quilted panels before cutting any coat pieces. Essential gear: a Size 90/14 denim needle and a walking foot (not optional). The secret to a crisp finish is pressing internal patchwork seams toward the darker fabric, but pressing coat construction seams open to reduce bulk. This is an intermediate project. Plan on a weekend for panel building and a second weekend for coat construction.
The Problem Most Tutorials Skip
“I watched three hours of YouTube, and the influencer kept saying, ‘and now we just attach the bias binding.’ They skipped the part where I actually get the corners to look crisp.” Reddit, r/sewing
If that sounds familiar, you’ve already met the biggest problem with patchwork chore coat tutorials. They skip the intersection where quilted fabric meets garment construction, and those two crafts have completely different rules.
The patchwork chore coat is the breakout garment project of 2026, bridging quilting and garment sewing in a way that makes sense for crafters who want a wearable showpiece. The good news: chore coats are one of the most forgiving garment shapes you can sew. They’re boxy, unstructured, and typically have 4 to 6 inches of ease built in. The fitting complexity is genuinely low. What trips most sewists up isn’t fit. It’s the quilted fabric itself.
This guide covers everything the tutorials skip: machine setup for thick patchwork layers, seam pressing decisions (which have two correct answers depending on which seam you’re pressing), and the exact order to build your patchwork panels before you touch the coat construction.
What Materials Do You Need for a Patchwork Chore Coat?
Before you cut anything, gather all the materials listed below. Missing one item mid-project is the single fastest way to lose momentum on a weekend build.
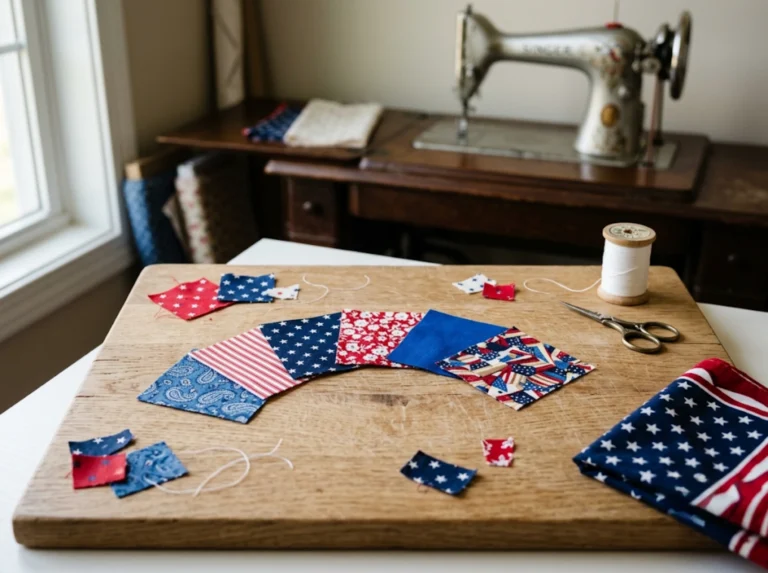
- Patchwork fabric: Pre-washed quilting cotton in your chosen blocks. This project is a perfect canvas for scrap quilting or a focused colourway.
- Backing fabric: A woven cotton or canvas for the coat’s outer shell, if you’re backing your patchwork panel. You can also use the patchwork panel as the shell directly.
- Low-loft batting (optional): A thin cotton batting adds warmth and body to the coat. High-loft batting makes construction extremely difficult. If this is your first quilted garment, start without batting.
- Lining fabric: Medium-weight cotton or flannel. Slippery linings are harder to control during construction.
- Interfacing: Woven interfacing for facings, collar, and cuffs.
- Hardware: Four to six buttons or snaps.
- Needles: Size 90/14 denim or jeans needles. Buy a pack; you may need to change them mid-project. Schmetz needle charts explain which needle matches which fabric weight.
- Walking foot: OEM version for your machine brand, if possible.
Skill Prerequisites
You should have completed at least two garment sewing projects and sewn a basic quilt block before attempting this. You don’t need years of quilting experience, but you should understand how to press seams flat and cut accurately. If garment sewing is brand new to you, try a single-fabric chore coat first, then tackle the patchwork version once you know the construction sequence.
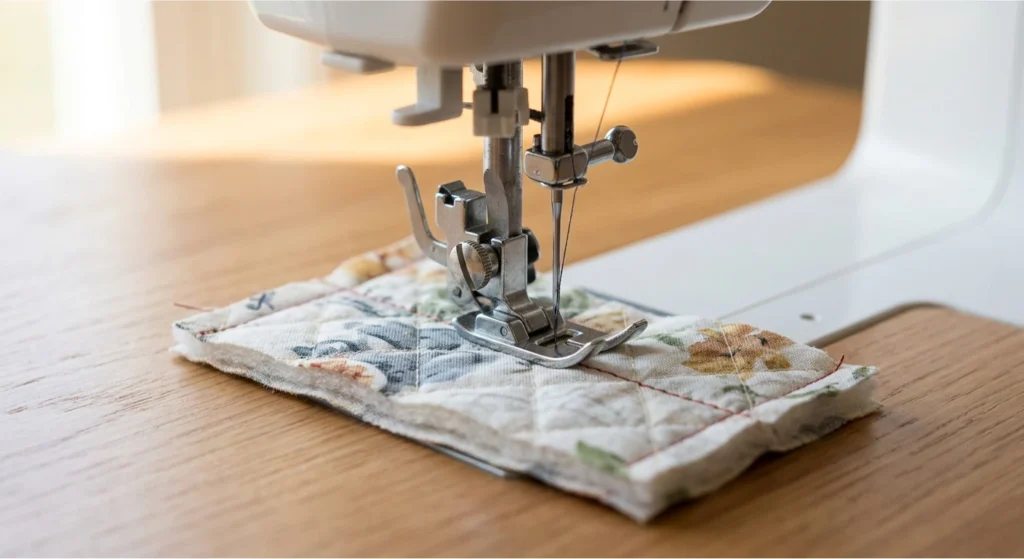
Which Sewing Machine Settings Work Best for Quilted Fabric?
Quilted layers are thick. You’re typically stacking three to five layers of fabric plus batting, and every seam intersection will stack up to eight or more layers. Your machine setup has to account for that before you sew a single seam.
- Needle: Size 90/14 denim or jeans needle. A universal needle will deflect in thick layers and cause skipped stitches. This is not a preference; it’s a structural requirement.
- Stitch length: 3.0 to 3.5mm. Shorter stitches perforate quilted fabric and weaken seams over time.
- Walking foot or dual-feed foot: The walking foot is not optional for quilted layers. Without it, your presser foot advances the top layer faster than the feed dogs move the bottom, and your seams will pucker. If you don’t have a walking foot, test on a quilted scrap before committing to your coat pieces.
Tension test: Sew a 6-inch test seam on a scrap of your patchwork before touching your coat. If you see top-thread loops on the underside, your top tension is too loose. Bottom-thread loops on top mean your top tension is too tight. Adjust before you cut anything.
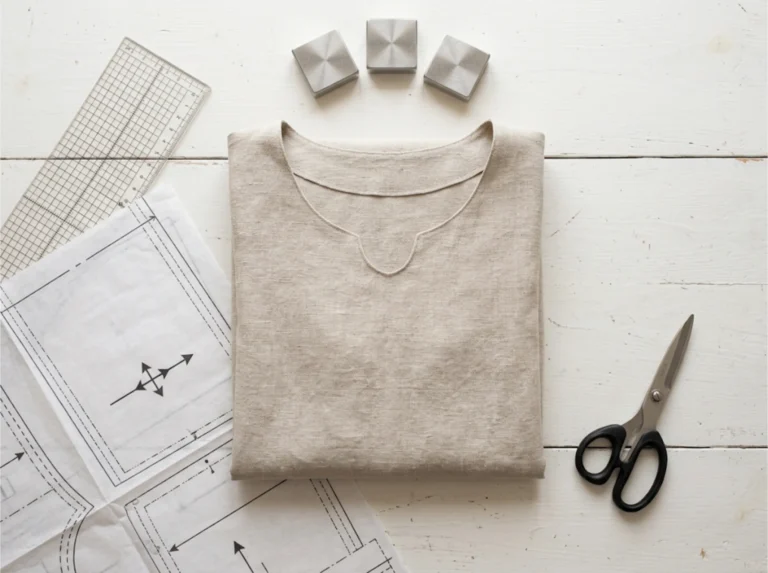
Choosing the Right Chore Coat Pattern
For a first patchwork chore coat, look for a pattern explicitly labelled “relaxed fit” or “oversized” with a simple collar. No darts, no tailored chest shaping. Patterns with a stand-up collar or simple lapel are easier than a notched lapel. Patterns with generous ease (4 to 6 inches) forgive minor cutting inaccuracies that would show in a fitted garment.
Sizing tip: Size a chore coat by your chest or bust measurement, not your dress size. Because these patterns are designed with substantial positive ease, they’re meant to be looser than your measurement.
A note for curvier sewists: Even with boxy ease, a chore coat can strain across a fuller bust. If your full bust measurement is more than 2 inches larger than your high bust, consider a pattern from a curve-inclusive brand or plan a small full-bust adjustment before cutting your patchwork panels.
How Do You Build Patchwork Panels for Garment Sewing?
The most important sequencing decision in this entire project: build your patchwork fabric before you think about the coat. Quilters instinctively understand this. Garment sewists sometimes want to jump straight to the coat. Resist that impulse.
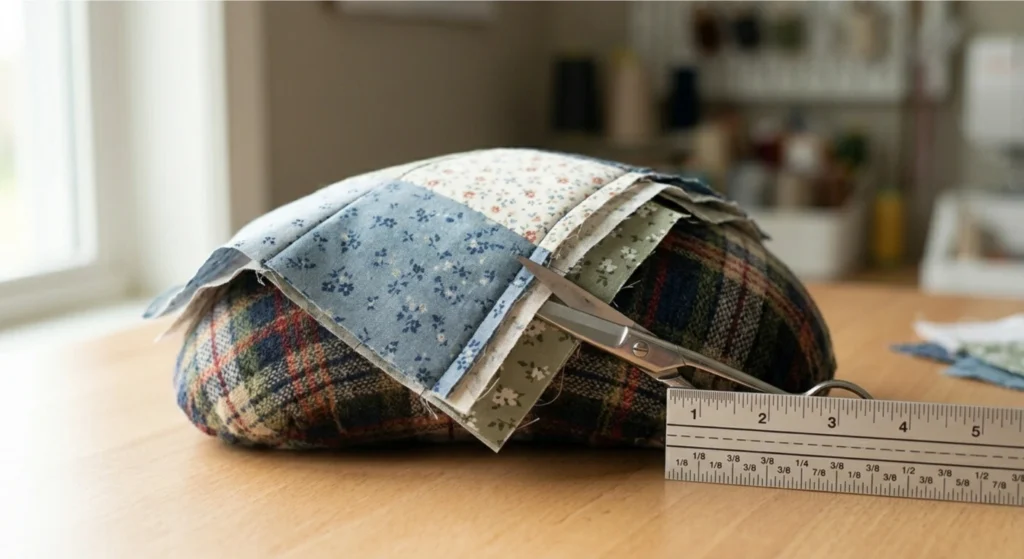
Step 1. Cut Your Blocks
For a chore coat, 4-inch finished squares (4.5-inch cut with seam allowance) are a practical size. Large enough to cut coat pieces from without too many seam intersections at awkward angles, small enough to make use of fabric scraps.
Step 2. Lay Out Your Design
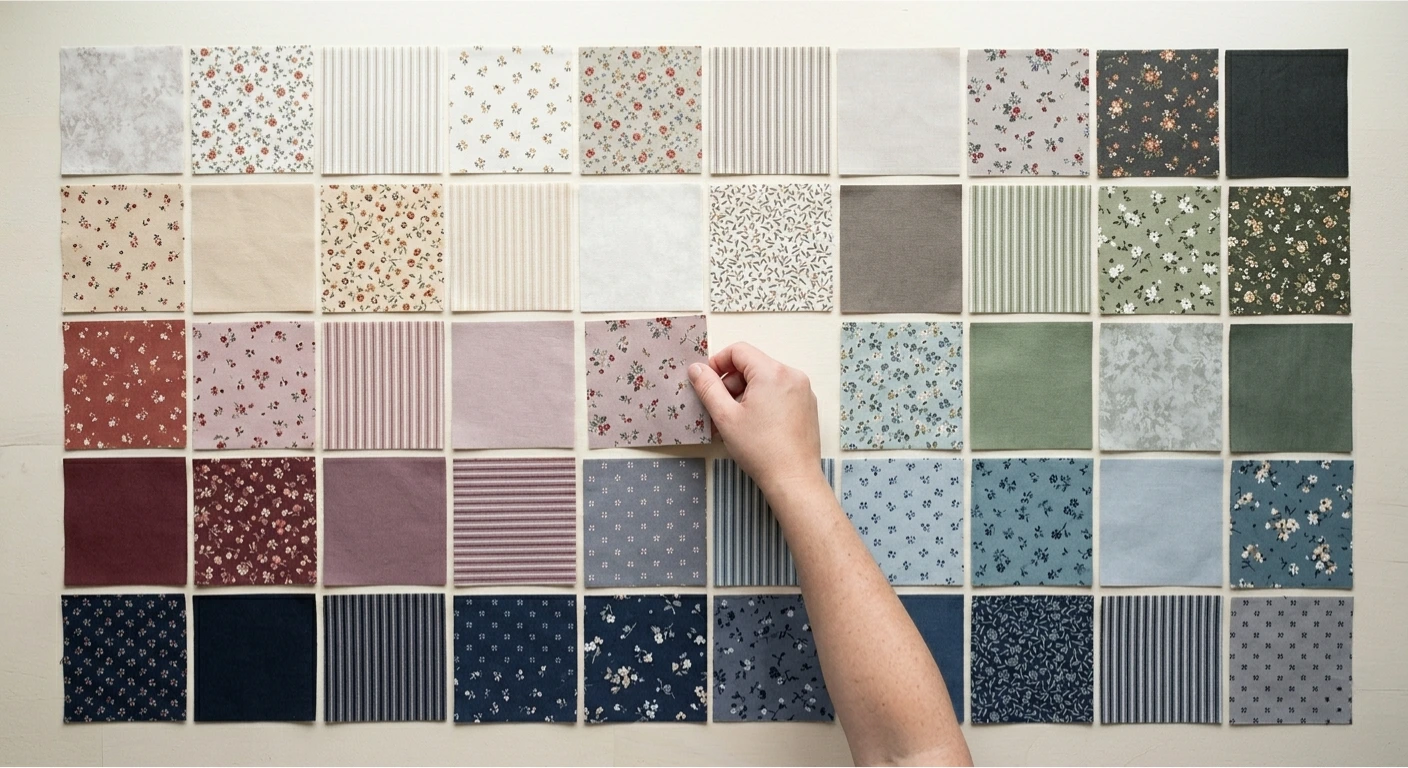
Before sewing a single seam, arrange your blocks on a flat surface. Take a photo. Live with it for a few minutes before committing.
Step 3. Sew Blocks Into Rows, Then Rows Together

Chain-piece your blocks in rows first, then join rows. Press seams toward the darker fabric as you go. This is standard quilting practice, and it applies here because patchwork seam direction affects how finished blocks read on the front of your coat.
Step 4. Press Every Seam Before Crossing It
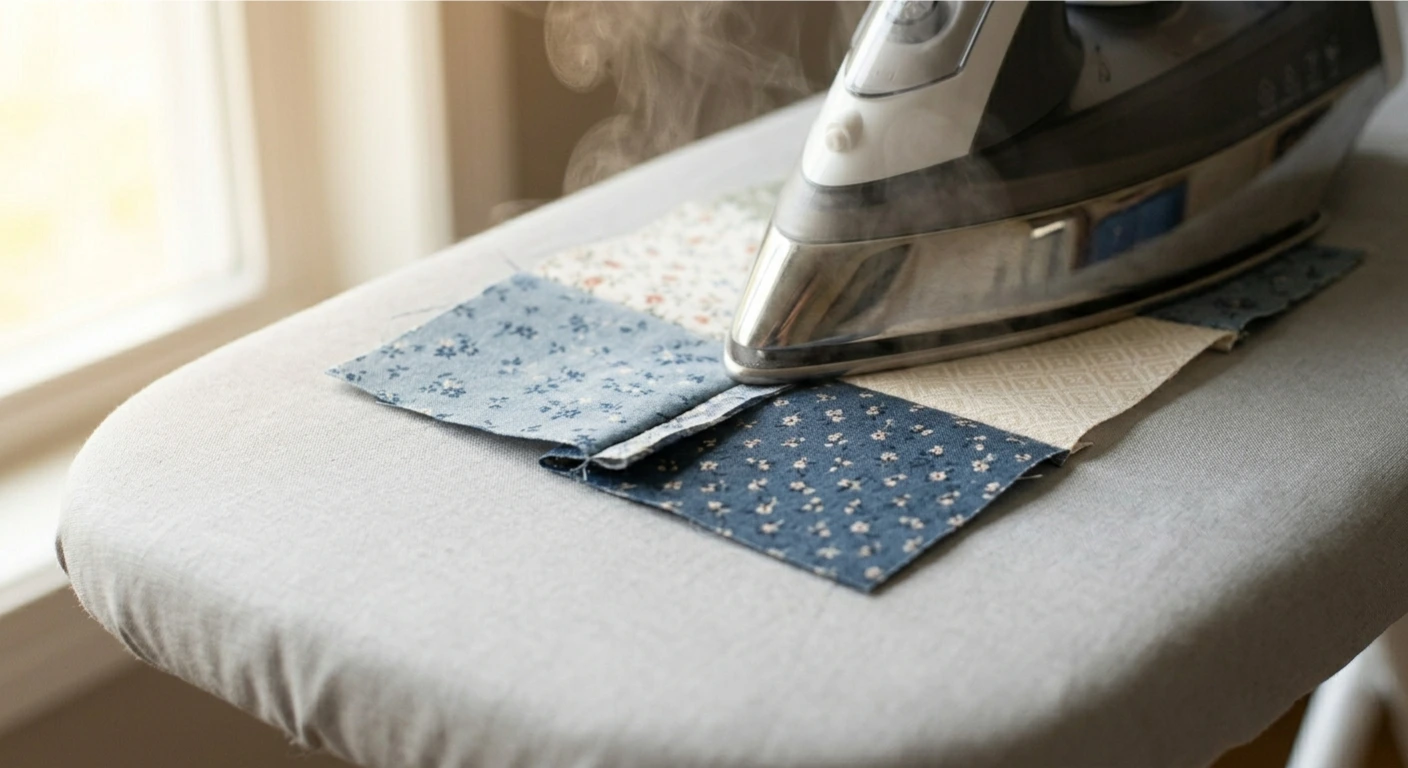
Unpressed patchwork seams create lumps that throw off your cutting accuracy. This step is not optional.
Step 5. Build Panels Larger Than Your Pattern Pieces
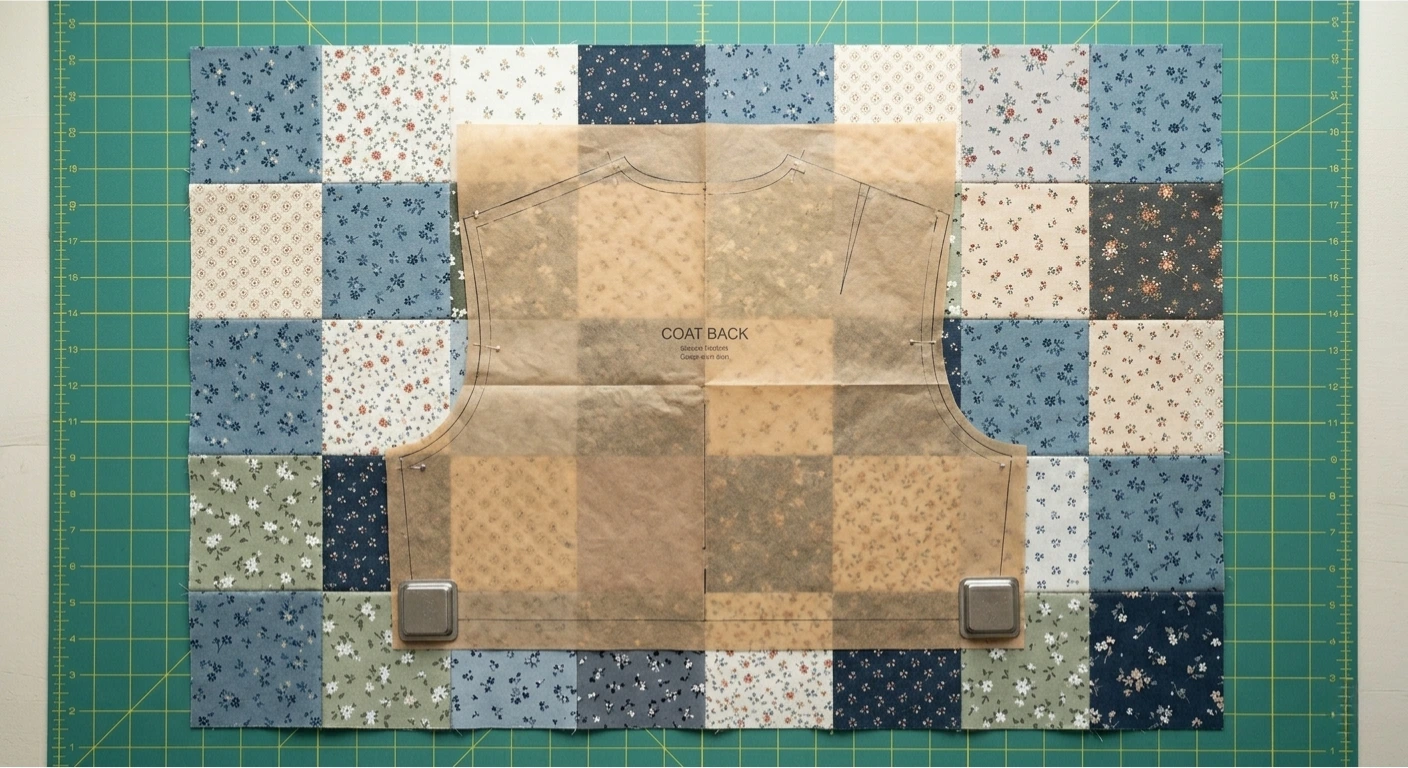
Cut your coat pattern pieces from the patchwork panel, not from individual blocks. Your panel needs to be 2 to 3 inches larger in every direction than your largest pattern piece to give yourself room to position and cut accurately.
Batting Note
If you’re adding batting, baste your patchwork panel to your batting before cutting coat pieces. Use a long stitch (4.5mm) and sew a 3-inch grid. This keeps layers from shifting when you cut and construct.
Should You Press Patchwork Seams Open or to the Side?
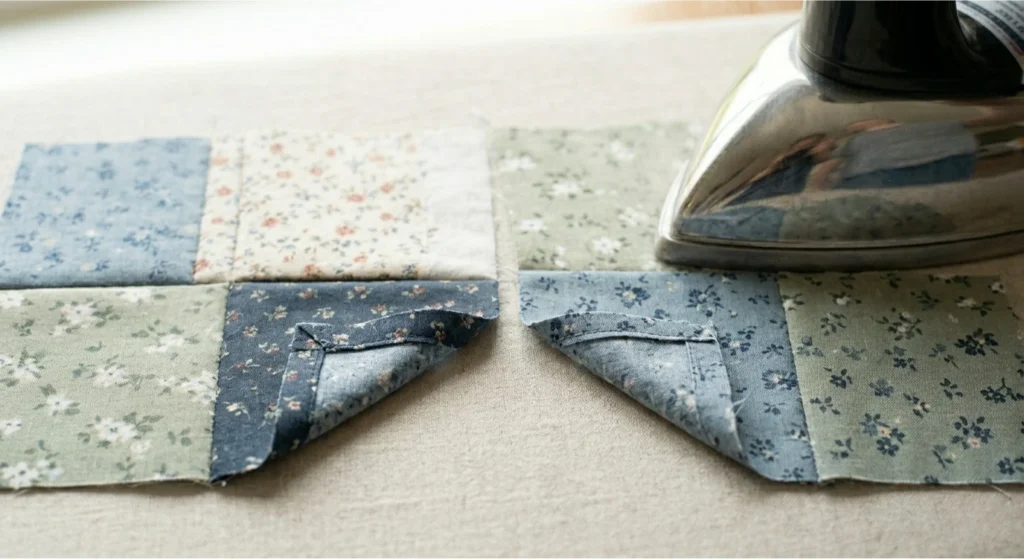
Both are correct. They apply to different seams.
Patchwork block seams (the seams inside your panels) press toward the darker fabric, as you would in any quilt. This reduces bulk at intersections and keeps the front of your coat looking clean and intentional.
Coat construction seams (shoulder seams, side seams, sleeve seams) should be pressed open. Open seams lie flatter in garment construction and reduce bulk at high-stress points like the shoulder and underarm. These seams experience different tension in wear than quilt seams do, which is why they behave differently.
The contradiction between quilting doctrine and garment construction doctrine dissolves when you recognise that these are different seams with different jobs. Press each type the way its end use requires.
“I refuse to use flimsy commercial tissue patterns straight from the envelope. It feels weird, and they are not durable.” Reddit, r/sewing
The same logic applies here. Match the technique to what the material and the garment actually need.
How Do You Manage Thick Seam Intersections on a Home Machine?
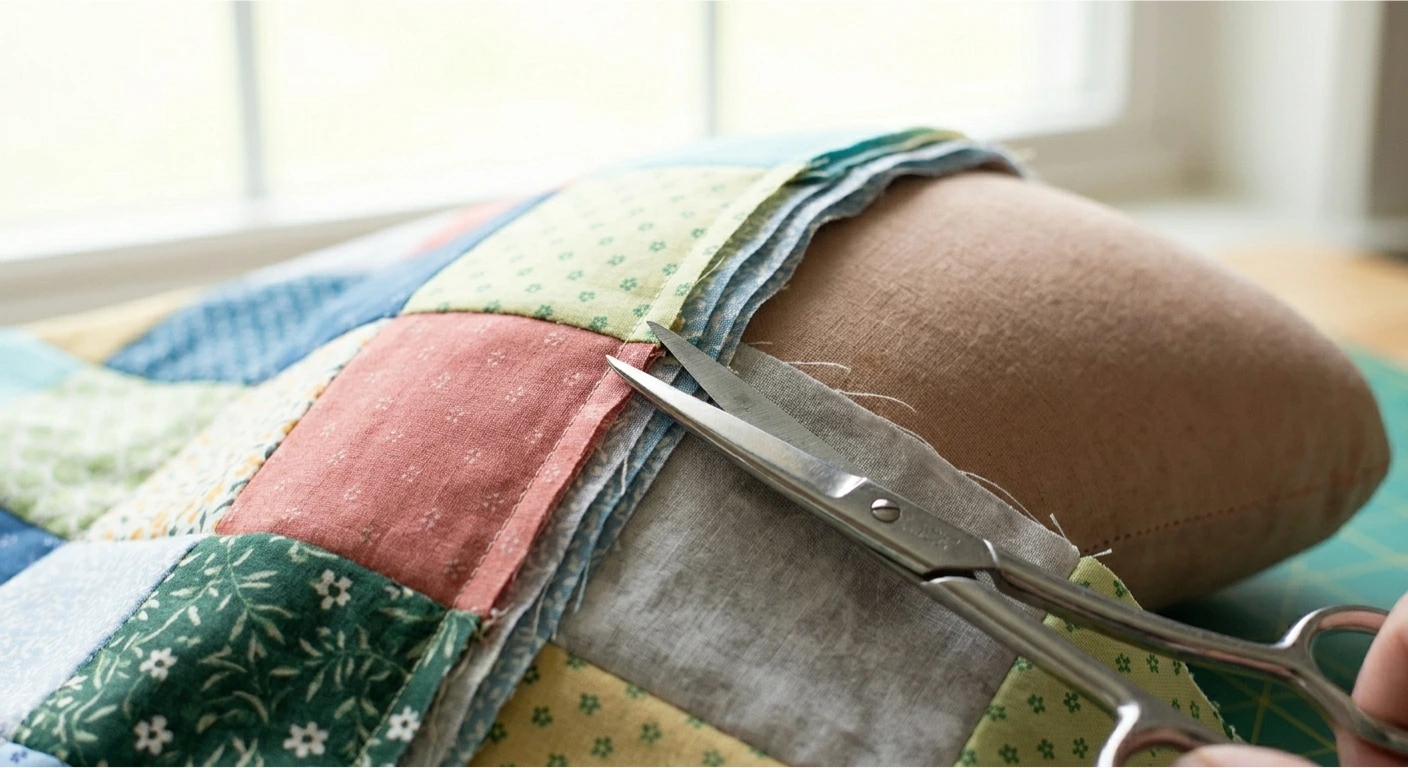
Where patchwork seams meet construction seams (for example, where a pieced shoulder seam meets a sleeve), you may have six to eight layers of fabric stacked. Grade your seam allowances to step down the bulk: trim the innermost layer to 1/4 inch, the next to 3/8 inch, the outer to 1/2 inch. Press and topstitch the seam flat before moving on.
Add pockets before closing side seams. Topstitch all external seams with a 1/4-inch edge for structure and a deliberately handmade look. Press at every step. Pressing is construction, not finishing.
Common Mistakes
- Using the wrong needle. A universal needle in thick quilted layers deflects and causes skipped stitches. Size 90/14 denim needle, no exceptions. If your machine skips stitches on thick seams, change the needle before you adjust anything else.
- Skipping the walking foot test. The walking foot eliminates differential feed on thick layers. Without it, panels feed unevenly and seams pucker. Test on a quilted fabric scrap before touching your coat pieces, not after you’ve already sewn a crooked seam.
- Cutting coat pieces before panels are fully pressed. Unpressed panels buckle and shift under a rotary cutter. Cutting inaccuracy at this stage is impossible to correct later. Press the entire panel completely flat before you pick up your ruler.
- Building panels that are too small. If your patchwork panel is only as large as your pattern piece, you have no room to position correctly. Build 2 to 3 inches larger than you think you need in every direction.
- Choosing high-loft batting. High-loft batting is made for quilts that lie on a bed, not garments that go through seams. It creates so much bulk at intersections that a standard home sewing machine can’t advance through them cleanly. Use low-loft cotton batting (1/4 inch or less) or skip batting on your first quilted garment.
- Treating this as a beginner project. The patchwork chore coat looks approachable in photos. It is an intermediate project. You need solid straight-line sewing, pressing discipline, and patience with thick seams. If you haven’t sewn a jacket before, make a single-fabric chore coat first, then bring the patchwork version.
Troubleshooting
How Do I Adjust a Chore Coat Pattern for Different Sizes?
Because chore coats have substantial ease built in, most size adjustments are simpler than on fitted garments.
- Length: Add or subtract at the lengthen/shorten lines printed on the pattern. Most chore coat patterns include these.
- Shoulder width: If the shoulder seam is falling off your shoulder, the pattern is too large in the yoke. Take in the shoulder seam 1/4 to 1/2 inch on each side.
- Sleeve length: Measure from your shoulder bone to your wrist and compare to the pattern piece. Adjust the sleeve length line.
Machine Stalling at Thick Intersections
If your machine slows down or stalls at thick seam intersections, slow your sewing speed and use the hand wheel to manually advance through the thickest point. If the intersection is extreme, a seam hammer and clapper tool can flatten it before you sew. Do not force your machine through intersections at speed. You risk needle breakage and skipped timing.
The Bottom Line
The patchwork chore coat is a genuinely achievable intermediate project if you respect the sequencing. Build your panels first, press everything before cutting, and set up your machine for thick layers before you start. The fitting anxiety that usually accompanies garment sewing is largely absent here. Chore coats are one of the most forgiving shapes in existence. The complexity is in the fabric, not the fit.
Once you’ve made one, the patchwork panel-building approach transfers directly to quilted totes, vest fronts, and quilted pillow covers. You’ve learned how quilted fabric behaves as a construction material, and that skill follows you into every project from here. Explore more in our quilting techniques hub.
Tool recommendation: A walking foot is the single most impactful tool investment for quilted garment work. Look for an OEM walking foot that matches your machine brand. Third-party options vary significantly in quality. For sewing machine recommendations across skill levels and budgets, see our sewing machine buying guide.
Looking for a free patchwork chore coat pattern to start with? Browse our free sewing patterns collection. We’ve curated several chore coat options across skill levels.
Patchwork Chore Coat Vlog from Electric Bee Quilting:
Frequently Asked Questions
-
Can I use a universal needle for quilted coats?
No. A universal needle will deflect in thick layers. Always use a Size 90/14 denim needle to prevent skipped stitches. If you have already started with a universal and it’s skipping, swap it out before sewing another seam.
-
What is the best batting for a chore coat?
Use low-loft cotton batting (1/4 inch or less). High-loft batting creates too much bulk for most home machines to handle at the seams. If this is your first quilted garment, consider skipping batting entirely.
-
How do I choose the right size?
Size your coat based on your chest or bust measurement, not your dress size, to account for the 4 to 6 inches of built-in ease. If your full bust measurement is significantly larger than your high bust, a small full-bust adjustment will still help even in a boxy silhouette.
-
Can I make a patchwork chore coat without a walking foot?
Technically, yes, but your results will show it. Without a walking foot, the top and bottom layers feed at different rates, and your seams will pucker. If you don’t have one, borrow one or buy an OEM version before starting. It’s the single highest-impact tool purchase for this project.
-
Do I have to pre-wash my quilting cotton?
Yes. Quilting cottons can shrink 3 to 5% in the first wash, and they don’t all shrink at the same rate. Skipping pre-wash means your finished coat may pucker or warp the first time you clean it. Wash, dry, and press every fabric before cutting.
-
How long does a patchwork chore coat take to sew?
Plan on two weekends. Weekend one: cut blocks, sew patchwork panels, press, and cut coat pieces. Weekend two: coat construction, topstitching, and finishing. Rushing either stage shows in the finished garment.
-
Is a chore coat a good first jacket project?
A single-fabric chore coat, yes. The patchwork version, no. Chore coats have forgiving ease and simple construction, which makes them friendly to first-time jacket sewists. But the patchwork layer adds thickness management and pressing decisions that are easier to handle after you’ve built one chore coat already.
Why did you vote that way? Drop your take in the comments.