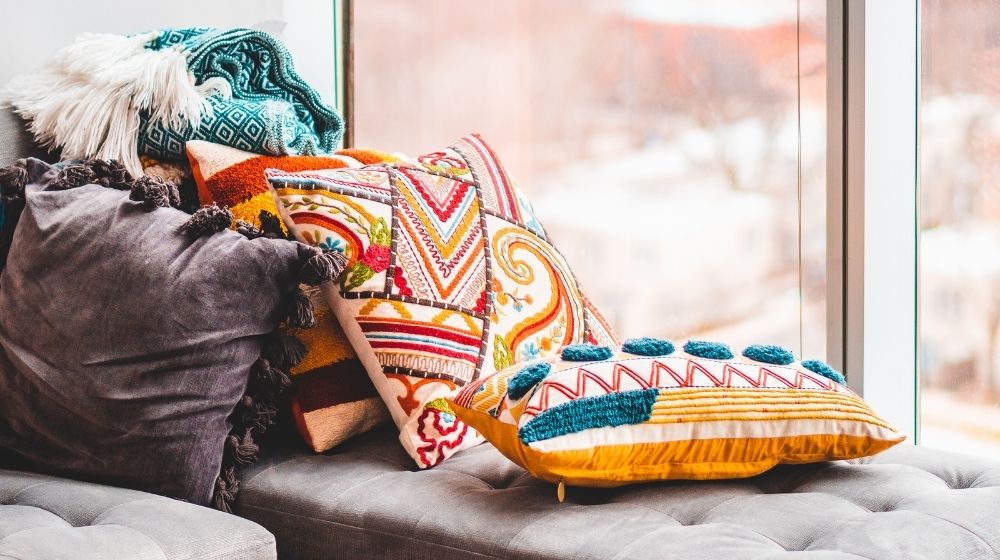

Decorative throw pillow covers are eye-catching pieces that truly get anyone’s attention. They can be great conversation pieces, too. Without it, your couch will just look bare and boring. It’s an affordable way to change the ambiance of the room by providing the necessary facelift. You should know me well enough by now to realize that I would jump on every opportunity to change the covers of my throw pillows. I’ve been busy making throw pillow covers for fall, and I found one that is apt for the season, so I am sharing it with you now.
TL;DR: Make a Decorative Throw Pillow Cover
- It shows how a custom throw-pillow cover can transform a space by choosing bold fabric or applique shapes (leaves, grass blades, flowers) for visual interest.
- It highlights the basic construction: cut your fabric to size, trace a design shape, attach fabric/applique pieces, then sew the seams to form an envelope-style cover.
- It emphasises both glue-and-sew options: you can temporarily glue applique pieces (felt leaves) for layout, then secure with backstitch or chain-stitch for durability.
- It encourages a step-by-step process: arrange applique, trace details (mid-rib veins), stitch decorative accents, and finish with a simple envelope closure so you skip zippers.
- It positions the project as beginner-friendly but design-rich, and you get a professional-looking cushion cover with minimal tools and creative flair.
How to Make a Decorative Throw Pillow Cover
By now, I have an awesome decorative throw pillow cover collection. I change them up depending on whether it’s Labor Day, Fall, or Halloween to add an accent to our living room area. Picking out the throw pillow cases to use involves a lot of decision-making. You have to select the colors that will work well with the room. Sometimes you would even need to change the curtains and other home accessories to match your vision. Try it! It’s fun!

What you need:
- Felt Sheets
- Fabric (Felt, Cotton, Linen, or Silk)
- Needle and thread
- Scissor
- Glue gun or fabric glue
Ready? Get set…Sew!
1. Cut Felt Leaves
Fold the felt in 1/3, make a half-leaf pattern, and cut. Sizes and the number of leaves will depend on your design.
NOTE: We can also cut blades of grass, flowers for your pillow.
2. Trace the stalk
Take your fabric, fold it to your desired size, and trace the stalk for your leaves. You can also check the video below.
3. Attach the Cut Felt
Arrange the cut felt on the traced stalk and attach it with fabric glue.
TIP: If you do not have fabric or hot glue, pin the leaves instead.
4. Trace the Leaves Details
Once the leaves are in place, trace the midrib and other veins of the leaf.
5. Backstitch the Leaves’ Veins
Let’s thread our needle. Then we will be using the back stitch to sew along the midrib and veins of the leaves.
6. Braided Chainstitch for Stalk
We will be using a different stitch for the stalk you drew on the pillowcase cover. We will be using the braided chain stitch. If this is your first time encountering this, follow this tutorial.
7. Making the Envelope Throw Pillow Cover
Fold the fabric and let both ends meet in the middle. Adjust the other end 1 inch from the middle to create the envelope effect. Sew the two sides of the fabric with a straight stitch, and you are done. Then have one space and share this question.
You’re all done!
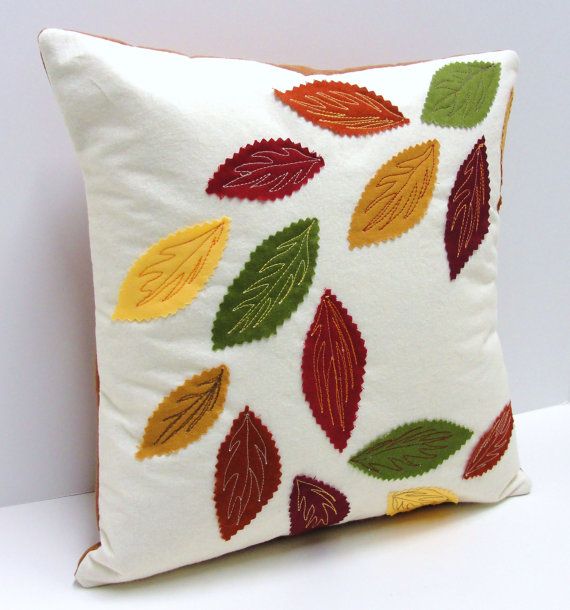
This decorative throw pillow cover is super easy, right?
Check out this detailed tutorial by HandiWorks. It’s one of the best ways to add a pop of color to your house without requiring a lot of time and money.
Get creative with your decorative throw pillow cover by drawing and cutting interesting shapes such as blades of grass, fronds, and flowers. You can even create popular figures like ice cream cones, cupcakes, or cartoon characters. Just follow the same basic steps I have outlined in this tutorial.
You want more projects to sew this fall? Click here.
FAQs: Decorative Throw Pillow Covers
1. What fabric is best for making decorative throw pillow covers?
Answer: Cotton, linen, felt, and even silk are great choices. Felt is especially good for decorative elements, while cotton and linen are perfect for the pillow base because they’re durable and easy to sew.
2. Can I make a pillow cover without a sewing machine?
Answer: Absolutely! You can hand-stitch the seams using a simple running or backstitch. Or, if sewing isn’t your thing, you can use fabric glue for a no-sew option (just keep it decorative, not for high-use pillows).
3. What size should I cut the fabric for an 18×18 pillow?
Answer: Cut one front panel at 18×18 inches and two back panels at 18×13 inches. This gives you a nice envelope closure overlap on the back without zippers or buttons.


