• Home
  • Sewing
    • Patterns
    • Materials
    • Organization
    • Supplies
  • Fashion Sewing
    • Dresses
    • Jackets & Coats
    • Pants & Shorts
    • Tops & Blouses
    • Accessories
  • Home Decor Sewing
    • Curtains
    • Pillows
    • Bedding
    • Novelty
    • Holiday Sewing Projects
  • Hand Sewing
    • Hand Embroidery
    • Crochet
    • Knitting
  • Sewing Techniques
    • Wovens
    • Knits
    • Quilting
    • Sewing Tips & Tricks
    • Specialty Fabrics
    • Sewing Skills
Logo
  • Wovens
  • Knits
  • Quilting
  • Sewing Tips & Tricks
  • Specialty Fabrics
  • Sewing Skills
You are here: Home / Sewing Techniques / How to Adjust Sewing Machine Tension Like a Pro

How to Adjust Sewing Machine Tension Like a Pro

January 17, 2016 By Sewing.com 3 Comments

Sewing machine tension problems can happen anytime while you are learning how to sew. It’s important to learn how to recognize the problem and fix it. It may seem daunting at first but you can do it! Keep reading for the steps.

Let’s learn how to address sewing machine tension issues with this basic tutorial. Explore your sewing machine and learn its quirks. Once you’re able to do that, troubleshooting will be a breeze.

Sewing Machine Tip: How to Adjust Sewing Machine Tension

A Guide to Nice and Tight Stitches

If you’ve noticed that your stitches aren’t coming out perfect (either they’re too tight or slack), it might be a problem with the sewing machine tension. Having the right sewing machine tension is vital to creating consistent stitches on both sides of the fabric.

How to Adjust Sewing Machine Tension Like a Pro

Adjusting the sewing machine tension is a task that even seasoned sewers don’t mess around with. It’s something usually left for skilled professionals, but a basic knowledge of this process will help you gain a better understanding of your machine and your stitches. A little practice with this method and you will be dealing with sewing machine tension problem like a pro.

Sewing machines usually have a tension knob that is numbered from 0 to 10. This varies from one sewing machine model to another. Ten is usually the tightest. The sweet spot is from 2 to 6. Finding out which number is best for your project is a three-step trial and error method.

Get ready, get set… sew!

How to Adjust Sewing Machine Tension Like a Pro

Step 1. Set up your sewing machine.

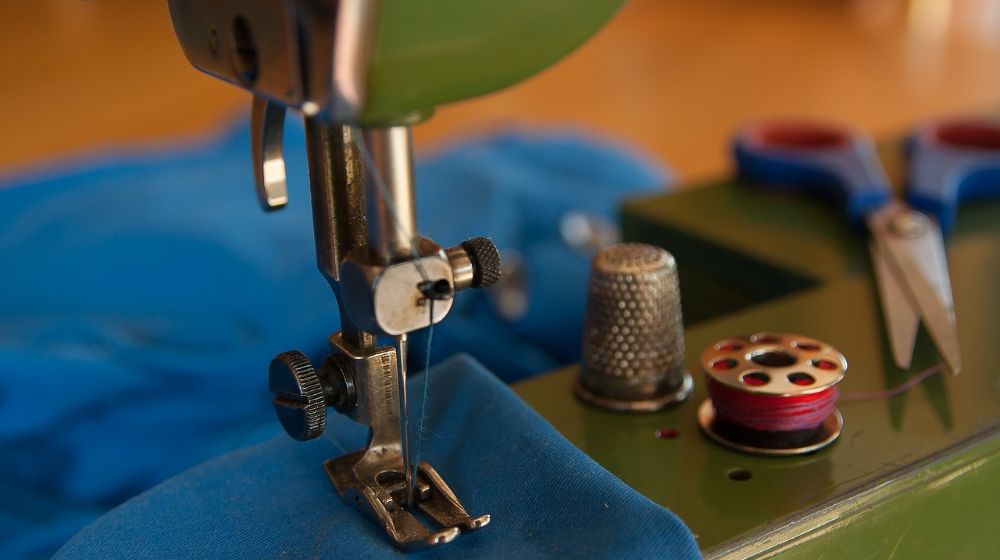
Before you begin, you need to set up your sewing machine and thread it properly. Check to make sure that the bobbin pin has been wound correctly. You need to do accomplish these tasks to ensure that these are not the causes of your sewing machine stitch tension problem.

Step 2. Adjust your tension knob

Now, put a piece a fabric under the presser foot. Run a stitch and evaluate the tension on it. If it is too tight, you will notice it on the front of the fabric. If it is too loose, this is more noticeable at the back. Based on this, adjust your sewing tension knob accordingly.

Step 3. Run a series of seam tests

After switching the tension, run another stitch again and evaluate what you see. Based on your findings you can continue to adjust the sewing tension knob until you find the perfect tension. This is usually in the middle part of the tension knob.

How to Adjust Sewing Machine Tension Like a Pro

Let’s observe how TheHikingFool fixes her sewing machine tension problem in this video:

This is an exercise that requires patience. You will need to evaluate your stitches time and time again while adjusting the sewing machine tension knobs. You’ll know that you have found the golden combo when the stitches on the front have the same look and tension as the stitches on the back.

Now that you know how to fine turn your machine, I wish you luck and happy sewing!

If you have some tips on how to adjust sewing machine tension, please share them with me by leaving a comment down below.

Filed Under: Sewing Techniques Tagged With: adjustment, fine tune sewing machine, sewing machine, tension, tension knobs

Comments

  1. marie says

    April 3, 2018 at 8:03 AM

    Thanks. Just got a new machine and I know I will need this when I set it up.

    Reply
  2. Carol Maddox says

    April 4, 2018 at 5:09 AM

    Sewing fine fabric or thick fabric makes a difference too.

    Reply
  3. Ivy says

    June 17, 2022 at 7:08 PM

    I have exactly the same (or similar) vintage sewing machine as in your beautiful picture – mine was quite badly broken during transport by a courier company which refused to compensate for the damage. Is there any place in sydney or australia I could get it fixed? Would be very grateful for the information.

    Reply

Leave a Reply Cancel reply

Your email address will not be published. Required fields are marked *

  • Facebook
  • Instagram
  • Pinterest
  • Twitter

SUBSCRIBE TO SEWING.com AND GET THIS FREE GIFT!

Sewing-Basics-for-Family-and-Home

Head Wrap Tutorial | How to Make Your Own in 6 Easy Steps

If you're looking for a simple, yet …Continue Reading

How To Sew A Simple DIY Rod Pocket Curtains For Your Home

Learn how to make simple DIY rod …Continue Reading

Sewing Patterns | 21 Pattern for Beginners That Are Fun and Easy

Learning easy sewing patterns for …Continue Reading

Go Shopping

  • Joann’s
  • Fabric.com
  • Michael’s
  • Art.com
  • Bed Bath & Beyond

Other Great Sites

  • DIY Projects
  • Homesteading
  • Garden Season
  • Homemade Recipes
  • Makeup Tutorials

Resources

  • FREE Sewing Patterns
  • Sewing Terms Dictionary
  • Sewing Projects
  • Sewing Machines
  • Sewing For Beginners
  • About Us
  • Advertise With Us
  • Privacy Policy
  • Contribute
  • Contact Us
  • Terms of Service
Sewing.com
Email Support: [email protected]
Phone: 512-394-8187

Product returns go to:
1889 E Maule Ave, Ste G
Las Vegas 89119

Copyright © 2022 · Sewing.com


This copyrighted material may not be republished without express permission. The information presented here is for general educational purposes only.

MATERIAL CONNECTION DISCLOSURE: You should assume that this website has an affiliate relationship and/or another material connection to the persons or businesses mentioned in or linked to from this page and may receive commissions from purchases you make on subsequent web sites. You should not rely solely on information contained in this email to evaluate the product or service being endorsed. Always exercise due diligence before purchasing any product or service. This website contains advertisements.

We use cookies to personalize content and ads, to provide social media features and to analyze our traffic. You consent to our cookies if you continue to use our website.

Privacy settings

Privacy Settings

This site uses functional cookies and external scripts to improve your experience. Which cookies and scripts are used and how they impact your visit is specified on the left. You may change your settings at any time. Your choices will not impact your visit.

NOTE: These settings will only apply to the browser and device you are currently using.

This website uses cookies

We use cookies to personalize content and ads, to provide social media features and to analyze our traffic. You consent to our cookies if you continue to use our website.

Powered by Cookie Information