
Learning how to sew a zipper may seem like a hard task if you're new to sewing. Nevertheless, with patience and practice, learning this skill will be well worth your time and effort.
Aside from sewing buttons and other embellishments to your projects, sewing zippers is also an important skill that shouldn't be overlooked.
How To Sew Zippers With Ease
Learning how to sew a zipper is a very useful skill that every sewer should master, especially when you want to make your own clothes or other sewing projects that include a zipper. With consistent practice, you'll realize that it's not as hard as you think. Check out this tutorial and you'll be adding zippers to your projects like a pro in no time.
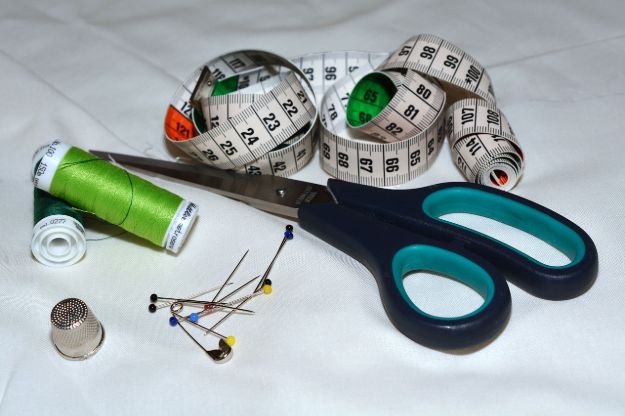
Here are the things you'll need:
Materials:
- 2 pcs. of fabric
- Zipper
- Zipper presser foot
Tools:
- Baby Lock sewing machine
- Wonder clips
- Pins
First method: Basic Zipper
Step 1. Attach zipper to the fabric
Take your zipper, place it face down to your fabric. Then, line it up at the edge and cut your zipper fabric the same length as your zipper. Attach with wonder clips or whatever other clips can keep the fabric together.

- Customize your project with a unique zipper.
- Great for any crafting or apparel project
- 20 inch Zipper
Step 2. Sew the zipper into the fabric
First, line your presser foot at the edge of the fabric (as a guideline to make sure you sew a straight line). Do a little forward and back stitch at the beginning (if you feel you're going too fast, you can always adjust your speed control). When you get down to the bottom, do a back stitch, then cut your threads.
Step 3. Sewing the top part
Now you can see which to sew on the top part. Take your zipper and unzip it a little bit (so it passed the area where we already sewed). Put it back in your machine, do a backstitch, and sew right along that same line. Just sew down until the two parts meet.
Step 4. See how it looks
Let's see how it looks. Next, what you're probably want to do is press this part with an iron. But be careful, if you're using a zipper with plastic teeth, do not let your iron melt the plastic.

- Singer Vertical Needle Zipper Foot Is A 1-Piece Tool That Is Able To Adjust On The Left Or Right Side Of The Sewing Machine Needle
- Hinged-Adjustable Zipper Foot Attachment Offers Precision Stitching For Zipper Application To Garments And Fabrics
- Helps The User Sew The Zipper Without Applying Pressure To The Zipper Teeth
- Suitable For Singer Vertical Needle Sewing Machines And Also Suitable For Other Brands That Use A Side-Fastening Thumbscrew

Step 5. Sewing the other side of the zipper into the next fabric
Now, to attach the other side, just do the exact same thing. Place it with the right sides together and flip it over. Also, make sure you're matching up your fabric underneath (whether this is a little bag or something like that) to ensure precision.
Step 6. Sewing the end part
This time, you're going to start at the bottom and sew up until you get to the zipper pull. Then stop, and zip it open again (you want to make sure you're sewing the same thing you did on the other side so your zip is evenly spaced). Now, take it off and unzip it just a little bit, fold it back over and sew the end.


- SINGER HEAVY DUTY SEWING MACHINE: It has 11 Built-in Stitches- 6 Basic Stitches, 4 Decorative Stitches, 1 Built-in Buttonhole—perfect for crafts, home decor, fashion sewing and much more
- ADJUSTABLE NEEDLE POSITION: The needle can be changed to any of the three available positions to add zippers or a decorative touch with topstitching and cording
- HIGH-QUALITY SEWING MACHINE: The heavy-duty metal frame adds stability, and with a strong motor, sewing a higher quantity of items more quickly and efficiently at 1,100 stitches per minute is achievable
- ADJUSTABLE PRESSER FOOT CONTROL SEWING MACHINE: Sew very lightweight and heavy weight fabrics with ease by adjusting the presser foot pressure
- BEST SEWING MACHINE: The SINGER Heavy Duty 4411 sewing machine is a true workhorse. With a heavy-duty metal interior frame, stainless steel bedplate, extra-high sewing speed and powerful motor, the SINGER Heavy Duty 4411 can sew a wide range of fabrics.Volts:120 V
Ta-da!
Don't you feel accomplished? You have successfully installed your zipper. The nice thing about this method is you can decide on how to expose the zipper to suit your needs.
Second Method: Concealed Basic Zipper
Step 1. Cut the fabric
Cut one big piece of fabric and cut it into two small pieces. Place the right sides together, sew them down and press that seam open.
Step 2. Get your zipper into the seam
Place your zipper the right side facing down on the seam. Start about half an inch from the top, just so there is room for the seam allowance at the top. Place the teeth of the zipper right on the line of the seam and pin it in place.

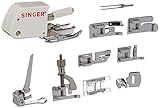
- SINGER ACCESSORY KIT: The SINGER Sewing Machine Accessory Kit includes 9 presser feet - Blind Hem, Cording, Darning/Freehand Embroidery, Even Feed/Walking, Gathering, Narrow Rolled Hem, Overcasting, Satin Stitch, Straight Stitch PLUS Twin Needle and SINGER case
- DURABLE CASE: Case is a durable, plastic SINGER custom-fit container and case includes a removable padded insert
- SEWING MACHINE ACCESSORY KIT: The SINGER Sewing Machine accessories fit most low-shank sewing machines
- EVEN FEED / WALKING PRESSER FOOT: The even feed foot, sometimes called a walking foot, is used for sewing several layers of fabric, and is a must-have when quilting
- EMBROIDERY PRESSER FOOT: The SINGER darning and embroidery foot is used for repairing holes or torn areas, and is used for creating freehand monograms, freehand embroidery, thread painting and most free-motion sewing
Step 3. Pin the zipper to the seam
Make sure you're making it right down on top the whole way. The more precise it can be, the better. Continue pinning. When you reach the end, you're now ready to sew.
Step 4. Put your fabric in the machine
Take your fabric over to a machine. Move your zipper foot over to the other side, go past that pull like you did from the first method, place your presser foot right down (you don't want to be so close that you're sewing over the zipper teeth in the middle).
Step 5. Sew the zipper into the fabric
Do little forward and back stitch, once you reach the end (you can see the end right along that metal piece). Lift your presser foot and turn across the bottom, then go back down the other side (lift, turn, and do the same thing). Stop when you get close to the pull. Do a backstitch, cut your threads, leave that little cutting button.
Step 6. See what it looks like
Now you can see what it looks like. When you look at the back, you can see that little rectangle. Flip it over to the front, you can see it there as well (you can use a thread that will coordinate with your fabric).
Step 7. Rip the seam open
Before you finish up, you need to expose your zippers so that you could actually use them. So, grab your seam ripper and rip the seam open. You want to pull the strings out, but finish those top pieces first. Turn it back over, go to your machine, do the back stitch, cut your threads, and do the same to the other side.


- Good quality ready-to-wear garments will often have an invisible zipper.
- These zippers are simple to create using the Concealed Zipper Foot
- Invisible zippers are suitable for all fabrics from fine silk jersey to suit weight wools and tweeds.
- The key is to get the needle as close to the zipper as possible.
- This foot accomplished that by slightly unrolling the zipper. Once fitted, a well sewn invisible zipper will merely look like part of a seam.
And you're done!

There you go, look how beautifully that zips open and closed. You can actually see it on the back of your dress. It's hidden very well so you won't really notice until you have to use it.
You can also watch full video for the full details and step-by-step details on sewing a zipper here:

You see? Sewing a zipper is not so hard after all. Plus it even pretty fun! The key understanding the steps and practice required to achieve a well-executed zipper. This will give your project a clean, professional look.
Which technique will you try out to sew your zippers? Leave those experiences and tips in the comment section below!