


Punch needling is a sewing method that blends creativity and precision. It promises adorable, fluffy designs that can transform simple fabrics into aesthetic masterpieces. Join YouTuber Stella Sun as she embarks on an exciting punch needle journey. This article details her successes, failures, and valuable lessons learned along the way.
What is Punch Needling?
Punch needling, or punch needle embroidery, is a fun craft where you use a special needle to push yarn or thread through the fabric to make loops that form textured designs. As you continue, these loops create patterns or images, which you can leave raised for a 3D effect or trim down for a smoother, flat look. Either way, the results can be both eye-catching and versatile.
A Step-by-Step Guide to Punch Needling
Punch needling is a fun and versatile craft that allows you to create everything from simple designs to intricate, textured masterpieces.
Pick a Basic Design
Start with an easy design, like a smiley face. Keep it simple first so you can ease into the craft without feeling overwhelmed.
Get Your Tools Ready
Gather your punch needle, some yarn, and a piece of fabric stretched tight on an embroidery hoop. These are your basic tools to get going.
- Punch Needle Tool: A hollow needle with a handle to punch yarn or thread through the fabric.
- Fabric: Monk cloth or burlap is commonly used as it has an open weave, allowing the needle to pass through easily.
- Yarn or Thread: Choose the type and thickness based on your design preference. Thicker yarn creates more texture.
- Embroidery Hoop or Frame: This keeps the fabric taut while you work.
- Scissors: To trim excess thread or yarn.
How to Do Punch Needle Embroidery
Punch needle embroidery is a quick and easy way to create textured designs on fabric. By following these steps, you can dive into this craft and start making beautiful patterns.
-
Prepare the Fabric
Stretch your fabric tightly in an embroidery hoop or frame.
-
Thread the Needle
Thread your yarn or thread through the hollow shaft of the punch needle tool.
-
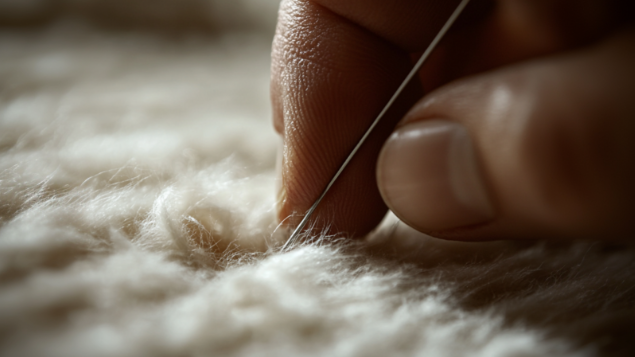
Start Punching
Hold the punch needle with the tip facing the fabric. After that, insert the needle into the fabric, keeping the flat side of the needle's shaft toward you. Then, push it through the fabric until the handle touches the surface.
-
Pull the Needle Out
After punching through, gently pull the needle back, leaving a loop of yarn behind. As a result, the fabric will hold the loop in place.
-
Continue Punching
Move the needle slightly, staying close to the previous punch, and repeat the process. As you punch, you'll create a series of loops that form your design on the fabric.
-
Finish the Design
Finally, trim the loops for a smooth look or leave them as is for texture. Also, secure the back of the fabric with glue to keep the loops in place.
Additional Tips and Tricks
Here are some practical tips to help you improve your punch needle skills. By applying these tips, you can make the process smoother and your projects even better.
Practice with a Simple Shape
Try making a simple shape, like a yellow circle. This way, you can get comfortable with the process.
Punch Slowly
Take time with each punch and watch your pattern take shape. Even though the back might look a bit messy, the front is what counts.
Add Some Fluff
Snip the loops to add a soft, fluffy texture to your design. Although it’s a slight touch, it makes a big difference.
Choose Something Fun
Once you're ready, move on to a new character that excites you. For instance, Stella went with Totoro, but you can pick something that inspires you.
Focus on Key Details
Start with important features, like the eyes. By concentrating on the details, you can create a cleaner, more polished final look.
Switch Materials if Needed
If the yarn you’re using isn’t working, try something else. Moreover, a thinner yarn might give you better results for detailed work. So keep experimenting until it feels right.
Exploring Different Punch Needle Projects
Once you’ve mastered the basics of punch needling, it’s time to expand your skills by exploring different types of projects.
Decorative Wall Art
Decorative wall art is one of the most popular punch needle projects. Since it allows you to play with texture and color, it is the ideal creation for showcasing your skills.
Functional Home Décor
To combine creativity with functionality, consider making items like pillows or rugs. Moreover, you can customize your home décor by choosing colors and patterns that suit your style.
Upcycling and Embellishing
Finally, embellishing clothing is another exciting project. For instance, you can add punch needle designs to jackets, sweaters, or bags. Furthermore, this method lets you create unique pieces that showcase your style.
Seasonal Decorations
You can also use punch needle embroidery to make seasonal décor. For example, create hanging ornaments and festive banners for Christmas, Halloween, or Easter.
Finish Your Masterpiece
In conclusion, punch needling is an intricate yet rewarding craft anyone can enjoy. For instance, Stella’s journey from a beginner to a confident punch needle artist shows you can achieve great things with practice and persistence. So, embrace the challenges, learn from every step, and enjoy the satisfaction of creating something uniquely yours. Now, it’s your turn. Grab your tools and start creating today!
Do you want to explore more creative punch-needling ideas? Click here for more tips, tricks, and inspiration to help you craft even more stunning designs.