Hanging toiletry bags are useful for two things: storage and mobility. Whether you're traveling or sharing a living space with someone else, this DIY hanging toiletry bag will certainly help keep your stuff from getting in the way.
RELATED: 25 Basic Sewing Skills Every Beginner Must Learn
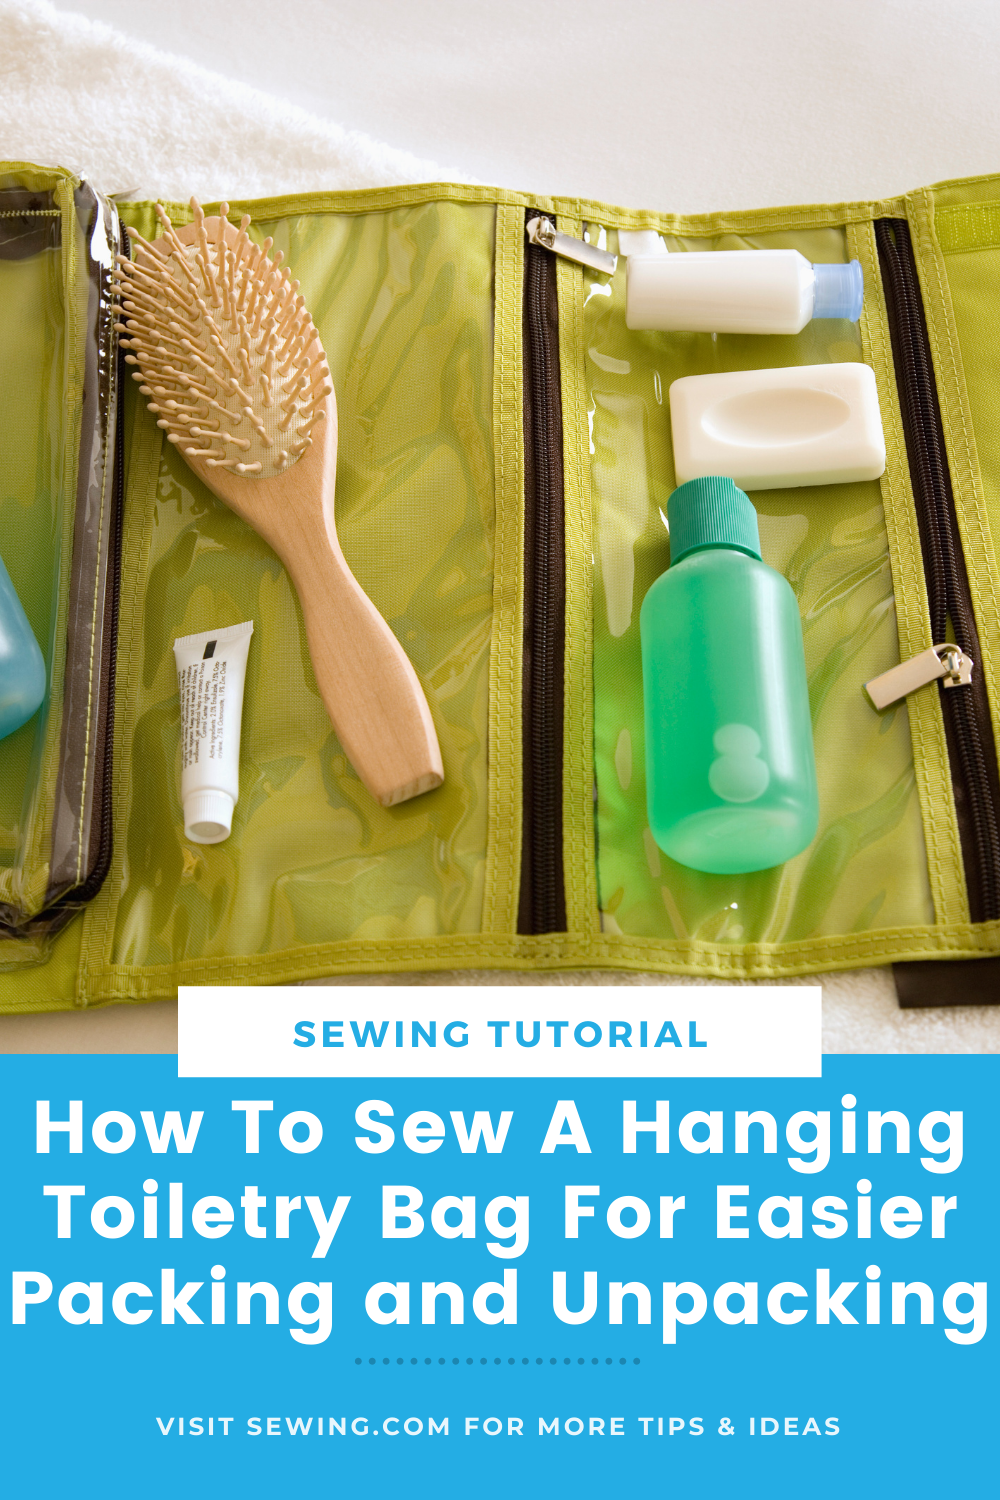
DIY Hanging Toiletry Bag for Better Organization
Materials:
- Pattern paper (any paper you can use to draw patterns with)
- 4 pieces 40 x 20 cm clear vinyl (For the 4 triangular pockets)
- 25 x 20 cm clear vinyl (For the top pocket)
- 70 x 30 cm clear vinyl (For the outer layer)
- 70 x 30 cm polyethylene foam
- 70 x 30 cm vinyl fabric
- 70 x 30 cm fabric
- 4 pieces 34 cm zipper
- 1 piece 20 cm zipper
- Basic sewing essentials
- Wire hanger
- Craft adhesive
- Wide elastic band
- Velcro fasteners
Instructions:
Pattern:
- On a piece of paper, draw two rectangles— the 57 cm x 20 cm, and 20 cm X 14 cm, respectively. The bigger rectangle will serve as the pattern for the bag's outer layer, while the small one will be for the triangular pockets.
- For the small rectangle divide the 14 cm side into two. Then, draw two small right triangles on each side— the hypotenuse side should measure 10 cm.
- Trace the pattern on to the clear vinyl and cut. Leave at least 1 cm for seam allowance. Do this until you've cut all four pieces of the pockets.
- Using the same pattern, only trace the two rectangles of the pocket pattern. This time, instead of them being both 7 cm, extend the top rectangle to 10 cm. Leave at least 1 cm for seam allowance when you cut.
- Using the bigger rectangular pattern, cut the last piece of the clear vinyl, the polythene foam, the fabric, and the vinyl fabric. The vinyl fabric should be bigger than the rest. This is for folding at the end of the process. Tip: Clip the clear vinyl, fabric, and foam (in that order) together. This will make it easy when you sew in the pockets.
Assemble:
- Using a zigzag stitch, attach the 34 cm zipper― with one side at the base of the pocket piece and the other to the top of another pocket piece. This will create one continuous column of pockets. This way, it will be easier to attach them later onto the outer layer of the bag.
- Cut diagonally where the smaller triangle meets the rectangle. Doing this will help reduce bulking when you fold the clear vinyl. Cut off all the excess.
- Repeat this step until all pockets have been attached to each other.
- Attach the last zipper to the top half of the top pocket (to the 7 cm, not the 10 cm). Then, attach the 20 cm zipper.
- Cut off the side without the zipper, leaving at least 1 cm to serve as a seam allowance.
- Sew all the horizontal sides: the bottom and the valleys between the pockets. You can use a simple running stitch with this one. However, for a sturdier seam, you can use the backstitch.
- Once done, attach the top zipper using a zigzag stitch.
- Trim the hanger accordingly and attach it to the top. Fold the fabrics around the hanger and sew in place. Tip: Wrap the trimmed edges of the hanger with some masking tape. This will prevent it from scratching through the fabric.
- Sew the sides of the pockets onto the fabrics. Once you've sewn all edges, trim off all the excess. Tip: You can try to align pattern lines when sewing the sides. This way, the sides are equal in bulk.
- With the fabric vinyl right side down, lay the assembled pockets on top of it. Glue the two pieces together using your adhesive. Next, glue in the elastic band.
- You can use a regular ribbon, but the elastic band is an easier way to ensure everything in the bag is locked in tight and snug.
- Fold the sides and bottom of the fabric vinyl and glue them in place. There's no need to fold at the top. Once you've glued them, fasten with clips.
- Once the glue is completely dry, remove the clips and trim the excess. Trim along to the top, following the shape of the triangle.
- Fold up the bag and wrap the band around it. Once you're satisfied with the tightness of the band, sew the Velcro fasteners in place, and you're done!
No time to sew? Check out this no-sew cosmetics bag by DIY Crafts TV:

A toiletry hanging organizer is as useful as it is versatile. Not only can you store toiletries, but you can also store stationery, cosmetics, etc. Goodbye, chaos! Hello order!
What do you put in your hanging organizer? Tell us in the comments below!
Up Next:
- How To Sew Your Own Purse Organizer | Step By Step Guide
- How To Sew A Simple DIY Laptop Sleeve In Minutes
- 25 DIY Apron Pattern Ideas That Will Inspire You In The Kitchen
We aim to feature the hottest trends in the sewing world, so get in touch if you can contribute! WRITE FOR US!
Stay connected with us on Facebook, Twitter, Instagram, and Pinterest!